Friday 27 February 2009

BatRep - Tau V Eldar 1000pts

By Suneokun.

After a long, long period, hiding in a darkened room and inventing devious ways of bringing glory to his enormous Eldar force, Devilin has emerged. Like the Imperial Guard before them, it was only a matter of time before my fledging Tau force was challenged by the eldest of the 40k races. What entailed was an epic and highly destructive battle.

One of the reason for writing up this report was to also put some practical demonstration of the Army List Tactica details in my last post. Ironically, the concepts behind the tactica become very previlent when facing an army you've never played before.

Points: 1000
Battle Type: Capture and Control
Deployment: Pitched Battle
Eldar win the roll and opt to go second.


Tau Battleforce:
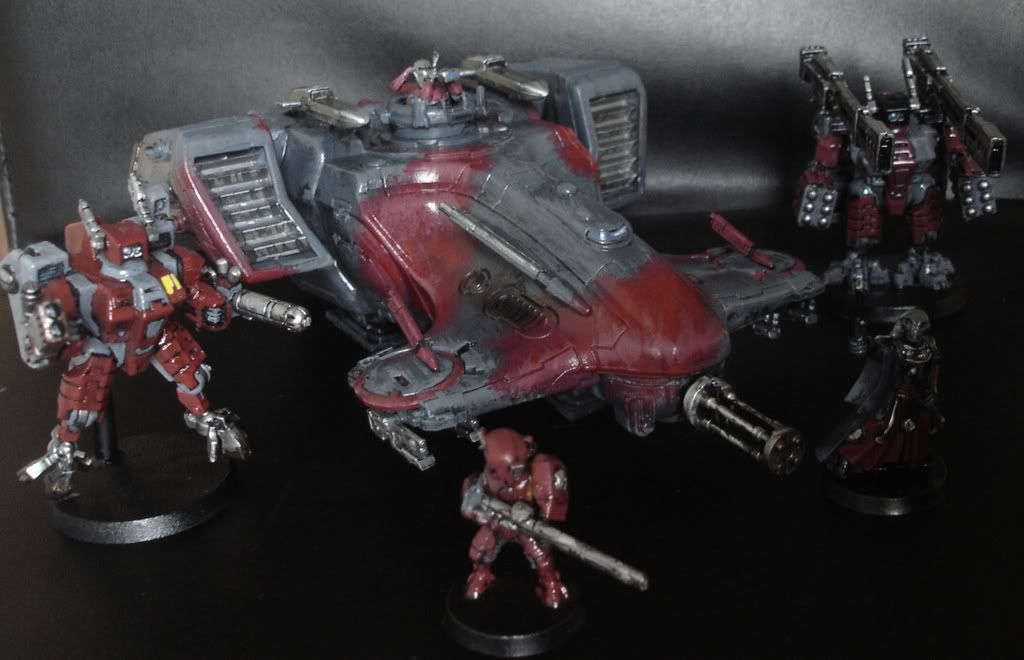
Applying my army list tactica was straightforward as I am very familiar with the Eldar force. Applying what I knew I decided that the best approach was to go for multiple small Crisis Suit and Stealthsuit teams, bulked up by a few gundrones to frustrate the return fire. I'm a big fan on gundrones over invulnerable shields or alternative drones. This would also be my first opportunity to take some of the 'special issue' weapons available to Tau. After long thought I opted for combining both weapons on the same model - concentrating one model on 18" anti infantry firepower. A widely known, but little repeated secret is that the optimum squad size is 9. After all 8 models will need a leadership test after 2 deaths and you'll have to go to 13 models to get to 4 deaths. Therefore 9 models give you the cheapest, toughest unit.

Following the tactica, the pulse rifle teams would form a 'castle' around the pathfinders and cushion the pathfinders from flankers and deep strikers. Effectively the Troops unit would attempt to outdistanced the Eldar while offering a 'tempting target'. The Devilfish would provide close support and would place itself in harms way, helpfully attempting to engage the close combatters with its fletchette dischargers.
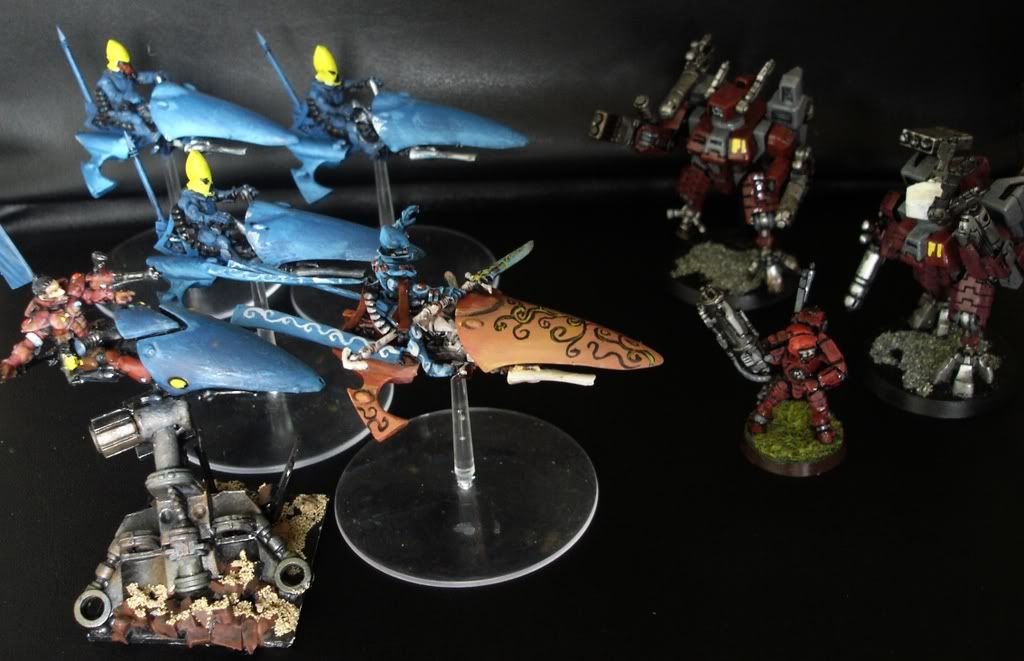
Meanwhile the crisis teams and stealthsuits would attempt to ambush the fast tanks or jetbikes with devastating firepower. Too thought long and hard about taking the broadside to head off any Wraithlord (Devilin has two) - but I doscounted this as a distraction from the true purpose of the battle - killing the men.

HQ - Shas'El with Plasma Rifle, Missile Pod and Flamer, 2 Gun Drones.
HQ - Shas'El with Cyclic Ion Blaster, Air Fragmentation Launcher, 2 Gun Drones.

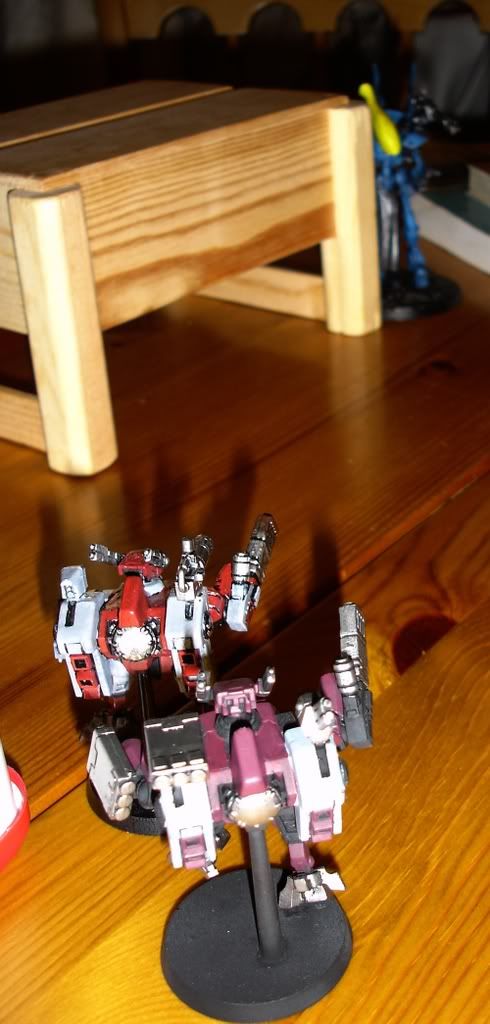
Elites - Crisis Suit Team [2], Team Leader with Twin Linked Plasma Rifle, Fusion Gun and Multitracker. Shas'la with Twin Linked Missile Pod and Fusion Gun.
Elites - Stealth Team [3], 2 Burst Cannons, team leader with fusion gun and target lock, two gun drones.
Elites - Stealth Team [3], 3 Burst Cannons and two gun drones.

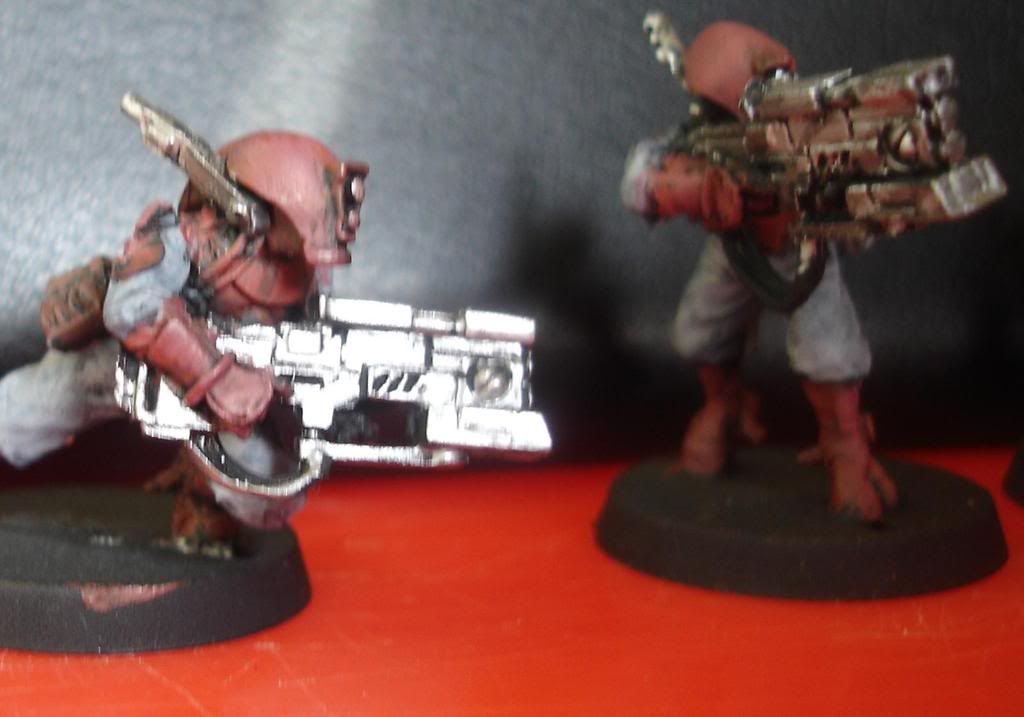
Troops - Fire Warriors [9] Pulse Rifles.
Troops - Fire Warriors [6], Pulse Carbines.

Fast Attack - Pathfinders [6] with pulse carbines and markerlights. Devilfish with burst cannon, 2 gun drones, fletchette dischargers and multitracker.

Eldar Battleforce: The tactics behind Develin's troops was a surprise and not a surprise to me. Wraithlord, harlequins, jetbikes and warp spiders provide dangerous options on multiple fronts. The only option to me is shut down one of the prongs, and fast...

HQ - Autarch, fusion gun, laserlance, jetbikes and power weapon.

Elites - Harlequins, harlequins kisses, ShadowSeer.

Troops - Jetbikes [4] with one shuriken cannon, led by a warlock with a singing spear.
Troops - Jetbikes [3] with one shuriken cannon.

Fast Attack - Warp Spiders, with Exarch (power blades, twin death spinners).

Heavy Support - Wraithlord with BrightLance and Scatter Laser.
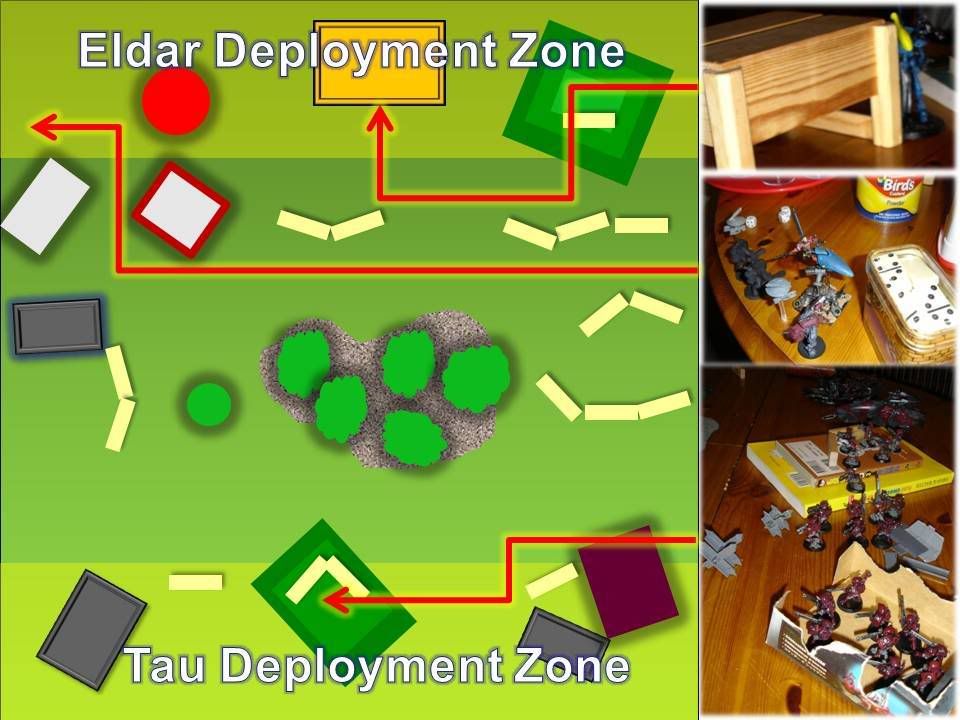
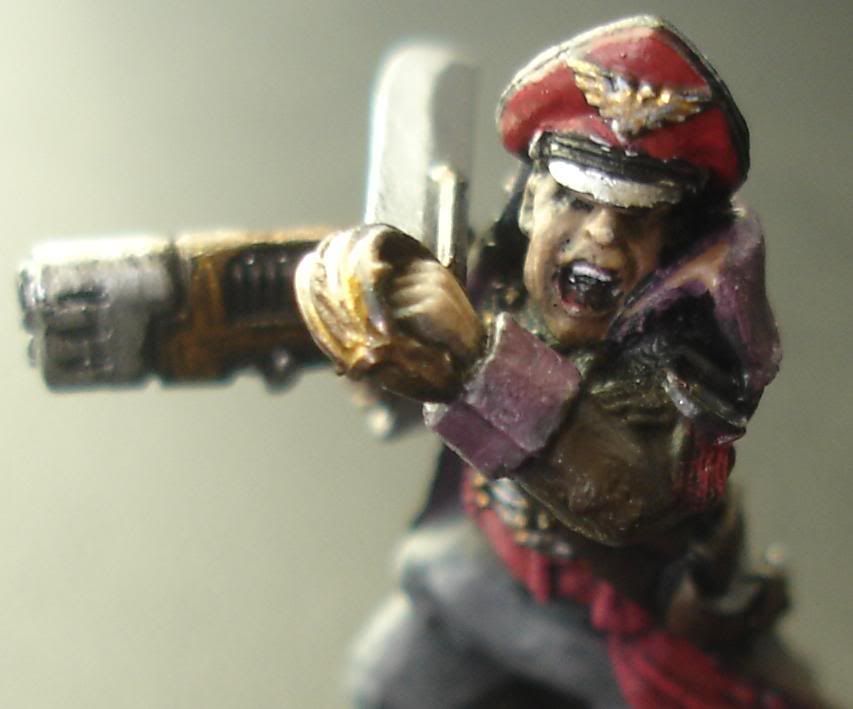
Game Board: Both Develin and I chose to place objective markers within our deployment areas, in each case the hills within eachother areas became the objective markers. With a small painted mini-genestealer positioned at the 'top' of the hill in the Tau deployment zone and Devilin opting to hide his unpainted mini-stealer objective just behind his hill.


Deployment: In a surprise move Devilin opted to go second, and then he opted to reserve his entire army! Hence why the deployment was a partcularly lonely affair with the Tau lines setting up unopposed. Clearly, Dev's been watching a few Fritz fights and wanted to rush the objectives at the end?
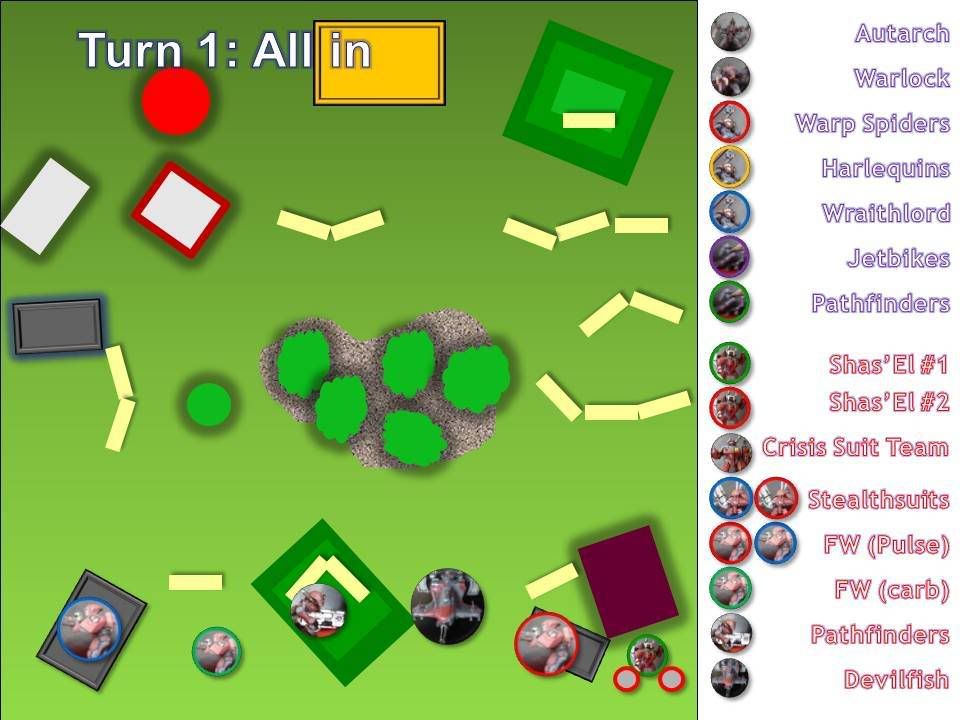
Turn 1 - With no Eldar on the team and no reserves, turn one was an unrequited turn. I opted to not move a muscle and place confidence in my gunline...
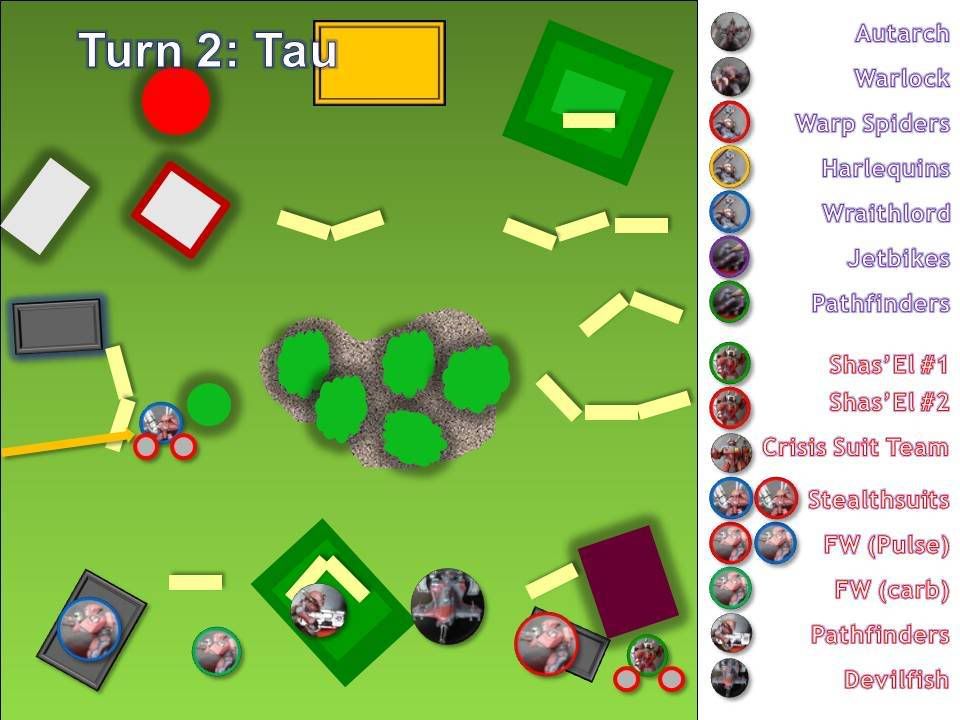
Turn 2 - Tau: After an undramatic first turn, I roll for my reserves. Luckily only my burst cannon [3] stealth team and the Shas'El come on. This means I still have 3 crisis and 3 stealthsuits in reserve. being crafty I float the stealthteam out in front of the enemy lines ... tempting tempting.
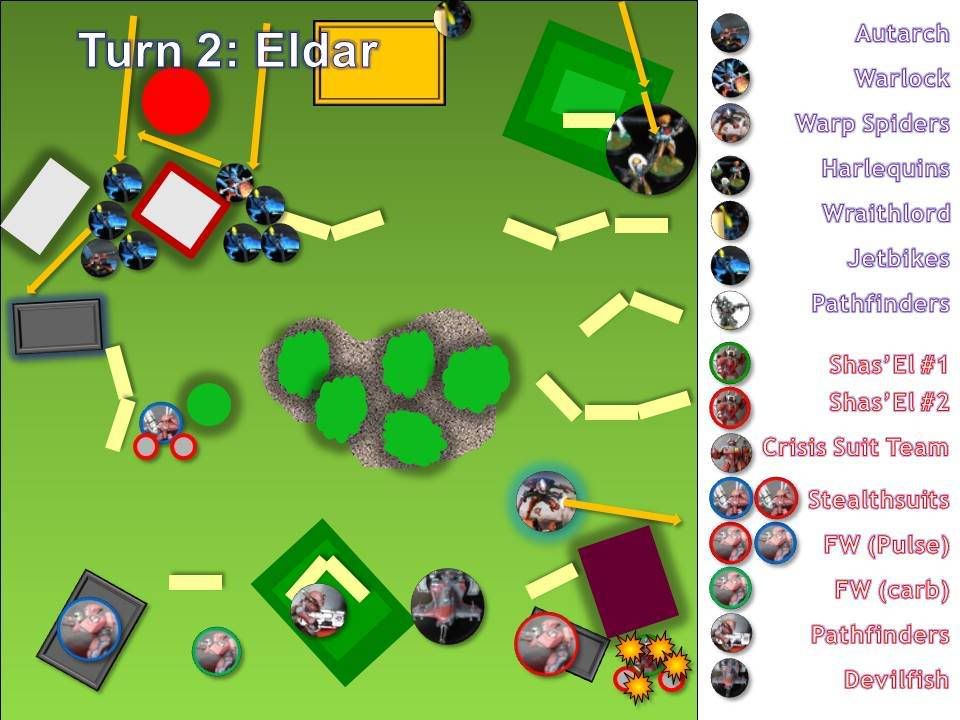
Turn 2 -Eldar: With a roar of hi-tech Elfin engines two squads of Jetbikes roared onto the board led by the resplendent (and fairly terrifying) Autarch. Surging forward 12", the Shuriken weaponry targetted the fairly surprised Stealthteam. Unluckily the two squads roll under their targeting range, only managing a paltry 10" maximum. The stealthteam breath a sigh of relief as the the jetbikes jump back into cover. Meanwhile the Harlequins surged onto the other flank, making a running move of 12". The Wraithlord (wraithsight operating on full power) stomped onto the board and immediately targetted the head of the Shas'El. More startingly, a full squad of Warp Spider deep-struck right on target and joined the Wraithlord in blasting apart the Shas'El and his gun drones.
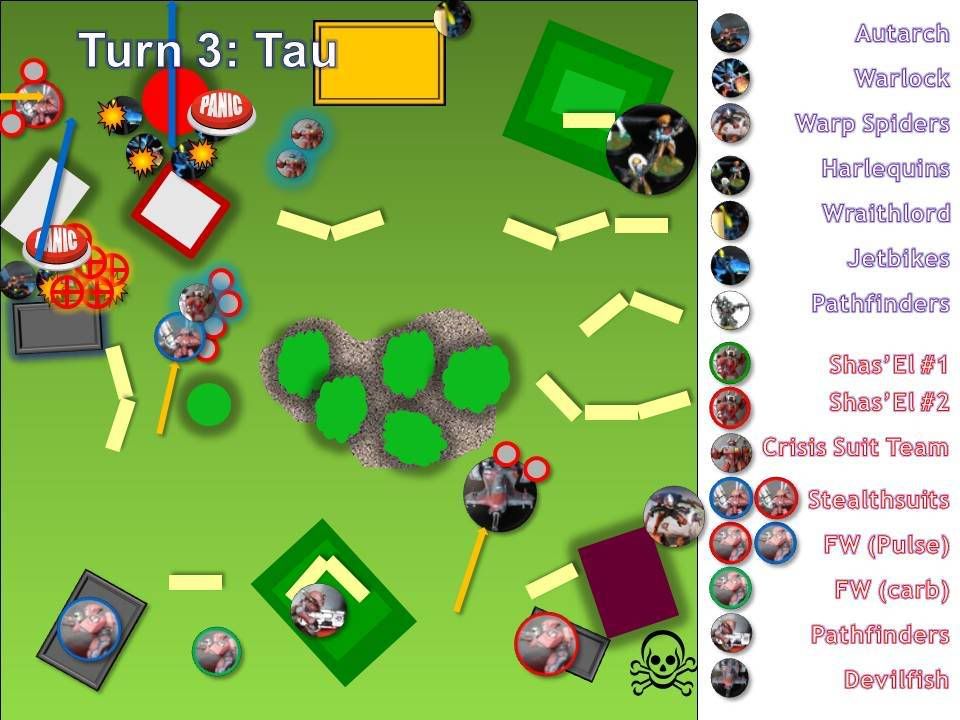
Turn 3 - Tau: Relishing my options, I nervously took the reserves roll. I needed everything on this turn to take on the threat of the jetbikes in a timely manner. The dice gods had clearly taken offence to the early demise of the Shas'El as all the reserves turned up. Placing my faith in these unruly lords I rolled for the flanking move for the other Stealthteam and arrived on the left. Taking the risk I decide to deepstrike both the other Shas'El and the crisis suit team. Hold your ground lads, the Eldar will be here soon ... at some point?!?
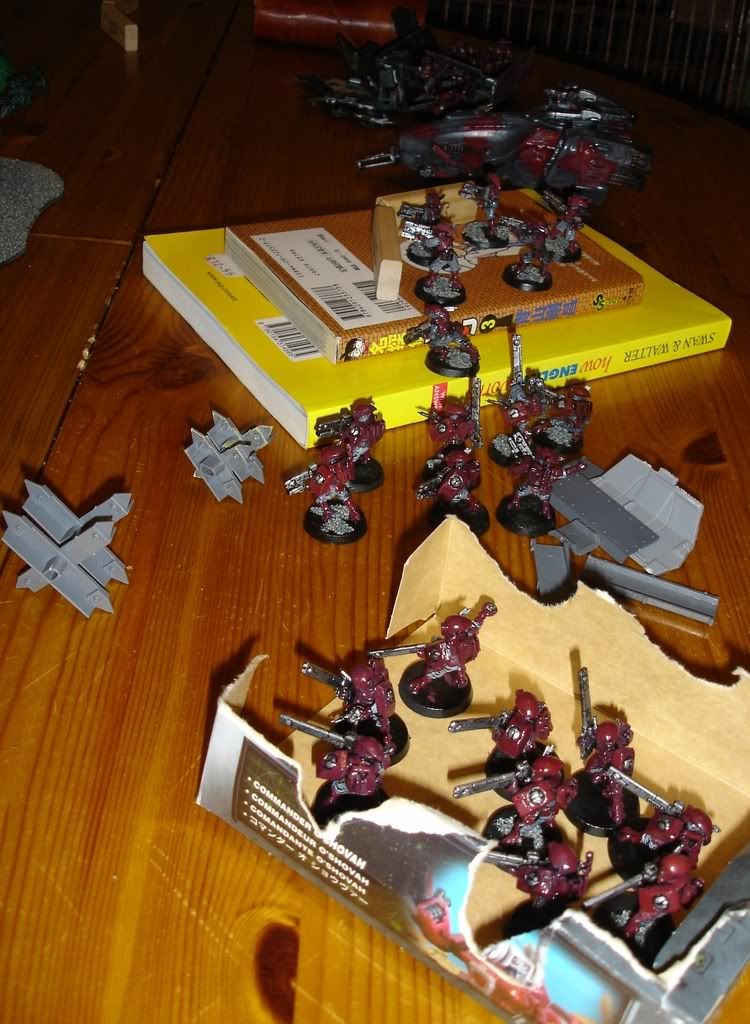
The Crisis Team deviates into open ground in front of the other team and closer to the Wraithlord. The Shas'El hits right on target and suddenly the two jetbike squads are looking down the barrel of 5 burst cannon, 5 cyclic ion blaster, 6 pulse carbine, 2 plasma rifle, 2 missile pod, 2 fusion blaster and an air fragmentation projector shot!

However, before this fire power lit up the night, the markerlights picked out the jetbike unit led by the Autarch. A total of 5 markerlights hit and I considered my options... I eventually decided to pass two bonuses to the burst cannon armed stealth team and one to the Shas'El. The remaining two I decided to use to reduce the Autarch LD10 to Ld8. Time to shoot some Elf!

First up the Shas'El targetted his AFP, but managed to scatter spectacularly off the board. The Cyclic ion Blaster was more on target at BS5 but only managed to kill 1 Jetbike with a rending shot. The associated gun drones fired, failing to kill a single model. However at BS5 the burst cannons score 8 hits resulting in 2 kills. The Autarch now faced a leadership test, usually a walk in the park, at Leadership 7 - welcome to Guard territory! His confidence buckled and he fed 3D6 towards his lines.

The other cluster of the two crisis suits and the XV25 stealthsuits opened fire on the other squad. Despite some resilient saving throws, the combined low AP1 and AP2 firepower proved too much for the other squad and without the benefit of the Autarch leadership within 12" they fled from the board.

Meanwhile, sighting the Harlequins, the Devilfish took up a defensive posture and dropped his gundrones - the devilfish, the 2 gun drones and 3 fire warriors from the left flank targetted the warp spiders on the far right but fail to kill.
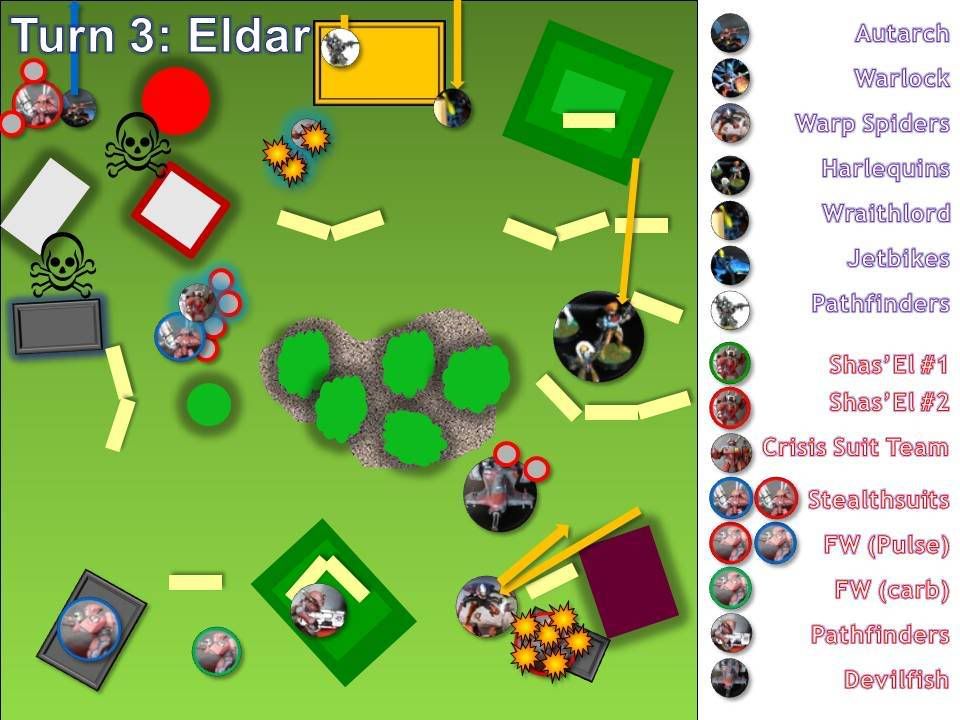
The Autarch cannot overcome the power of the targetter beam!

Turn 3 - Eldar: Bereft of options on the left flank, Devilin bit the bullet and brought on his troops on the right. The Autarch, within 6" of the XV25 stealthteam, fled the board.

In the centre the Eldar pathfinders took up position in the building, shooting their shuriken pistols at the crisis suits to no avail. The Wraithlord (making his wraithsight roll again!) stepped forward and emptied both the birghtlance and his scatter laser into the crisis suit team, killing the Shas'la and taking the team leader down to one wound. The Harlequins surged forward gobbling up another 10" to come within charge range of the devilfish and the gun drones for next turn. The flip-belts of the Harlequins showed their value allowing them to ignore cover that even genestealers would stumble on.

Meanwhile the warp-spiders demonstrated their power, leaping out 12" they fire a devastating volley into the right flank fire warrior squad - killing five! Rather than risking a charge into dangerous terrain, the aspect warrior opt to leap back into cover and out of range of the carbines. Impressively, the fire warriors hold their ground - demonstrating their loyalty to the greater good.

Turn 4 - Tau: Deciding to muster my reserves, I decide to retreat from the close combat monster called the Wraithlord but not without a passing shot. The burst cannon and fusion guns fail to hit, but a lucky shot from the plasma rifle results in one wound. I wasn't going to step out in front of sniper rifles so tucked my men back into hiding. The Gun drones moved forward to face the Harlequins While the drones, devilfish and markerlights attacked the Harlequins. Only one Harlequin died though. The Warp Spiders were positioned neatly outside of LOS for the fire warriors on the left and rnage for the fire warriors on the right. My troop options could only face one at a time - so the next assault would be essential.
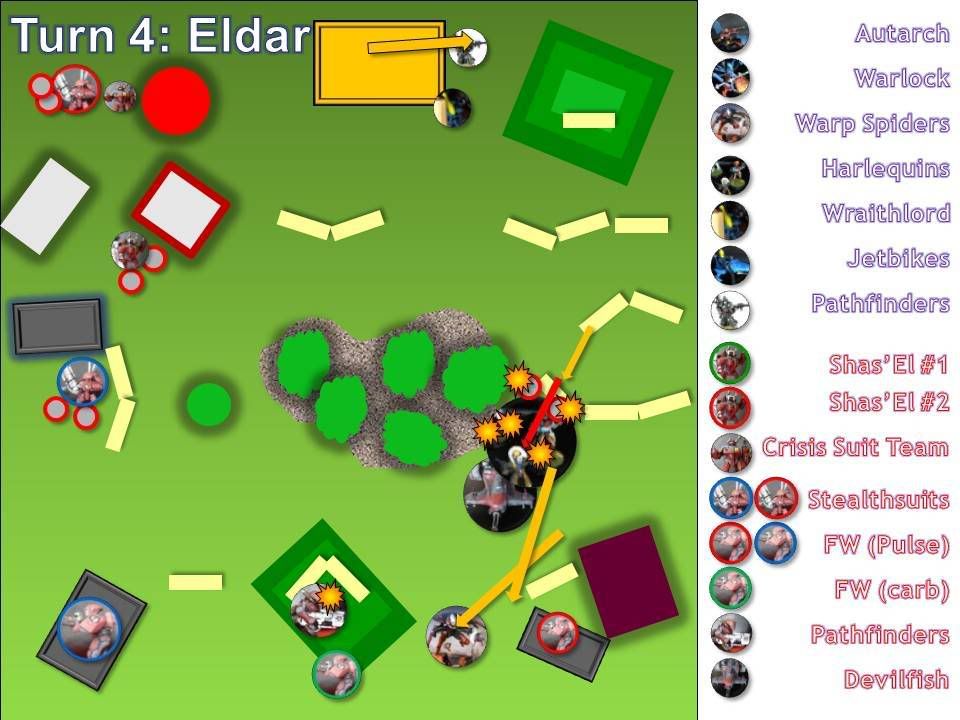
Turn 4 - Eldar: With a high pitched squeal, the Harlequins plowed forward racing in to engage both the gundrones and the devilfish in frenzied close combat. The gundrones died quickly, but the devilfish held a secret - immediately the flechette dischargers ignited shredding 3 of the poorer armoured elites. In return the Harlequins couldn't damage the devilfish. Despite losing the comabt, the ShadowSeers nerve held and he leapt 3D6 using hit and run to hide behind the warp spiders. The Warp spiders had targetted the pathfinders, but unlike their previous shots, the pathfinders only lost a single man. At the back of the board the Eldar pathfinders made a move towards the objective on the far right.
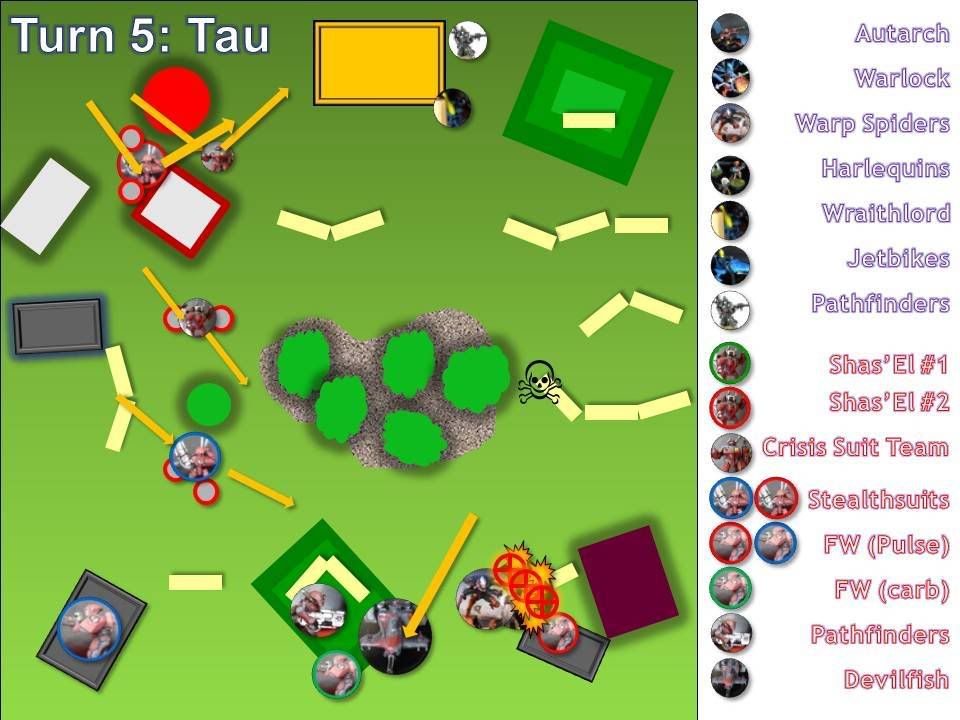
Turn 5 - Tau: With the pathfinders breaking cover, I now felt confident about taking my mobile units out against the Wraithlord. Jumping forward the XV25 team (with the fusion gun) and the remaining Tau Crisis Elite member starting 'WraithLord hunting' - popping S8,S6 and S5 shots at the Wraithlord.

Meanwhile the XV15 team and the Shas'El starting moving towards the encroaching Harlequins and the Warp Spiders. In the center, I raced back my Devilfish, playing 'barrier' again. The markerlights managed 4 hits against the harlequins.

The highly damaged fire warrior squad stepped out of cover and shot 3 harlequins dead at point blank range! Using the markerlight shots to ignore the 'shoot through warpspiders' saving throw, the carbine armed fire warriors managed to kill another two harlequins. Unfortunately, the shadow seer consistently passed both the pinning test and the leadership test - damn these pesky clowns!
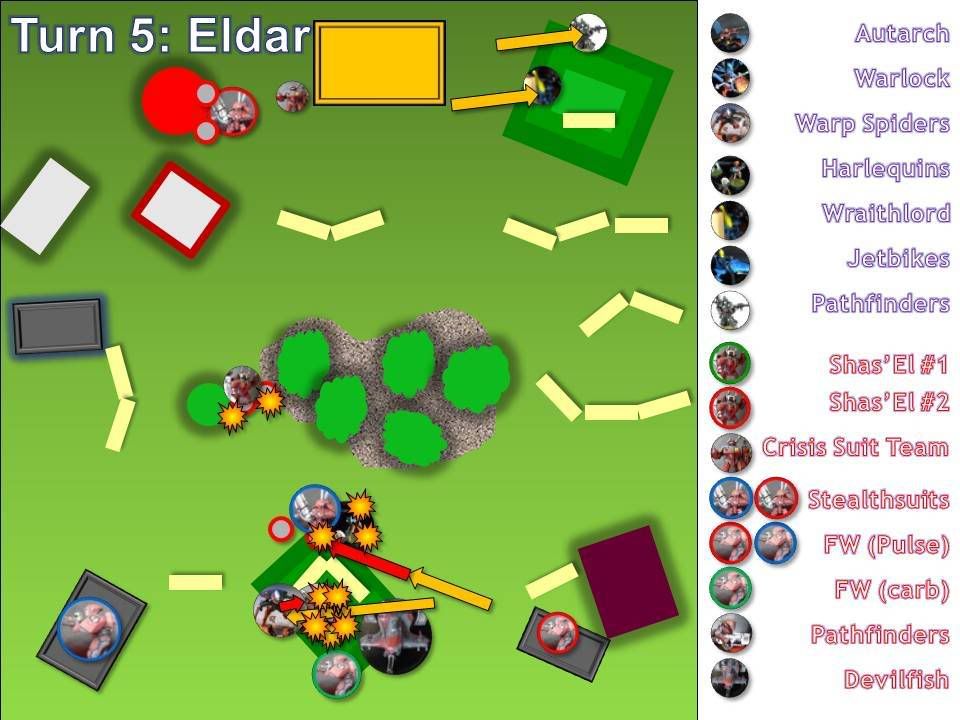
Turn 5 - Eldar: In an ingenius move the Warp Spider leap right over the Devilfish and the pathfinders, their spinners blew a brutal hole in the pathfinders and then charged into close combat. The impact of so many hits and powerblades slaughtered the brutalised pathfinders and they rolled over. Meanwhile the remaining 3 Harlequins plowed into the Stealthteam carefully defending the hill. Despite 12 attacks on the charge, the Harlequins only managed one rending hit and a gun drone died. With the majority of the team with 3+ save, 6 other hits were cancelled. The Tau team struggled to hit back, getting two strikes - luckily with S4 and the harlequins only having a 5+ save, only the ShadowSeer survived.
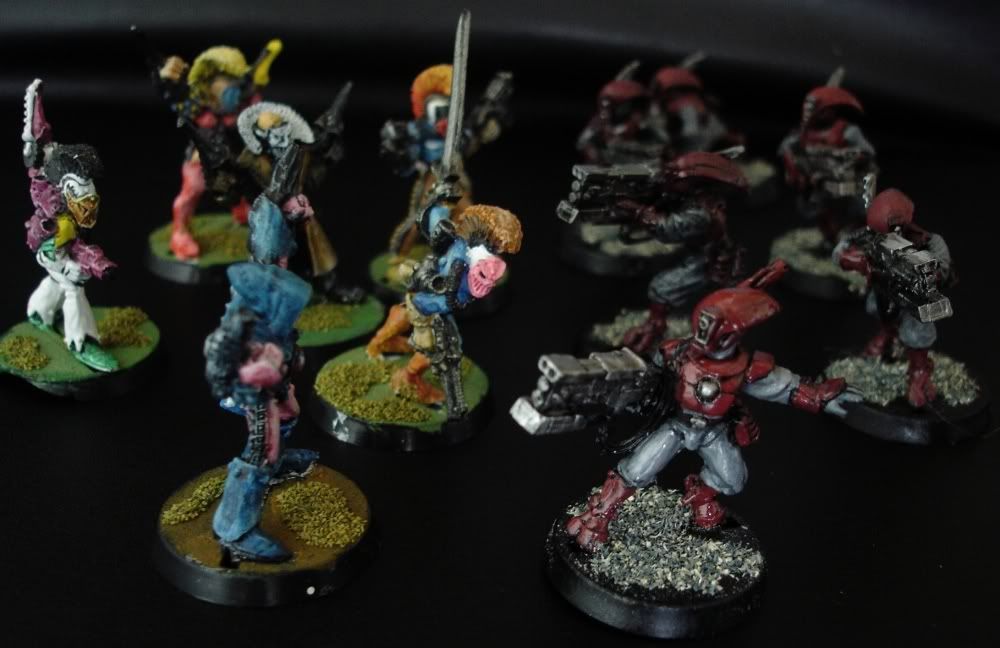
The dice roll another turn.

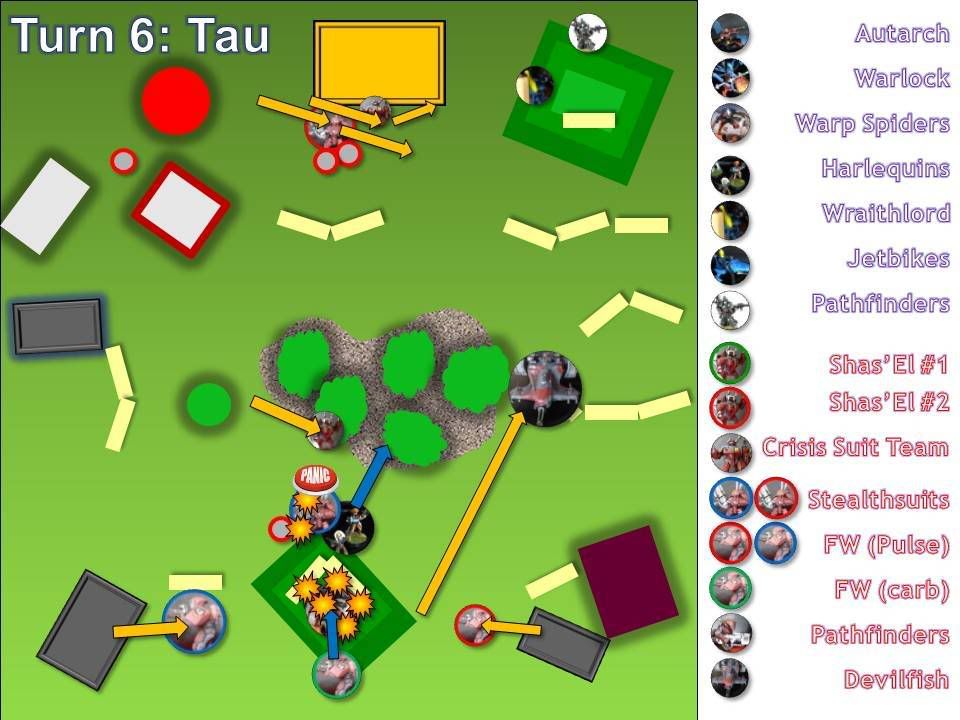
Turn 6 - Tau: Moving all the fire warriors out of cover, I lined up every pulse rifle on the warp spiders and they died very quickly. The carbine armed squad were then able to run up to the top of the hill and consolidate around the objective. Meanwhile, the Crisis suit commander, crisis suits and stealthsuits continued on their Wraithlord hunt. But failed to wound the beast. The Devilfish meanwhile went full speed up the board in an attempt to head off the pathfinders on their objective. In the close combat, the Shadowseer did a stunning job and managed to rout the stealthsuits, slaughtering them. He then retreated to the nearby woods.
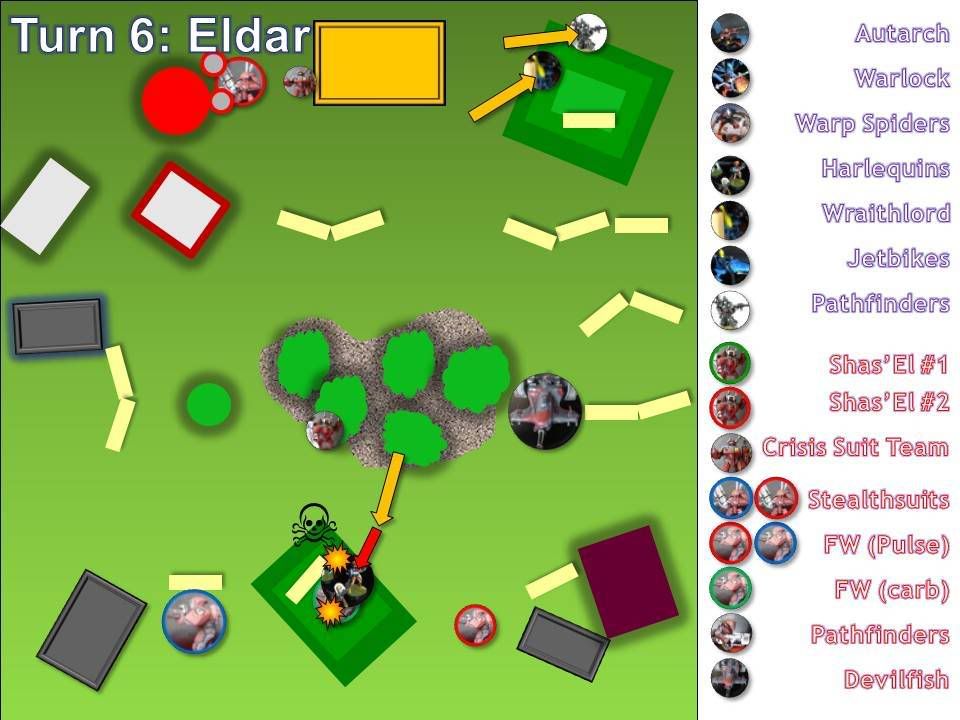
"Oh a Wraithlord hunting we will go!"

Turn 6 - Eldar: The ShadowSeer surged out of the wood and charged the fire warriors. The pathfinders snuggled down on their objective behind the hill, with their T8 bodyguard. The Wraithlord opened up on the Devilfish, but thanks to the disruption pod nothing stuck.

Despite killing one fire warrior the Tau managed to make 2 wounds stick and the ShadowSeer died, leaving the obective securely in Tau hands.

The dice rolled again, and again we were for seven turns.
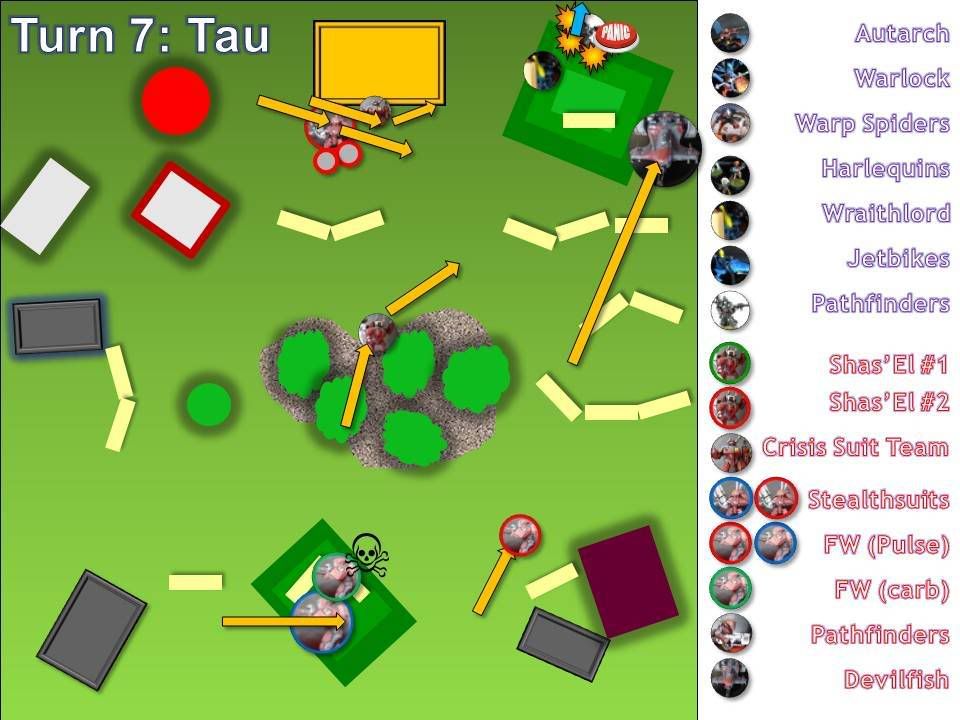
Turn 7 - Tau: It was now a desparate race to get within Line of Sight and Range to kill the pathfinders and deny the objective. The Devilfish went pell for leather, but with the WraithLord standing vigil he could tank shock the objective. The Tau lined up, with the stealth team and crisis suits having no choice but to attack the Wraithlord - everything failed. Until, with the last shot of the game the Shas'El dropped a Air Fragmentation Round on the pathfinders heads. The AFP denied them both saving throw and cover saves, killling all but one. With a shaking roll, the pathfinders failed their leadership and quit the board.

Tau Victory.

Conclusion

Tau
  • AFP and ion Blaster: Unlike many other units, the crisis suit pilot thrives on combining both long range and short range fire power. Having two 18" guns on a Shas'El was a wasted opportunity as he could have harrassed far more with a missile pod. Although the AFP effectively finished the game, I've subsequently changed his outlay to a missile pod, an AFP and a flamer. Making the Commander a pest at range and bloody lethal in close quarters!
  • Fire Warriors and firepower: The troops options worked very well, providing layers of firepower. I was especially pleased with how the fire warriors and stealthsuits performed in close combat killing elite troopers. The stealthsuits were well worth sacrificing, allowing me enough time to regroup and swamp the obejctive.
  • Gundrones: the smattering of gundrones were brilliant. Although their firepower was neglectful, their ability to soak up fire, especially instantkill hits from Brightlances proved essential - allowing me to keep unit on the board. They also perform well in close combat, giving me more options. My only mistake with these units was to push my gun drones in front of the devilfish, I should have trusted more to the flechette discharger and not thown away these units.
Eldar
  • Elite Choices: Where were the flanking striking scorpions, the deep striking swooping hawks, the 48" S5 AP4 blast Dark Reapers, the war walkers at 31" or the two wraithlords. Just like my Guard force against Dustin's Tau, I feel that Devilin got focused on mash the Tau in close combat, and thereby got pull within 30". By exploiting range first, and then LOS (which both the Harlequins and the Warp Spiders fulfilled), and then survivability (with the Wraithlords), things would have proven nigh on impossible.
  • Jetbikes and Autarchs: the Autarch's +1 to reserve rolls proved more a bane than anything. With the Jetbikes coming on in second turn, the stealthsuits and crisis suits were set up to ambush. The reason for missing the first turn and then putting everything in reserve was ideal for Saim Hain army, but this force struggled.
  • Rangers: I still don't quite understand why the Rangers didn't come on in turn one. I do think that they are a secondary choice against Tau as the high saving throws, deep strike options and flamers are murder for rangers. However if the rangers had come on behind the hill objective they could have set up sniper rifles outside the pulse rifle range and started pinging away at the Tau. A couple of pinning hits could have held that corner and would have allowed the Wraithlord the freedom to charge the 'hunt pack' - scattering their approach.
Wednesday 25 February 2009

Army List Tactica - "Shooting your way out"

By Suneokun.

Recently, I've been giving some detailed thought to the ways and how's of playing 40k. Despite playing for many years, and having (what I think) is a fairly detailed and intelligent mind, I seem to have struggled with army lists. The simple fact is that while I can visualise the minutae of a particular playing pieces and devise cunning assault of defence strategies about them, I have struggled with the 'bigger picture' and against many experienced players I've lost poorly.

Importantly, you'll notice that I have completed excluded the mention of close combat 'potential' in this tactica, as I believe this will confuse things greatly. Close combat is in it's essense a 'micro-managed' part of the game, with unit versus unit/s. As such the potential of each is easily identified and is either halted, counteracted or contained. I will consider following up with a combat tactica later.

This post was inspired by a recent 'Eureka' experience in the construction and planning of army lists - and this has been decisive in some fairly good victories.

When writing an army list, its all too common to fall into the following traps:
  • I'll take my key unit/character/vehicle again: as fetishising geekdom attests, its awfully easy to get 'attached' to the abilities of a particular hero, squad or vehicles in your line. As others have highlighted, the 'seer council on jetbikes with rerollable saving throws' of doom, is great - but it does lead to a 'one size fits all' army list - this can have impacts for your opponents (they may avoid you and your instant-win army), but all to frequently it builds in a familiarity or predictability that your opponent can exploit (mainly by killing your key unit).
  • I'll build a generic list and not think about my opponent: With the wide access on-line to codex sheets, tactica's and battle reports - we have no excuse to go into battle unprepared. Even facing an army you've never played before, you should have a fairly firm idea about their strengths and weaknesses. More importantly you should think about their army (and your own) on a macro level (how do they operate, what sort of playing style should I expect?) - otherwise you'll be blindsided.
  • It just fun, isn't it? Yes, most importantly it is fun - but FAIR fun. This is about ensuring you don't have to endure 5 turns of fruitless massacre without comeback (and the frankly slightly embaressed and yet still present crowing of the opposition!) - which ain't no fun.
So with the above in mind, where do we start?

Army list Tactica 1: know your opponent.

Ok, so we know Deamons all deepstrike, ravenwing are fast and Nob Biker Platoons are far to fast, hard and jammy - but, importantly, how do we match our army to theirs? The first thing to do, which seems very obvious, is play to your strengths. It's all too easy when facing Tau with a Imperial Guard army to get carried away with thinking about rough riders and Ogyrns pummeling their lines - but lets face it, you are going to have to get there first! You could opt for a jammy option like flanking your whole force, or deep striking the lot - but let's face it - like Ork Bikers its an 'in game' cheat, and anything that denies the opposition a chance ain't fair.

So your Strengths should be defined by your ability to strike the opponent without retaliation. It should be reviewed on the following, these are listed in priority order:

Defensive Matrix
  1. Range: Can I outdistance the opposition. Example: Guard can outdistance Tau forces in multiple ways, by staying outside 30" the guard have over 10 heavy weapons and ordinance weapons (not counting the new codex) to the tau's missile pods, rail rifles and rail guns - this gives the guard a secure advantage by outranging the Tau.
  2. Line of Sight: Against emplaced units, mortars beat missile launchers... The indirect fire action of mortars mean that you can ping emplaced units (like bunched up troops on objectives), have the opporutnity to pin, and with no retaliatory fire. Alternatively, the Tau jetpack gives you ultimate protection at range allowing your crisis suits pop out attacks. The same can be said for 'grav-vehicles' popping up behind buildings, allowing immunity from retaliation.
  3. Resilience: I've placed this third on the list as few both this and option four tend to add together... The resilience of your unit ensures you can continue fighting despite the firepower. I don't rate this as a 'choice factor' for two reasons: 1) cover saves are awesome now - meaning that you gain a cover save for covering ANY part of your model. So as long as half the squad has a toe covered in moss - you're good to go! 2) Armour saves can be good, a hammerhead with a disruption pod or landraider in cover is a daunting prospect - but it can always be circumvented by the right weapon at the right angle with the right modifiers. Nothing can survive 3 meltaguns (except if they are in the hands of conscripts) !
  4. 'Heat': what I mean by this is how 'useful' or dangerous a unit may be perceived as. You can use this as a tactical option, Wraithlords and landraiders are frequently taken for their usefulness as a tactical 'bullet-magnet', but they can die quickly as well as slowly... alternatively the missile launcher is a much 'hotter' target than the mortar as it can damage both vehicles and massed troops - it's versatility is its downfall. The 'heat' factor will help to dictate which units the enemy will target first and how they will prioritise - use this to your advantage.
Example: one suggestion I've seen is to equip all heavy weapons and special weapons options identically, an opponent faced with nothing but missile launcher cannot 'cherry pick' your most lethal options. Alternatively, use your less 'able' weapons as a cost effective barrier to your main weapons. For example, a space marine combat squad with flamer can provide a useful 'bullet shield' to a devastator squad in the open. Forcing your opponent to choose between the easier to kill squad and the 'juicier' devastators. Tau often use this tactics, deploying floating waves of drones to irritate and erratically pin the opposition units, but will they waste a turns fire on them?

Offensive Matrix


The 'heat' of a unit is defined through the offensive matrix. By combining a score from the offensive matrix (classing the unit as low, medium or high) and combining with the defensive matrix score your get a result. Combine this with the unit type (ranged, close combat etc) and the army type and you have a clear priority order. You will likely guess at the top priorities, but analysing like this introduces some interesting results.
  1. Rate of fire: this has become the single most important stat in W40k under the new rules. Like attacks in close combat, rate of fire is essential when dealing with all types of opponent and has even eclipsed low AP weapons. This is mainly due to the benefit of improvements in cover saves. This, combined with low AP weapons being either low range (plasma, melta) or low rate of fire makes a mockery of low AP weapons. They have their place, but the multilaser is now better than the autocannon. The scatter laser rules.
  2. Strength: With vehicles becoming more survivable, high strength heavy weapons have gained more heat. After all, more players are placing more trust to their tactics in the use of rhinos, chimeras and wave serpents. Therefore any high strength weapon will gain a measure of heat. High strength and high AP - goodbye.
  3. Ordinance: terrifying to both troops and less so vehicles, ordinance with its pinning and high strength gets targets prioritised, luckily they are mostly tanks (which are already hotter then hell).
I've purposely excluded range from the offensive matrix. Range is a defensive trait, but both players will naturally vie for the 'long range' power over the game. This is a distinct tactic and doesn't add to the mix.

I would class like this: give a score from 1-5 for each unit, with 1 being inoffensive or poorly densive, this will give you the heat factor on the following equation:

2 x offensive + defensive = heat.


It is as important to gauge your own units, as well as the opponents. This may turn up surprises you were not expecting. Additionally this matrix is useful as it will give you the 'actual' heat of your/their unit rather then the perceived one. This is useful, as 'heat' (and opportunity) is what will be driving the shooting choices and assault choices of your opponent.

Example: Tau pathfinders are dangerous and very versatile units, forming lynch pins in the Tau force. However by looking at the combined scores of the two matrix, a Tau firewarrior squad has medium to high range (3), high strength (4) and medium resilience (3) while being low perceived 'heat'. Many players will ignore firewarrior squads in preference for shooting at crisis suits or hammerheads. This is where the 'fish of fury' tactic has it's greatest strength, giving Tau complete range of the board from a position outside their deployment zone while challenging or capturing an objective. Of course it's important to note that any troop choice on an objective will suddenly gain a lot more heat!

Conclusion (the final mix)

I hope the above is of interest. I have started to use the matrix' in anger and have found them to be quite effective, especially in getting an objective view into how your opponent views your force. The final thing to consider is the options of your force against those of your opposition. How do you play to your strengths AND commit his forces in a way you can control and guess at. This process needs to be drawn up from the army list to the table, and in the next part I will be exploring how to break down your force and maximise your potential.

Monday 23 February 2009

Future Tactica - Ogyrns

By Suneokun.

Let's face it, the guard have some fantastic point sink units ... I should know, I spend a significant time converting them. Between the underarmoured, overpriced and inaccurate Sentinel scout walker to the overpriced instantkill magnet that are Ogyrns - the guard are peppered with good intention - hopelessly drawn up.

Reading through the new Guard codex datasheet that's been doing the rounds, something important jumps out! Ogyrns have been buffed, a lot. Rumour has it that Ogyrns may be Feel No Pain, or have carapace - all I can go on is the Codex listing, and that's enough to make the eyes water....

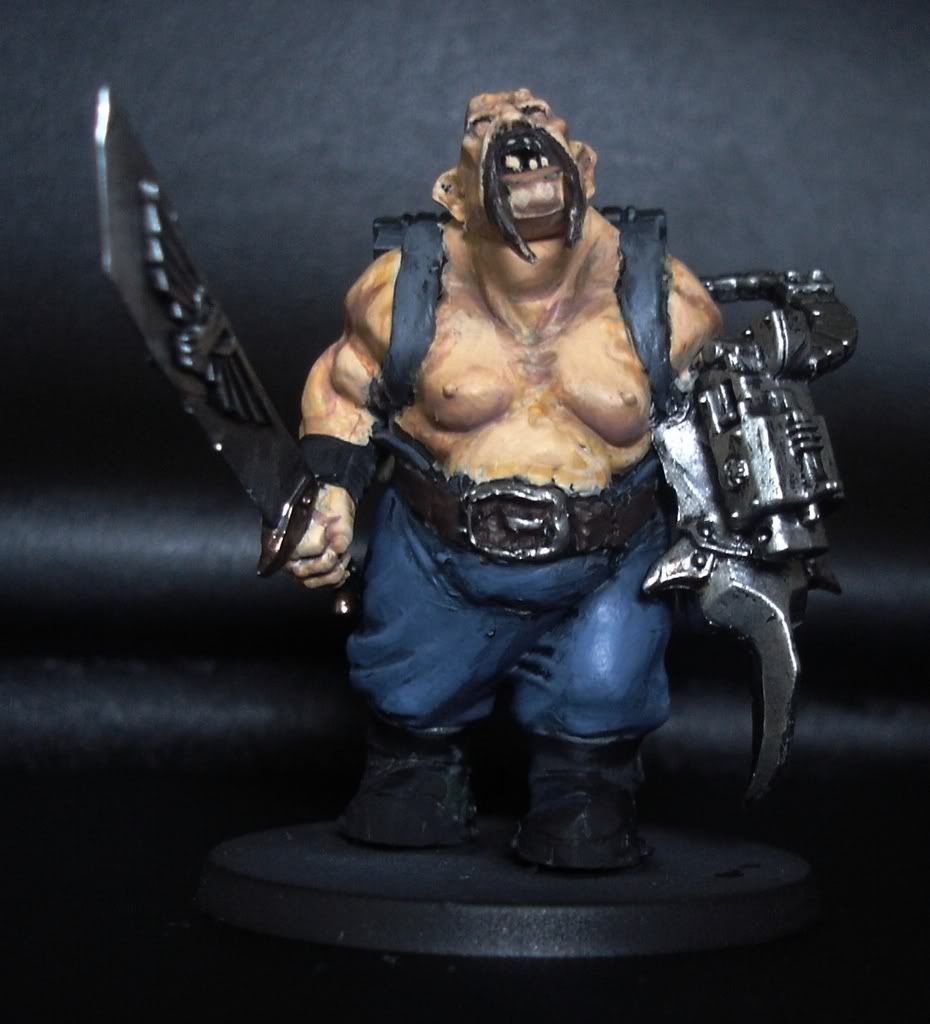
Put simply the Orgyrns have a statline to make a Terminator blush, and if rumours are true - at 25pts each, they will be a new 'Must-have' for the Guard player. Only one specification has changed - they are now Toughness 5!

This doesn't seem such a big deal, but when combined with the new vehicle charts and greater 'indestructability' of APC's in general - it gives a significant boost. While out on the field, a group of Oggers will be peppered with heavy bolter, plasma and scatter laser fire, but that counts for any close combat options. Where the Ogyrns really excel in in the thick of it.

Ogyrns are awesome against terminators with powerfists (as they hit first with lots of strength) and can grind up large hordes of orks (17+) on the counter charge. Only a Ork Warboss offers up an instantkill option on Ogyrns. On the stats, Ogyrns sink both Terminators, Orks and would even give the Ork Horde a run for its money...

To top it all off the Ogger has receivd an additional bonus. The Ripper Gun has been upgraded to a Assault 3 S5 weapon! This means that Orgyrns can comfortablely take on the ork brood, and with the potential of 15 S5 shots plus 18 S6 attacks on the charge - other armies should watch out.

I'm looking forward to taking them with a Commissar Yarrick Upgrade for a well led squad. This would overcome the Ogyrn's single weakness - it's leadership has been reduced to a poor 6 - matching the Ratling. This means that Ogyrns would really suffer when losing a combat round.

Hopefully these new rules will be an essential for my £3 Ogyrns.

Wednesday 18 February 2009

Progress on the Tau

By Suneokun.

Progress on the Tau force: Cadre J'Etsu, after a lovely spot in northern Japan I used to live. The current 'painted' roll call (from Christmas) stands at:
  • 2 Crisis Suits
  • 24 Fire Warriors
  • 9 Pathfinders (including 2 rail rifles)
  • 1 Broadside Battlesuit
  • 1 Stealthsuit
  • 1 Ethereal
  • 1 Devilfish
This leaves me with the small job of finishing the following:
  • 2 Crisis Suits
  • 4 Stealth Suits
  • About 20 Drones (including 2 shield drones and a marker drone).
I've purchased the 'Crisis suit commander' sprue (mainly to get my hands on those lovely guns!) - anyone have advice over the best Tau gun combinations?

Tuesday 17 February 2009

Painting, mascots and markers

By Suneokun.

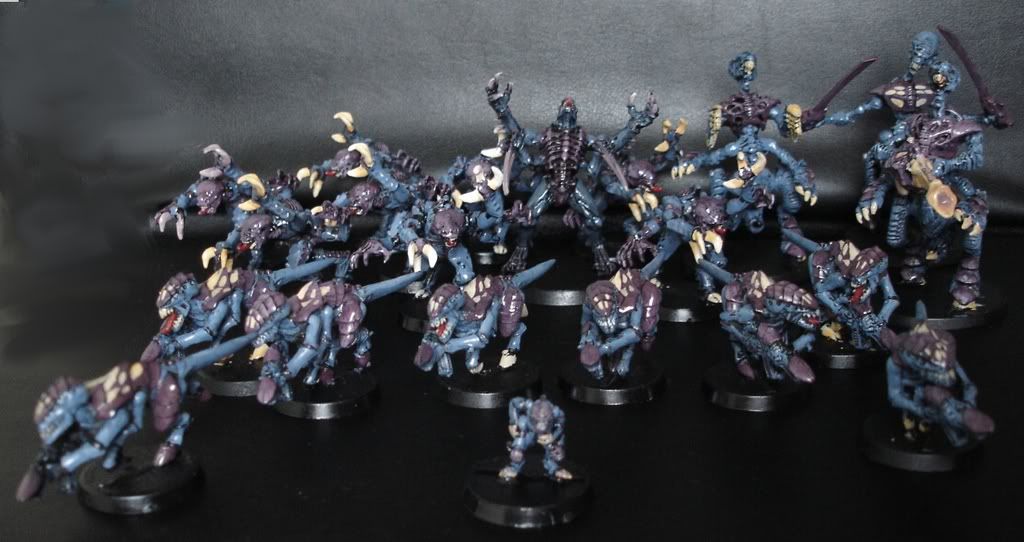
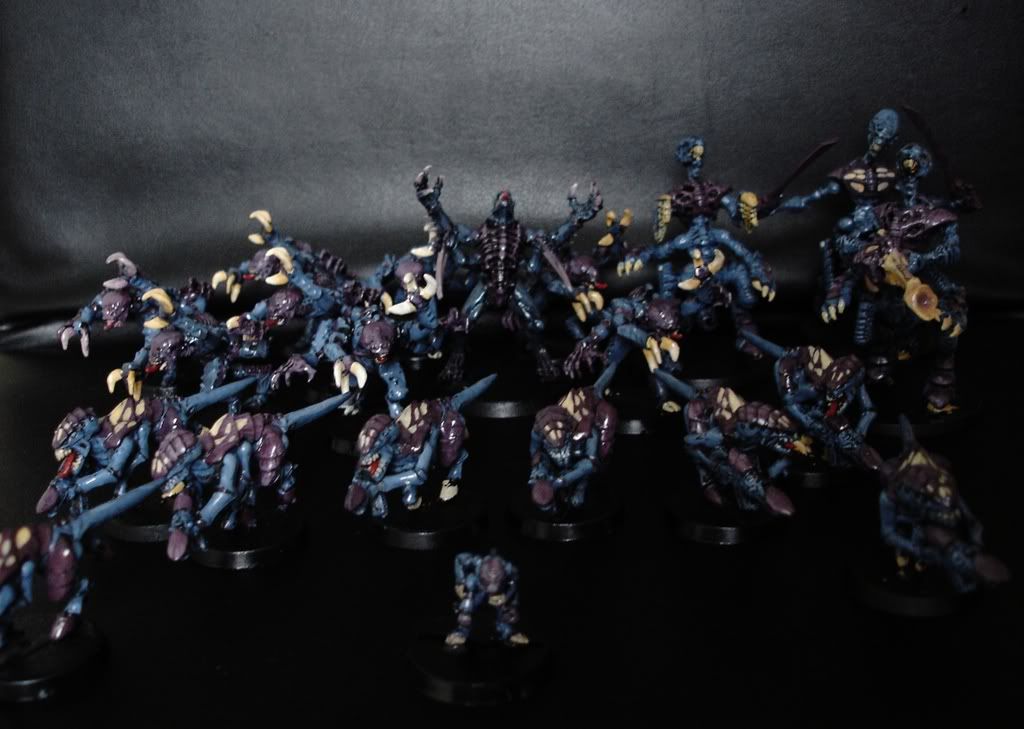
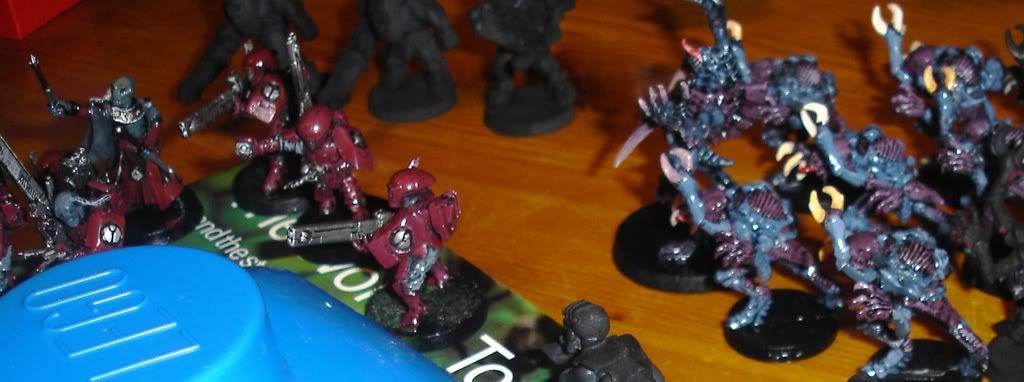
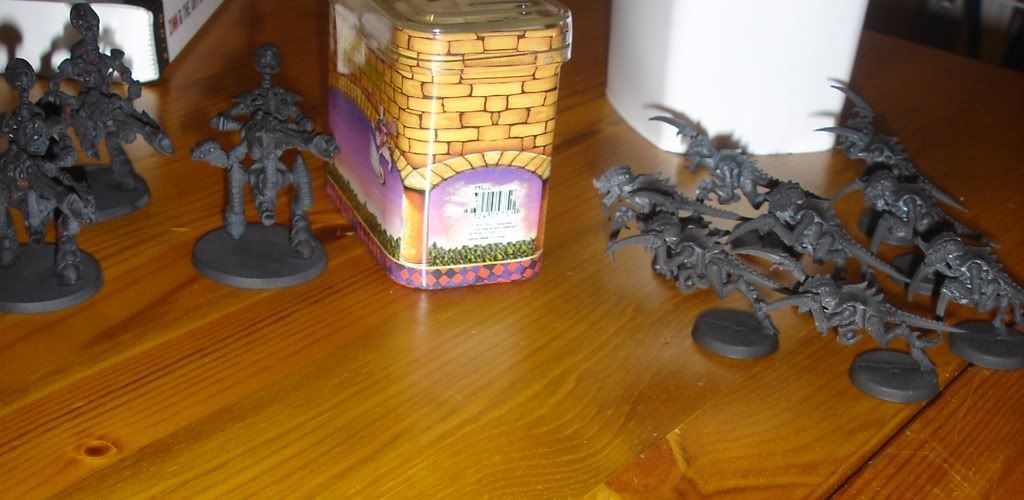
The Tyranids are coming on a pace. I've detoured back to finish off the Tau fire warriors [10], but here's the latest Roll to duty:
  • Broodlord
  • 3 Tyranid Warriors
  • 8 Genestealers
  • 8 Termagaunts
  • 6 Hormagaunts (see below)
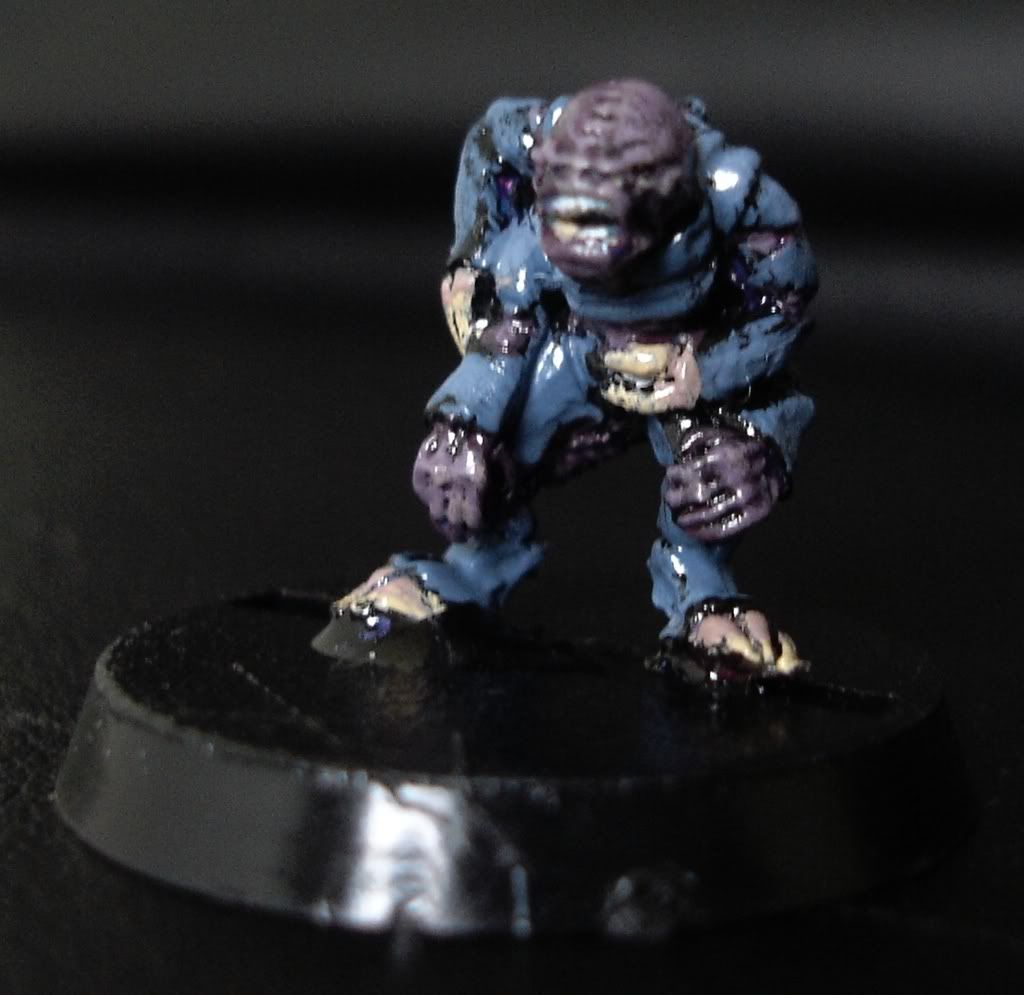
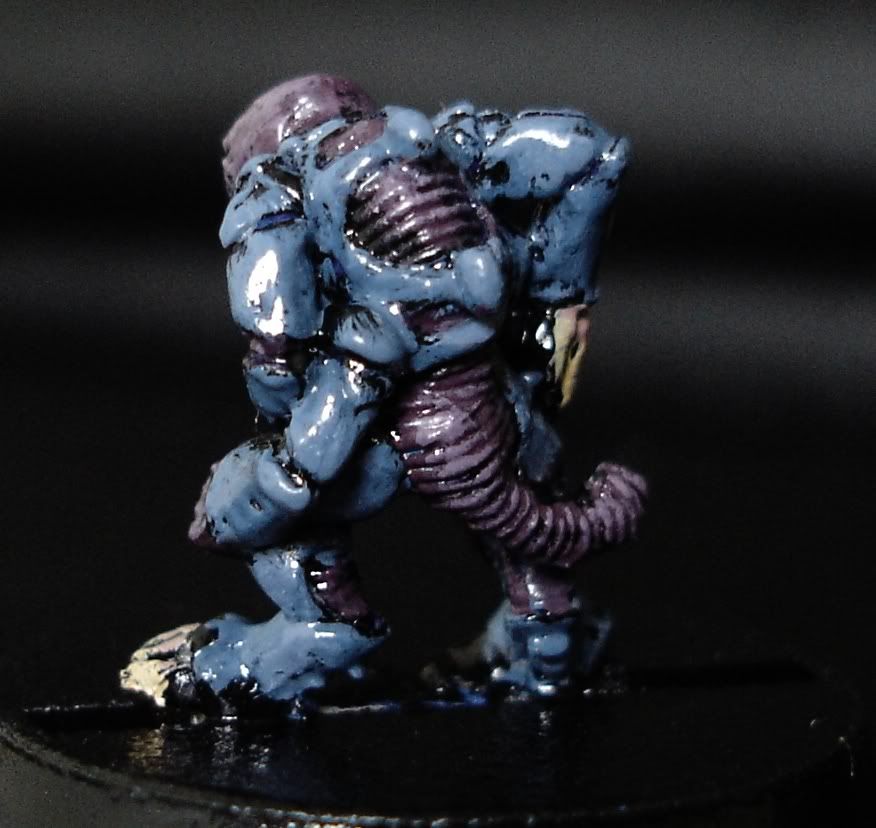
  • ministealer
  • 1 Ripper Swarm
You may recognise the ministealer, he's an early 1990's Genestealer cult army magus familiar. Just to give you an idea over scale, he's quite tough to paint, being only 15mm high and will be used in games as a objective marker.

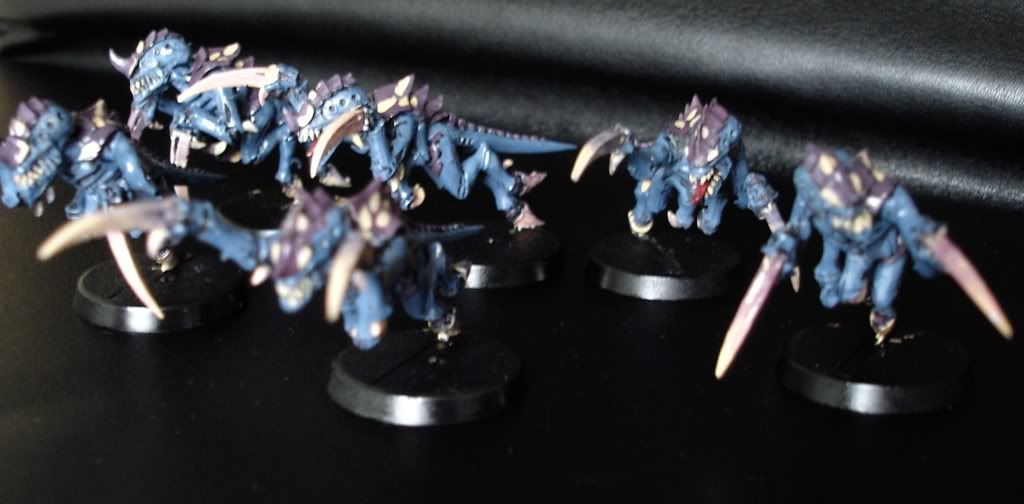
Next up are the Hormagaunts which I completed over two nights with very little pain, gaunts are quite easy to paint and really lend themselves to the quick paint (which is good becaue I've got loads!)

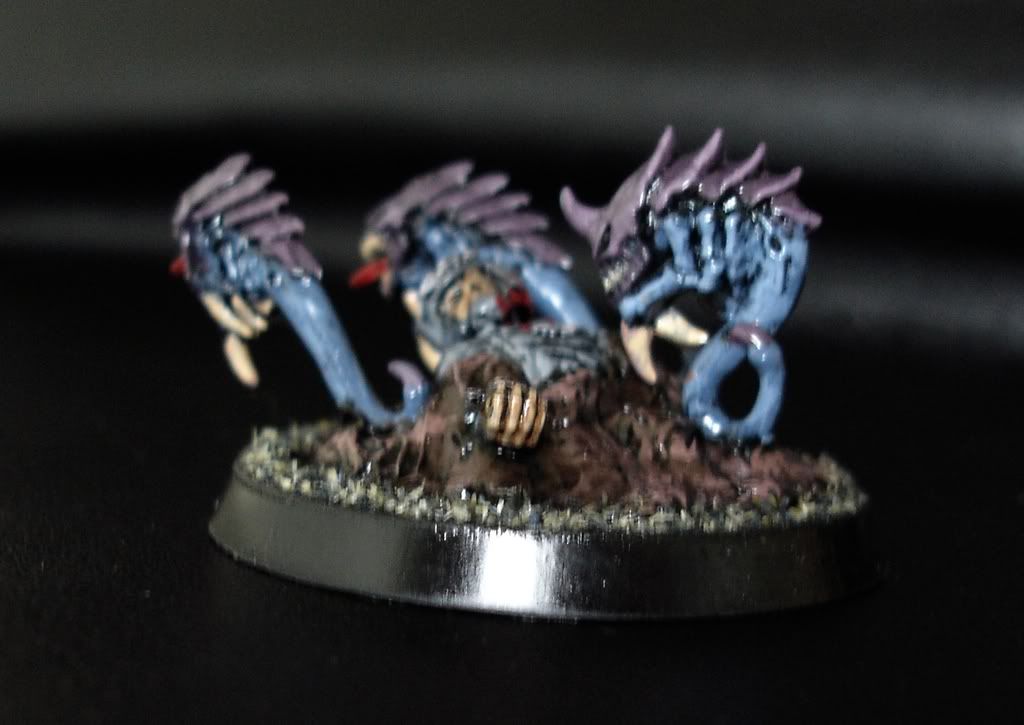
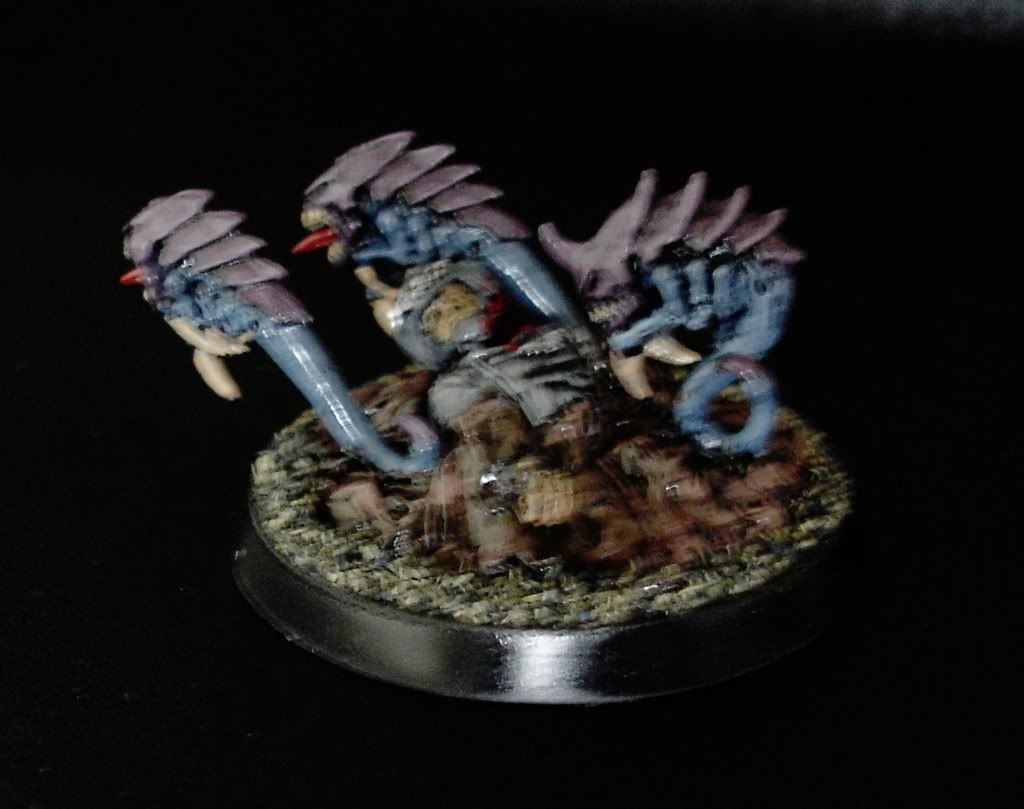
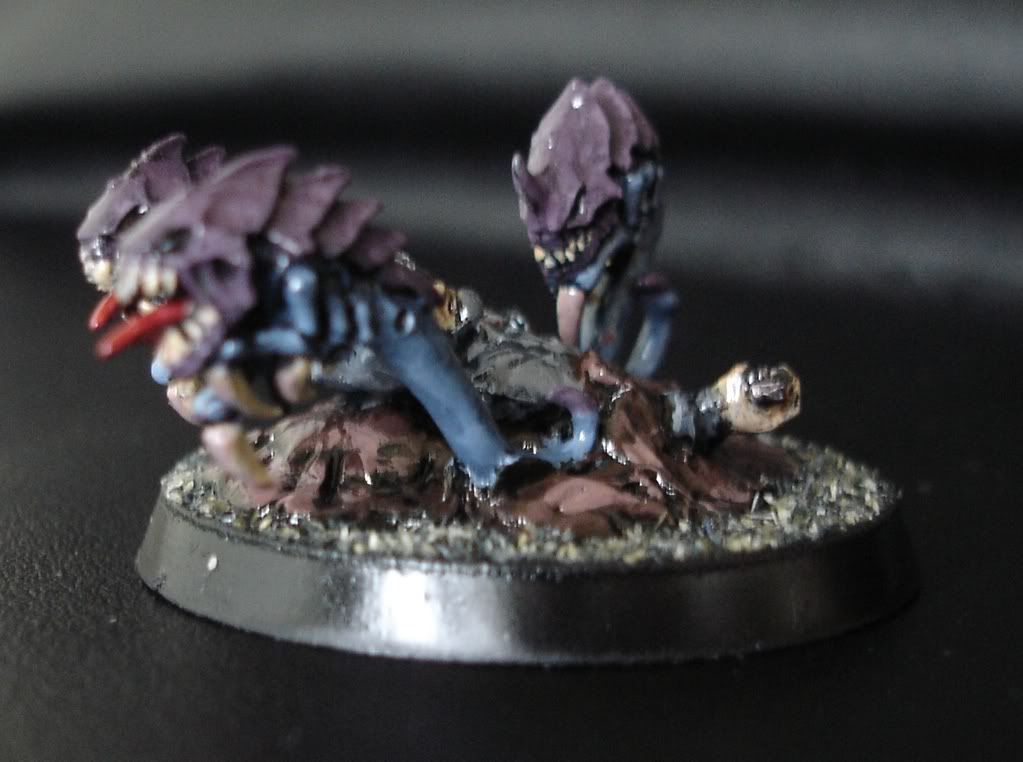
Last up is my personal favourite. On my continuing quest to spend hours hand crafting completely pointless units, I present my first ripper swarm. Put simply, I have lots of 40mm bases and only 10 rippers to share them.

They looked particularly unhappy on the bases on their own, not the mention a bit wimpy! So I decided to "bulk 'em up" with the addition of greenstuff and bits. The following is (while a bit gross) very pleasing for me, as it really gets a sense of the Rippers thriving through the carnage they make.

Please excuse the quality of the photo's, I had to rush them as the other half needed the camera for a trip to the petting zoo!

Let me know what you think?!?


Thursday 5 February 2009

Tau defence of Legoland

By Suneokun

Further to the last battle, we decided to face-off the Tyranids against the Tau for round two. Unfortunately, all the pretty cover is currently over at Devilin's and I need to borrow some for match-ups. Hence why this is the defence of Legoland. We agreed an unconventional board setup of 3 foot wide and 3.5 foot deep. This would potentially give the Tau a better chance for shooting down those nids.

After the experience of my last (close run) defeat, I had decided on going all out with a leaping monster of an army...

*** Prologue ***

Shas'El Ke'Vak was relaxing in his study when the alarm warbled throughout the bunker complex. He had just been completing his daily update report for Shas'O Clearskin and had taken an all too brief moment to consider the growth of his blossoming children, not nearly fully grown at a sturdy seven years. Soon they would enroll with the planetary fire caste hub for their first stage training.

He knew that Jad'Ui, his eldest son, would blossom in such a competitive environment - he was a crisis commander through and through, but he worried after his second child, a daughter called Fei'den and whether she would weather such challenge. He at least could see her right with the pathfinders, she was forever running off after all.

He was just smiling at such banal concerns when
the low resonant warble of the perimeter defence mesh went into high alert. Ke'Vak placed down his view-monitor and looked up a a young fire warrior mustered into the room. The warrior was quivering with excitement, and smiled a nervous grin at his commanding officer. The warrior dropped to one knee.

"Shas'El, forgive me. I felt that the alert should be raised immediately and I forgot my place. I was stationed on routine duty in the drone overview area when I noticed an anomaly. I actioned a head count, and we'd lost 23 drones without triggering an alarm." He paused for breath, and the Ke'Vak nodded that he continued, his own face mirroring the grim humour that had gripped him. The kneeling Shas'Ui gulped down air.
"The last loss was 4 minutes ago at a bare 1.5km. I felt that the pattern warranted immediate response." He glanced into the Shas'El glowering face, concerned for the response writ large.

Ke'Vak shook aside his personal impatience and frustration that this warrior had not sought guidance. He had acted in the greater good, making action of what he thought right. Maybe he was impetuous, but his instincts were good. The ageing commander placed a firm four fingered hand on the Shas'Ui's shoulder.


"Nephew, I am glad you were on duty. Your clarity has given us pause. Well done." The younger crisis suit pilot beamed at such praised from his famous uncle.

"Thank you, Uncle." he stammered.
Behind him, a large grissled fire warrior slipped into the room and stood to attention. Ke'Vak straightened and motioned his nephew to stand.

"You should make haste to the suiting room, nephew. I suspect we shall have an interesting day." The fire warrior bowed quickly, a short nod of familial clarity and backed out of the room. As the door softly swooshed shut behind him, the grizzled veteran smiled wryley.


"Shas'Ui Fn'Vak seems right sir. We have reports from the pathfinders of Tyranid lifeforms. We've identified a small host, sir. Maybe two score organism, doesn't look like a significant brood, but we shouldn't underestimate them." He paused. "The pathfinders are returning immediately, they haven't sighted any of the larger beasts."


The Shas'El glanced down at his monitor and fired off his report. "I never underestimate these monsters. Update the Ethereal and get his honour guard topside. We'll need their support, the duty roster at this base is too small. And tell those pathfinders to get back here."
He looked sternly at bodyguard, a friend of a decade of expansion. "And put Fn'Vak on a meditation course. His instinct are good, but his damn hair trigger responses are risky."

The veteran nodded, pressing the door activator.
"Let's suit up."

***

Army Lists

Tau - a similar force to that which had succeeded last time but reducing the number of stealth suits in preference of more fixed fire power in the ethereal and his bodyguard.

HQ - Shas'El Ke'Vak: Missile Pod, Plasma Rifle and Flamer, hard wired multitracker, Hard Wired Target Lock. plus;
Shas'Ui Bodyguard: Fusion Blaster, Plasma Rifle, hard wired multitracker.

HQ - Ethereal with 2 close combat weapons, plus Honour Guard Fire Warriors[12].

Elite - Crisis Suit Monat Fn'Vak: Fusion Blaster, Missile Pod, hard wired multitracker and shield.

Elite - Stealth Team [3]: 2 burst cannons, team leader with target lock and fusion blaster.

Troop - Fire Warriors [6]

Fast Attack - Pathfinders [8] with 2 rail rifles and a Devilfish transport with disruption pod and multitracker.

Total:869 points.

Tyranids -
much thought went into this deployment, with scuttling and feeder tendrils upgrading the 'bullet proof' genestealers, while leaping all round for the warriors. Leaping 12" in a charge is a remarkable benefit and make the Tyranid Warrior a fearsome opponent. While all the models are "wargear" rich, it's hoped that this will compensate for the lack of bodies on the field (soon to be rectified).

HQ - Broodlord with extended carapace, feeder tendrils, flesh hooks, toxin sacs. Plus genestealers [8] with extended carapace, flesh hooks, toxin sacs.

Elite - Tyranid Warrior [3] with Spinefists, Toxin Sacs, Leaping, Rending Claws, Bio Plasma, extended carapace and flesh hooks.

Elite - Tyranid Warrior [3] with Devourers, Toxin Sacs, Leaping, Enhanced Senses, Scything Talons, extended carapace and Leaping.

Elite - Tyranid Warrior [3] with Deathspitters, Toxin Sacs, Leaping, Rending Claws, Bio Plasma, extended carapace.

Troops - Termagaunts [10], flesh borers, scuttlers, without number.

Troops - Hormagaunts [8] with toxin sacs flesh hooks and bio plasma.

Total: 849 points.

***

Description

Location: Tav'Ven'Ka - fifth sector.
Deployment: Pitched Battle.
Objective: Annililation.
First Turn: Tyranids

***

Deployment

Tyranid: With the first turn going my way (for a change), this would give me the added advantage to close the distance to the Tau. My biggest concerns were the troops on the ground. My primary objective was to close as quickly as possible with my opponent and not dally on the way. If I could succeed in destroying the "unreserved" troops in the first two turns, then I could hopefully mop up the deepstrikers and reservist pathfinders when they arrived. My termagaunts were armed with without number, so my bullet shield would provide the cover for my Genestealers. With everything on the board having the 'leaping' ability and everything in reserve flanking, my hope is to catch his Tau between the straight jab and a right (or left) hook.

Tau: In going second, the Tau player Bim judged the ability to 'finish' every turn a better strength than the first strike. Opting to go second, Bim was all too aware that the deployed forces were vulnerable to the flank attacks of Genestealers and Termagaunts. The tau would have to practice the "retreating gunline" approach ... but from what direction?

Turn 1 - Tyranids: Leaping Lizards!

The Tyranid Warriors walk forward across the left and right flank. All three squads targetted the Fire Warriors Honour Guard on the 'big blue lego hill'. The deathspitters on the far left score 5 hits despite their random scattering and killed 2. The devourers were more successful, killing 3. The spinefist Warriors tested their range through firing 12", killing a further honour guard. Bim then smartly removed the only honour guard in range. Both the spinefist and devourer tyranids leapt at the fire warriors, but the Ethereal held them firm as the marauding tyranids came up an inch short.

Tyranid Warriors and Hormagaunts swarm forward on the left flank

On the left flank, the hormagaunts weren't so tardy and achieved a 21" movement to pounce on the fire warrior squad in the left building. Thanks to their toxin sacs, the fire warriors were hit 14 times, they were sliced apart, despite Bim making 8 saves on 4+.

Turn 1 - Tau: Keep Firing, KEEP FIRING!

Looking down the maw of death, the Tau had some serious thinking to do. After careful thought Bim judged that the hormagaunts were outside synapse range and gambled that they couldn't cope on their own. As such, she ignored the three death-nid's and 8 Hormagaunts and pointed everything lethal and tau'va (6 honour guard, 6 fire warriors, 3 stealth suits and a crisis suits worth) at the two 'assaulting' tyranid squad. As the pulse fire cleared, the devourer squad was massacred to a model. However, two spine-nids still stood, sharing 3 wounds between them. The stealth suits use their jetpack move (move 6"-fire-move 6") to hide behind the Honour Guard, while the crisis suit decides to hide on top of the LEGO bunker - passing his difficult terrain test.

Keep Firing, Keep Firing!

Turn 2 - Tyranids: What a bunch of flankers.

I decide that I need to finish off these Tau in no uncertain, unfortunately the Hormagaunts fail their decision making roll and break cover for the death-nid's. Karma reasserts itself, and the reserves rolls go well for me with both the termagaunts and the genestealers arriving. On the flanking roll, I get the right flank for the genestealers and broodlord and my choice for the termagaunts.

"It's behind you!"

I bring the termagaunts in behind the genestealers. They fire at the crisis suit, but he's out of range. Meanwhile the broodlord and his merry band of genestealers plow into the Stealth team. Despite hitting first, and killing a genestealer, they are torn limb from limb by the broodlord (feeder tendrils are awesome). The brood then consolidate 1" towards the building. The tyranid warriors make combat with the honour guard after whittling their numbers down a further two thanks to the firepower of the gaunt fleshborers and the spinefists. Three honour guard die under the Nid's attacks, but it leave a single fire warrior remaining. This means that the fearless squad gain an important 4+ save for the additional 3 wounds. This means that the ethereal survives intact, but fails to wound his opposition.

Turn 2 - Tau - Run, run as fast as you can...

The look on Bim's face is fairly panicky as she explores her options ... making the reserves roll, the command duo of Shas'El and bodyguard arrive and she places them downfield (well of of harms way) but close enough to damage the 3 deathspitter warriors with both plasma and missile pods.

Meanwhile, all her "slower" force evacuate to the left. The fire warriors aim at the hormagaunts - perhaps they can damage them enough this turn. The rooftop Monat decides to back up his commander and all three crisis suits target the only synapse creatures on the left of the board. The barrage is devastating, with the commander and his bodyguard killing 2 warriors and the monat finishing them off. The fire warriors decide to sell themselves dearly and succeed in killing 7 out of 8 hormagaunts. The Monat, confident in his superiority to a single fleeing hormagaunt retreats to the far left.
Turn 3 - Tyranids: ... You can't catch me, ack ... arggghh ... gasp!

With the loss of a valuable squad of Warriors the genestealers and Warriors get to work. While the enormous brood of Termagaunts bound across the board towards the crisis suits (failing to make close combat, just...) the broodlord scuttles through the abandoned bunker and makes quick work of the six man fire warrior squad. The last man standing is handed to his seven strong brood ... it's messy, I needn't continue...

Get 'em, Get 'em!

The Monat thinks himself safe (cocky bugger) when two leaping snipefist armed tyranids land on his swollen head, hehehe! He is dispatch quickly by their rending claws.

Turn 3 - Tau: They are apper-teasing us, oh no, we're all gonna die!
The pathfinders arrive, and manage to land on their 66% chance of taking the hill in the tyranid deployment zone. The devilfish move 12" and drops off his pathfinders, along with the two gun-drones (or sacrificial AI's). The gun drones target and devilfish target the last remaining (and recovered) hormagaunt, leaving the way open for the command crisis team to repeat their firepower on the Spine-nid brood. The remaining warriors fall as the command team skim across the field towards the defensible hill.

Turn 4 - Tyranids: Duh, what are we doing here again?

Suddenly, my mighty force of all conquering nids has been struck down by three squads. I also face a long (and painful) charge back towards the gunline without the benefit of any leaping beasties... hmmmm.

I decide that if I can distract the Tau with my fleeting Gaunts, then my genestealers will be close enough to charge. Hopefully between a fleet charge and the pincers of the genestealers I can pull off a win...

Only one problem, my termagaunts are outside 12" and roll a 10, doh!? They move in generally the right direction, but by heading directly for the genestealers, we're bottling up into a kill zone.

Turn 4 - Tau: Clever manuerves...

The markerlights are finally setup. Out of 6 shots, 3 hit and they are dolled out as follows. 2 go to the Commander and bodyguard, giving them both BS5 and 1 goes to the pathfinder rail rifles, giving them BS4. First up to shoot is the gundrones and the devilfish, who manage to whittle away a couple of genestealers, next comes the rail rifles, but despite two hits, only one is killed thanks to a 4+ cover save for angle. Finally comes the dreaded command squad who manage to kill 3 more, reducing the broodlord's 'brood' to one. On such is a commander judged.


Turn 5 - Tyranids: Dumb...

The broodlord decides to charge the gundrones and mashes them mightyly, but only manages a 2" of follow-up... so 1 genestealer and a broodlord are looking down the barrel of how many guns? Meanwhile the termagaunts remember that they're name is all collectively 'Bob from Ohio' thanks to the broodlords synapse and run at the Tau.

Turn 5 - Tau: ... but lucky!

Bim plays things smart again moves the devilfish 7" towards the broodlord and buddy, giving him a 1 in 6 chance of getting boshed next turn ... if anything survives. The markerlights whir again, allowing a further 3 light. 2 are given to the command team and one to the rail rifles. The burst cannon and rail rifles fire first, managing to kill the last genestealer bodyguard.

The broodlord looks awfully vulnerable as the Shas'El and his bodyguard lay 4 plasmarifle, 2 missile pod and 1 fusion blaster (all at 2+ to hit) shots at his door. The attached photograph demonstrates some spectacularly bad rolling, as only two of the plasma shots hit! To add insult to injury on of the plasma shots comes up 2, failing to wound the T5 critter.

All hail the Broodlord!!!

With the end of turn five we roll, but the dice are cruel and we play on...

Turn 6 - Tyranid: Tin Opener?

Without choice or option, the broodlord attacks the Devilfish. He manages to land two 6+ hits on it! With his toxin sacs he only need a 4 to glance, or a 5 or 6 to pentrate. The Broodlord has clearly sucked all the Karma from the room as he rolls a 2 and a 3... scrabble scrabble... The termagaunts get as close to the enemy as possible, but can only move within 1" of the Devilfish - which is blocking the route - 4 termagaunts get in range and manage to kill a single pathfinder.

Turn 6 - Tau: Ok, now settle this!

The devilfish reverse course and parks back up at its original location as the markerlight manage 4 hits. With the rail rifles and the command team all hitting on a 2+, the broodlord is vapourised in a scatter of atoms. The crisis team retreat back behind the termagaunts to see what they will do.

We roll a die - play on!

Turn 7 - Tyranid: ...RUN AWAY!!!

The termagaunts have a serious problem on their hands, they will surely die. They can either attempt to kill another single pathfinder, or risk a Ld test against 5+ to kill the pathfinders in total. With 10 shots, reroll to wound there is a chance. Unfortunately, for the second time in the game, they forget who they are (It's Bob dammit!) and without a synapse creature on the board. They run.
*** Epilogue ***

Ke'Vak looked down at the body of his sisters son.

He had left as quickly as allowed, barely disengaging from the robing room's systems he and his bodyguard had launched quickly across the field. His autoguidance system feeding him detailed information as he sailed far above his Caste's position.

What shocked him was the brutality and sheer speed of the Tyranid assault. His systems reported the Ethereal and honour guard dead, the stealth team (led by the able Shas'Ui, Mak'tu) had been leapt on by a giant genestealer. They had only managed to kill a sole monster before blades and claws filled their viewscreens.

A Jetpack landing is never a subtle thing. The systems board lit up red as the battlesuit came to a dramatic halt. Shas'El Ke'Vak felt his cranium being pushed into his spine, the suit compensated seemlessly, stopping his spine truncating into a single lump. Within a breath, both he and his bodyguard had destroyed a synapse group, their longer organic 'guns' noted with 'extreme caution' on his head up display .

He noted that the Tyranids were cut down by a cross-fire of blazing plasma rifle shots and was pleased to note that his nephew was weathering this alien storm.

"Uncle," came the hoarse voice of his nephew over the direct-comm. "That was well done, the others have only short ranged weaponry and are less of a threat."


"Acknowledged, Fn'Vak! Now get yourself out of..." Ke'Vak never finished his sentenced. With a sickening crunch and a chorus of alien hisses, two giant warriors crashed into his nephews suit.

"Fn'Vak!" He cried, but all that responded was the sickening crack and shrill tear of admantium. And almost inaudibly, a carefree sigh.


"Greater good, uncle."


Now it was over, the scale of the losses hit home to Ke'Vak, with the loss of an ethereal, his career was blighted. The loss of the majority of the defence fire warriors for this outpost left them naked under the dark, alien infested, sky. Who knew how many other creatures were near, either out in space or on this very planet. Reinforcements would take months to arrive from Tau'Va.


Shas'El Ke'Vak felt a shame he could scarce hold within himself. He looked over to his bodyguard, who was conversing with the pathfinders. Most of the pathfinders were checking the bodies of the dead and injured, while a single member tended to their own wounded.

"Sir, pathfinder team reports that the smaller beasts have fled. However, they are unlikely to be alone and they proximity will attract more synapse creatures. What are your commands?" Ke'Vak looked one last time about the field. They had won, eradicating the threat to the base, but at what cost?


"Signal the Earth caste to strike camp. We abandon the outpost in 5 hours. Bring back the reserve pathfinders, be need sentries. Also get the earth caste to activate more drones - that's all we've got. I hope its enough."
he clenched his fists within his suit in frustration.

"Signal the Air-caste. We're leaving." He looked one final time at the dead body of his nephew and thought;


- But not forever -


***

Conclusion and Final Thoughts

Final Score: Tyranids 7 - Tau 7, Tau victory (just!)

Tyranids -
This is my third outing with this force and I'm starting to get to grip with exploiting its potential. I was pleased with the way the tyranid warriors performed, the ability to leap into combat, although expensive was money well spent. Some of the other biomorphs were pretty pointless, for example, I forgot to use the bio plasma twice. I'm still undecided over whether rending claws or scything talons are best but one aspect proved perfect - feeder tendrils for the broodlord in a must. Equiping him with tendrils AND flesh hooks and the genestealers with flesh hooks means you hit first, reroll to hit and then it's good night vienna.

Tactically the game was effectively two games for me. The first half massacre was then reversed as the pathfinders and command team lay down a withering fire. The broodlord and retinue did well, but consistent fire power withered them and the tau had multiple "non-combat" units like the drones and devilfish to speedbump me.

Synaptically Challenged: While I felt my hormagaunts and termagaunts worked well, I need to practice my synapse range. On four occassions I lost options due to being out of synapse range. I should have been confident enough to leave my hormagaunts put, they were safe in the building and weren't needed. By risking a movement they lost their 3+ save (for go to ground) and died in droves. The problem with hormagaunts and termagaunts (thanks to fleet) is their ability to get outside range very quickly. I will have to work on keeping the intermesh of synapse creatures together.

The benfefit of a horde: I need to cushion my warriors behind the hordes. On multiple occasions my warriors or genestealers were pincushions by AP2-4 weaponry, a "fire through" saving throw would have been helpful. In addition, I missed a trick with my termagaunts. By not keeping them at the front of the army I missed out on much needed body shield. This would have been particularly helpful as the Tau player would have been torn between shooting (and mistakenly killing) my Termagaunt brood or taking the shots at the genestealers.

Playing Alien: on several occasions I would have been better off hiding my hormagaunts, termagaunts and genestealer brood and playing for a win. If the 2 gundrones count as a unit then it was tactically a draw, but I could have hidden away in the second "bout" and left the pathfinders and crisis team behind and with a uneviable task of coming to find me...

If, for example I had simply hidden my troops on the start of turn four, the Tau tactic wouldn't have worked as the score was 6-5 to me... oh the generosity of hindsight. If I hadn't have risked my hormagaunts they would have still been available as a bullet shield for the genestealers AND had the potential of getting into close combat with the pathfinders.

Tau perspective: The only comment I coudl make about Tau play was that a little faith in deep striking could have given me a much harder time. The stealth team, monat and command team could have made life unbareable. Additionally, I don't understand why the ethereal's squad was placed on the perimeter. His team should have held the central bunker - with it's 3+ save and BS4. The two small troops squad could have died heroically while the honour guard massacred on mass. In fact between the stealth team and the 24 S5 shots of the honour guard, the tyranids would have died very quickly indeed.

I hope you enjoyed the battle report, please let me know as it encourages me to play more and write them up - which takes some time...! I promised that by the next matchup I'll have some more cover and more nids - 48 more to be precise. Next up I'm taking on Dustin's Tau again with a Tyranid/Genestealer cult army force. Wish me luck!