Tuesday, 3 February 2009

How to buy new GW and save money!

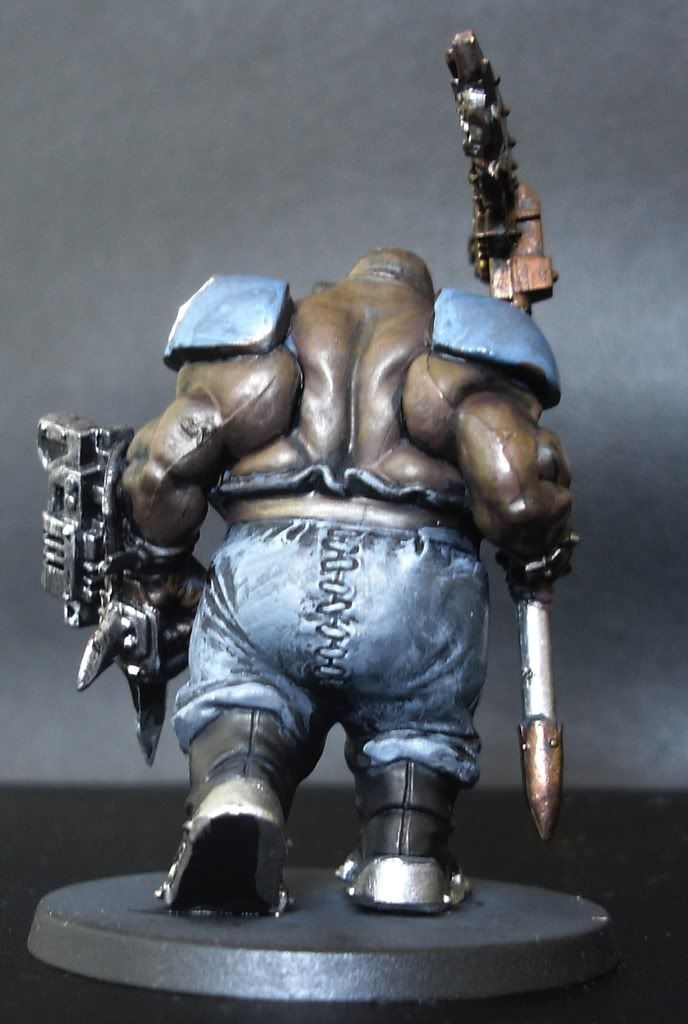
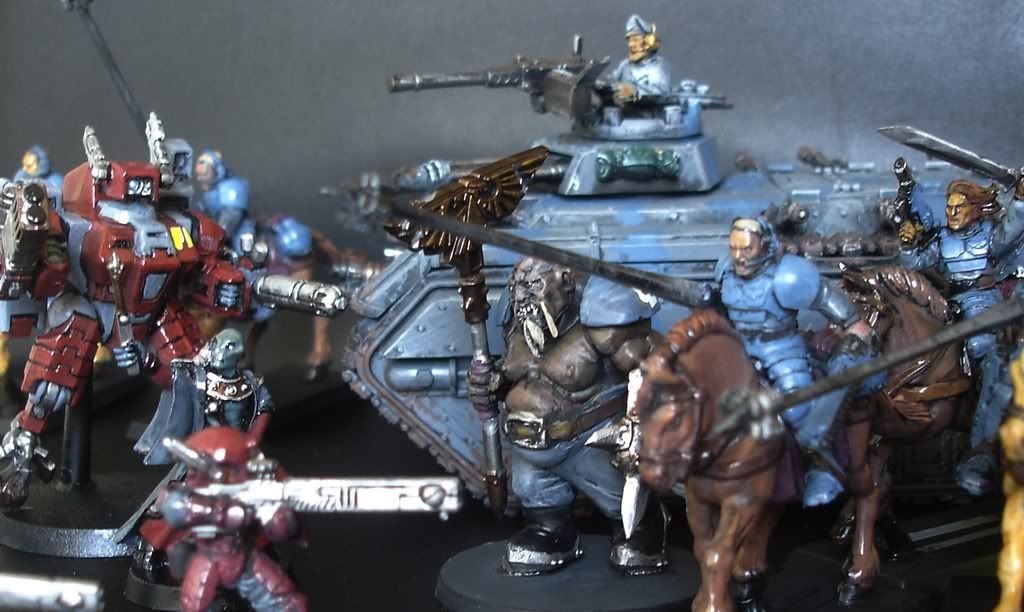
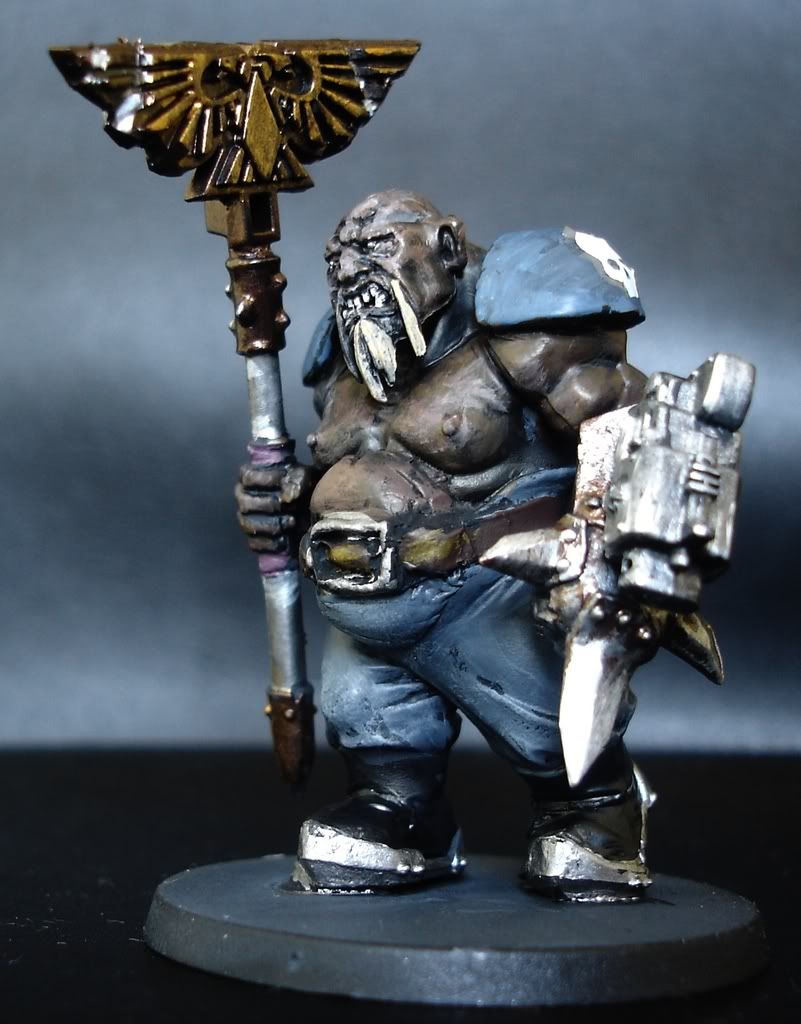
Rough Riders and Ogryn Assault troops storm the Tau Cadre lines

By Suneokun

Let me just take a moment to nail my colours to the mast - right, hold on, OUCH! Unlike much of the GW 'boarding' community, compared to the 'blogging' community, I'm very positive about GW making a profit. I run my own business, and I get quite frustrated with the 'Oh they're raking it in, greedy swines!' arguments online. Perhaps I'm old enough to remember what the old price versus quality models balance actually meant (back in the early 90's) when 3 lead marines cost £2.50. The downside was that it was actually a remarkably lonely hobby - since the internet is really the lifeblood of such an insular passtime. So when young teenagers whinge about the prices, I point out that Tyranids and Tau are actually very cost effective. That said, I have one bug-bear ... Overpriced and Ancient 'specialist' models. I'm not talking about special characters here, but outrageously overpriced models that you only really have in your army for fluffy reasons. With Guard it's Rough Riders and Ogyrns. I've always wanted them ... ever since I first saw them ... I even bought 5 rough riders in 1992 at full price of £2.50 each and they were RUBBISH! Both as models and as playing pieces.


So how come they're £7 a head now? And Ogyrns are £12 each?!? So I went in search of Warhammer FB! Over in Warhammer Fantasy Battle you need LOTS of horsies or LOTS of Ogres to make an army - so they can't charge silly prices. Thus formulated a cunning plan involving conversion, greenstuff, the internet, lycra and origami. Ok, maybe not the last two.


The concept was to convert the Ogryns from Warhammer Ogres (thereby saving in the region of £55) using greenstuff and ingenuity. I have to give a mention to my sources, which have been great value for money.


First of all there's Gifts for Geeks, Dustin does a fantastic job from his discount store in Leicester and cutting 25% off most prices means I can get 25% more than I expected! Thanks to the great prices at GfG's I was able to produce completed Roughriders for just £2.05 each! The Ogre Bulls came in at a cost effective £15 for all six. Since six is the maximum number of these blighters allowed in a Chimera - this was perfect!

Next up is the ever fresh bitzbox. A great source for supplemental plasma guns, powerfists (when in stock) and melta weaponry - not to mention the occasional empire lance and in my case a pot full of dreadnought storm bolters. These weapons were fitted onto the Ogre Kingdom 'spiky fist thingies' (that's a technical term kiddies - don't use them at home) to create a Ripper Gun substitute. To compensate for the lack of a 'Ogryn-proof' weapon - I also gave each model something really BIG to hit things with (like a Lascannon).

Finally, but not least are Products for Wargamers (another local shop to me) that stocks 40mm bases at £1 for 10! Some sound advice online had me scurrying for 20 bases. I rebased all my Tyranid Warriors and Ogryns and have 6 bases left for Ripper Swarms - total cost: £2.30.

So that's that, I created 10 Rough Riders and 6 Ogyrns which should have cost me £142 for two units. Instead I've spent under £55 and got 20 Guardsmen into the bargain - so that's Rough Riders @ £2.05 each and Ogyrns at £3 each. Plus a lot of labour (when is that not involved anyway?) and some random vehicle bits and greenstuff.

Finshed result - priceless! (Let me know what you think).

Monday, 2 February 2009

Busy Busy Busy - my painting since Christmas!

By Suneokun.

As you may be aware I am attempting the ludricrous attempt of painting 3 armies at once. The idea is to finish the huge amount of standard, inherited and converted mini's before I can buy any new one's. Since this amounts to over 100 models, it's quite a challenge. In January I have completed the following:

Guard

#1 Leman Russ
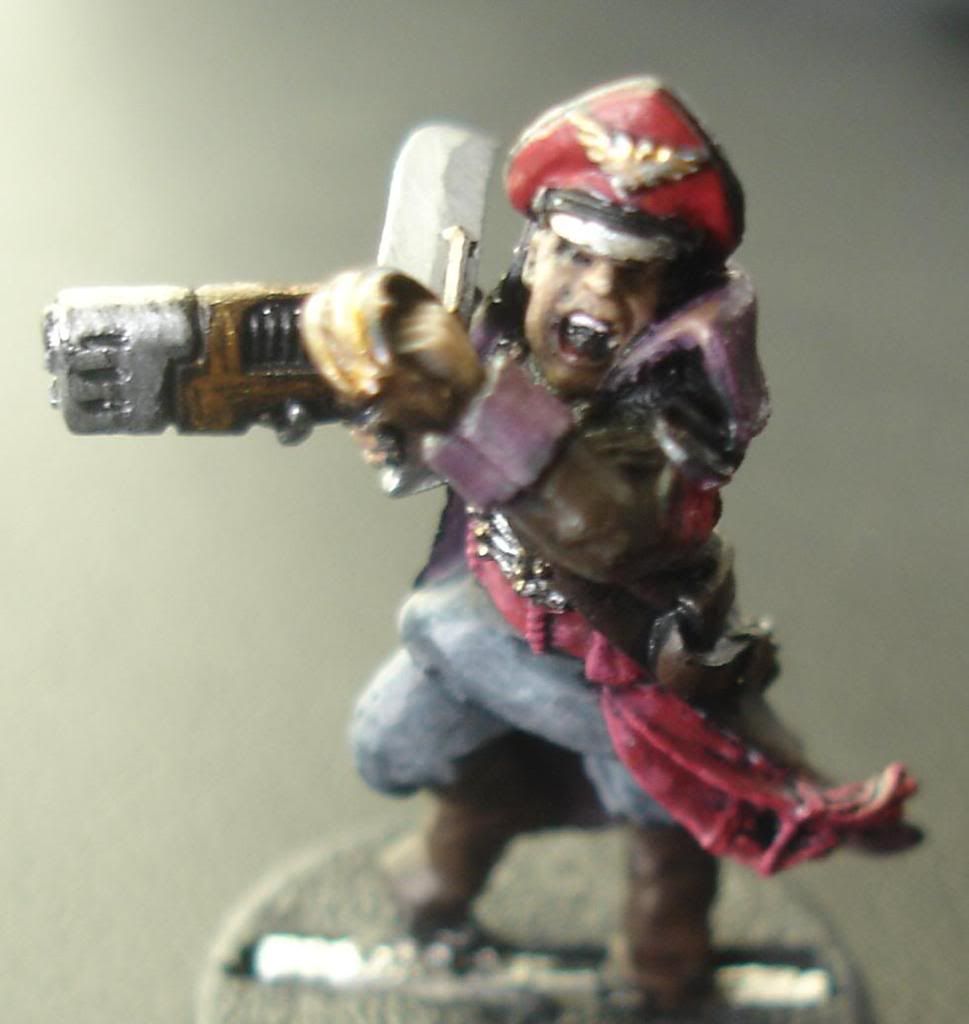
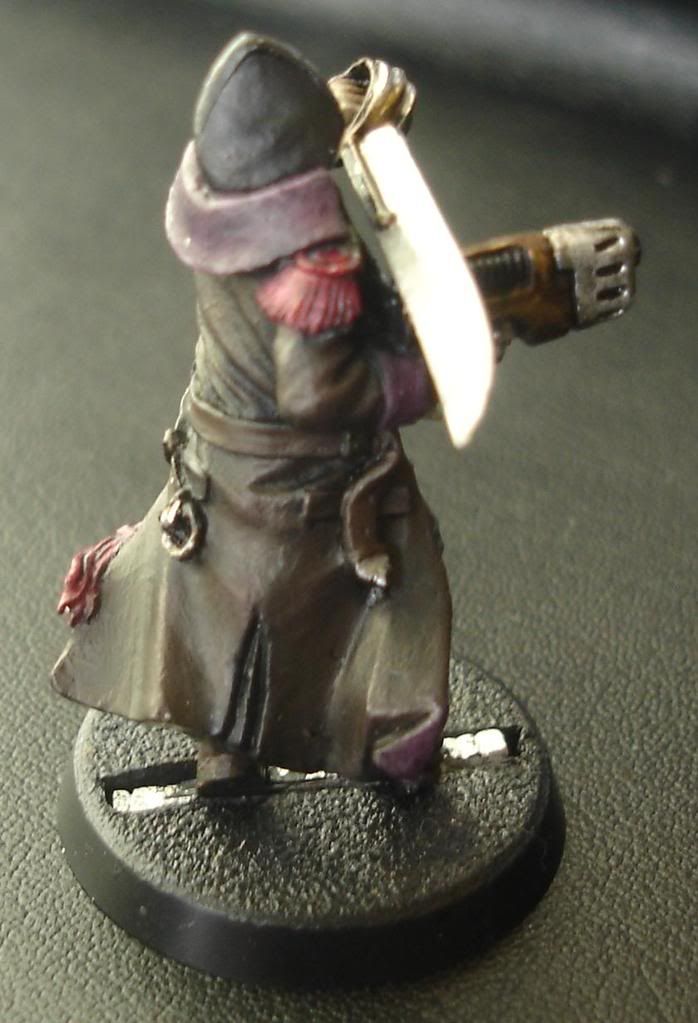
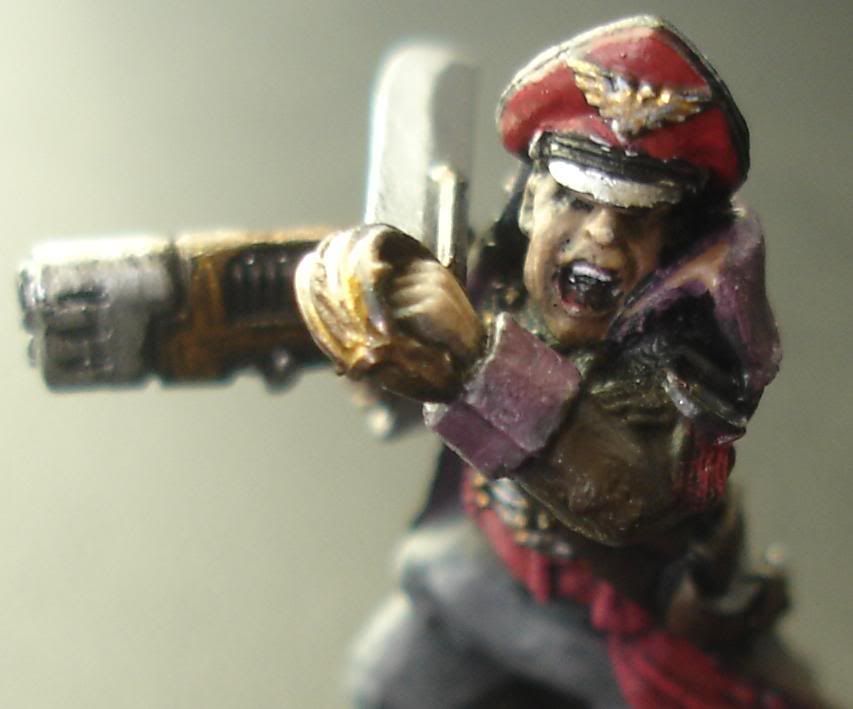
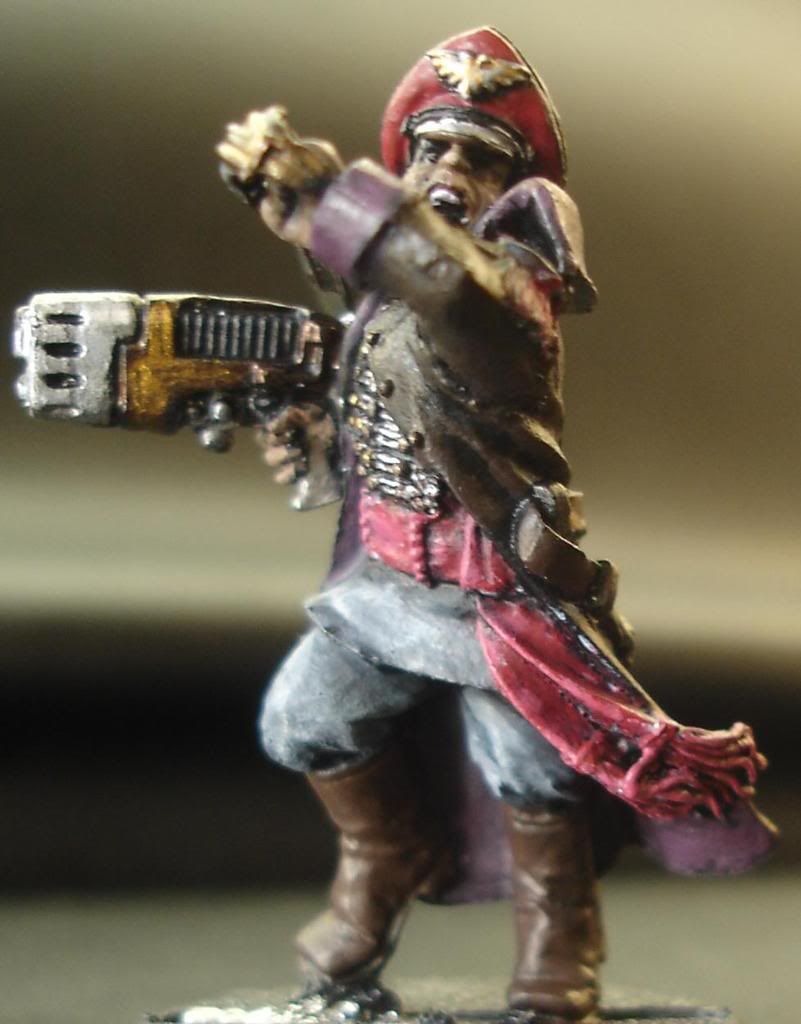
#1 Commissar
#5 Rough Riders
#6 Orgyrns are Greenstuffed (and they look great!)

Tau (arrived Dec 20th)

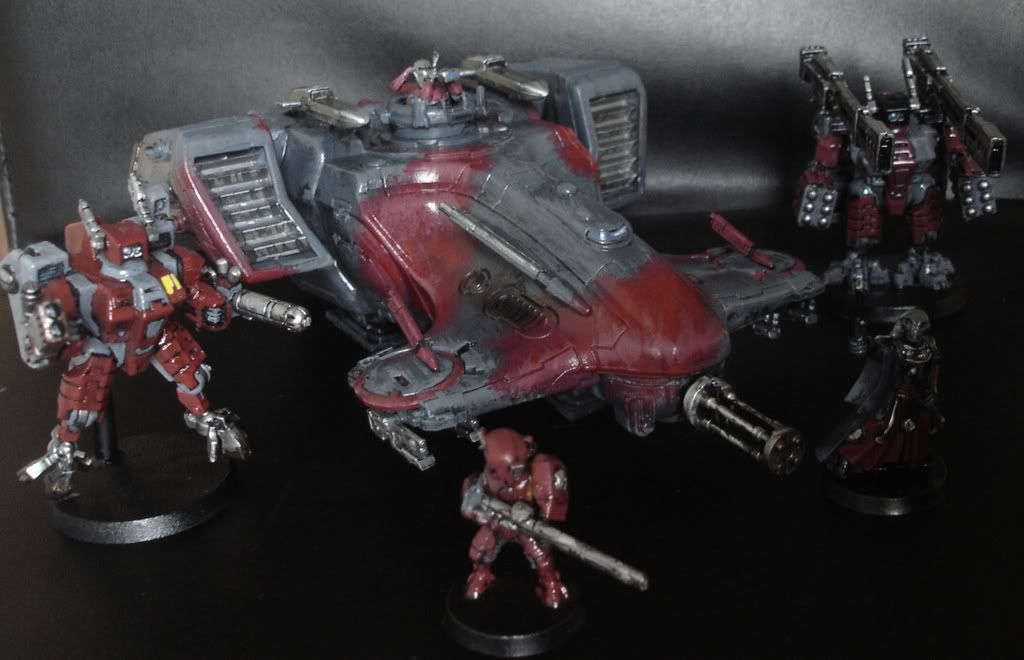
#1 Ethereal
#1 Crisis Suit Commander
#1 Crisis Suit
#1 Broadside
#1 Stealth Suit
#14 Fire Warriors
#4 Pathfinders
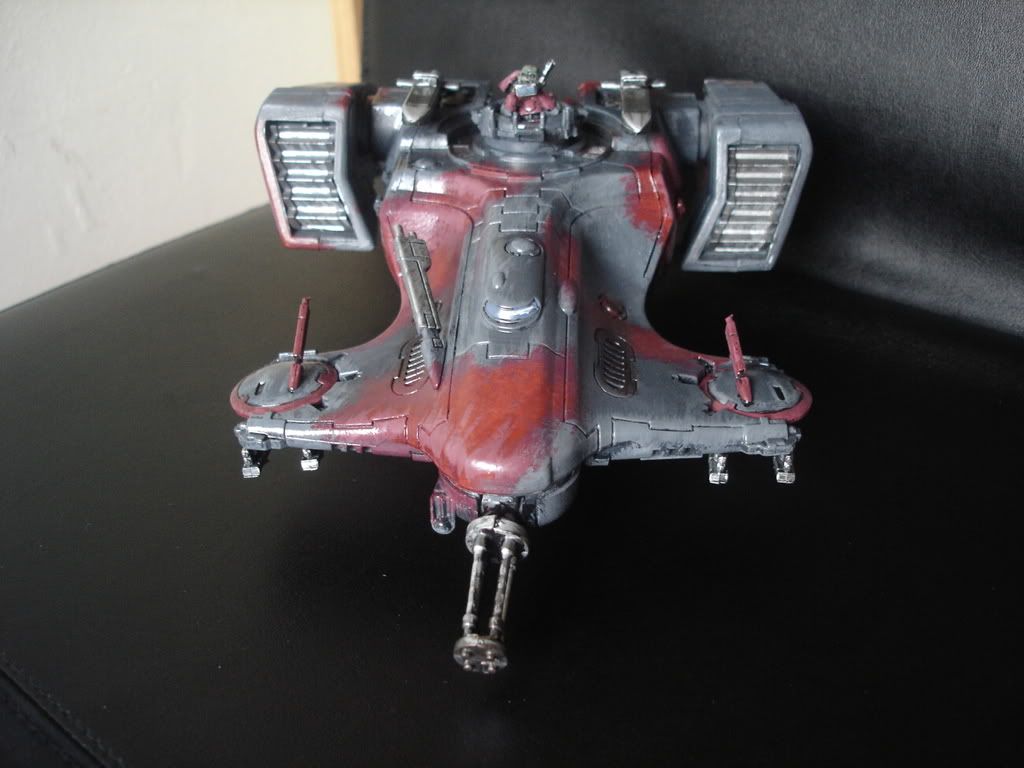
#1 Devilfish

Tyranids

#1 Broodlord
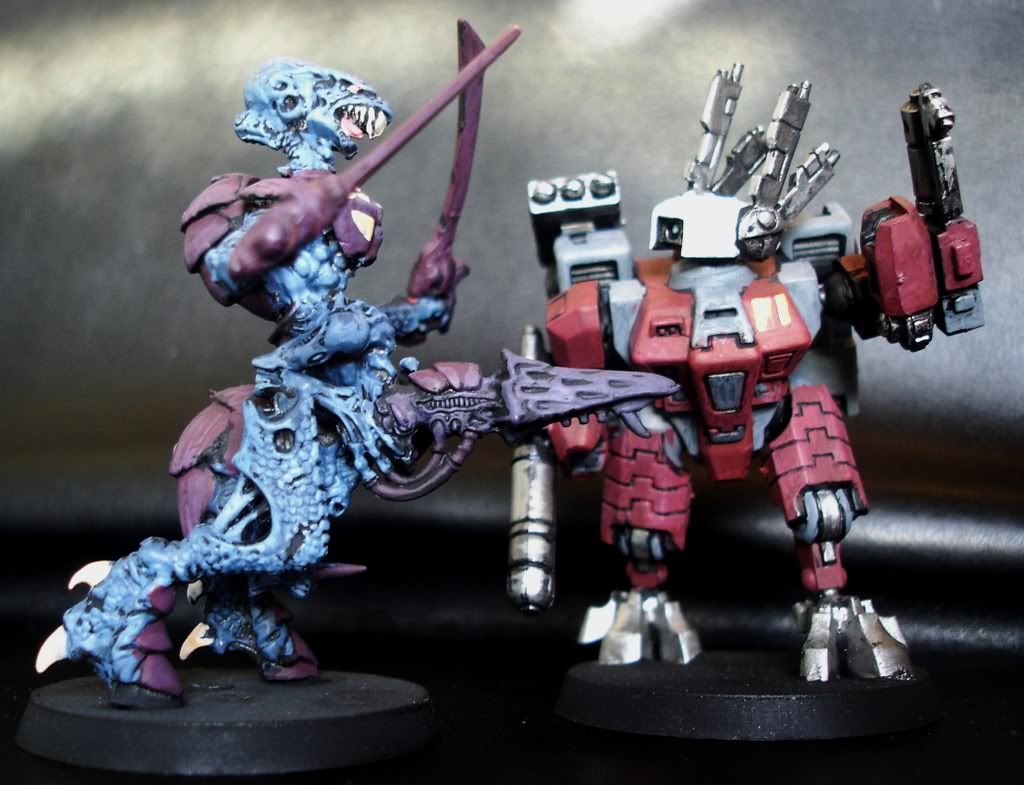
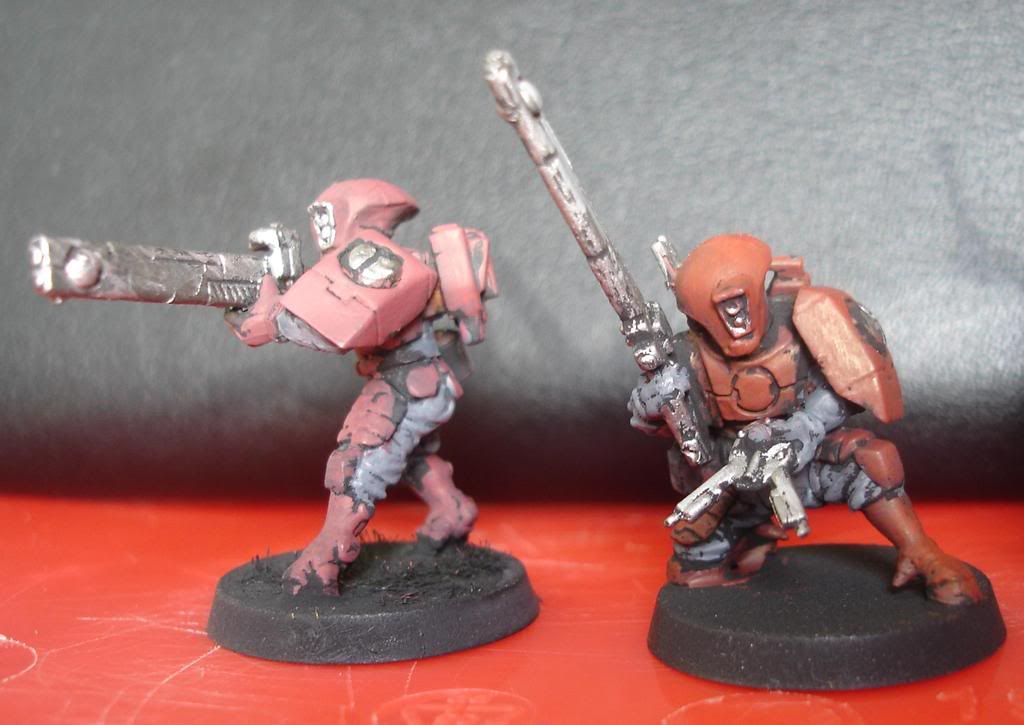
#1 Tyranid Warrior (see right)
#5 Genestealers
#4 Termagaunts
#1 Genestealer Magus

Left to do...

#40+ Guardsmen
#6 Termagaunts
#8 Hormagaunts
#3 Genestealers
#10 Fire Warriors
#5 Pathfinders (including 2 rail rifles)
#6 Orgyrns to Paint
#4 Roughriders
#1 Rough Rider Commissar
#6 Heavy Weapon Teams
#5 Stealth Suits
#1 Crisis Suit
#8 Tyranid Warriors

I've decided to arm some of my Tyranids with Spine Fists, while unusual this will fit in with the close combat orientated leaping warriors and enable me to effectively measure the leaping charge. Plus spinefists are peanuts and are rerollable to hit (very useful for BS2 Warriors). These guys will accompany either the Devourers warriors or the deathspitter warriors as leaping close assault specialists.

Warriors benefit from the 4+ cover save of the brood in front of them, so like the Broodlord, they help to fill the synapse gap between the horde and the bigger synapse creatures.

The Orgyrns look awesome, as soon as the greenstuff hardens I'm gonna get these guys painted. After playing with the greenstuff with these guys, I'm quite tempted to go after the Tyranid Warriors - maybe to extend their carapaces and make the old "turkey" models look a little more fearsome!

Thoughts on painting models

As you can tell from the list above, I enjoy skipping from one army to another when painting. I particularly enjoy mixing up painting clusters of smaller models with painting a larger model (crisis suit/tank/tyranid warrior) in the same night. I find that this mixes up the monotony of painting 30 guardsmen (I have a low threshold for manufacturing techniques and I take marginal pleasure from 'finishing' a squad!)

That said, what approach do you take to painting? And additionally, which army is the easiest to paint?

After painting several Tau and Tyranids, I ahve to say they are remarkably easy. After all the Tau have few skin areas to paint - meaning that you can churn them out pretty quick without eyes of mouths to mess with. The Crisis Suits are fiddly but fun to paint and the tanks are simple. With the Tyranids, their very 'alien' quality lends itself well to fast (ish) painting with a few highlights and details to catch the eye (The teeth and claws are the only thing their victims will be focusing on anyway!)

Both are far simpler than Guard. And the toughest unit to paint in Guard ... roughriders! As I know from my arty days, drawing the human form or a portrait is the hardest thing. It very hard to get the 'line' right. Also while it's hard to draw the line, spotting an incorrectly drawn one is almost instinctual on a basis human level. We humans are born and bred to spot the difference. Unfortunately the same seems to be the case for both human skins tones and horse flesh! Getting the horses the correct colour has taken me hours!

Saturday, 24 January 2009

850pts Tau versus Nids

By Suneokun

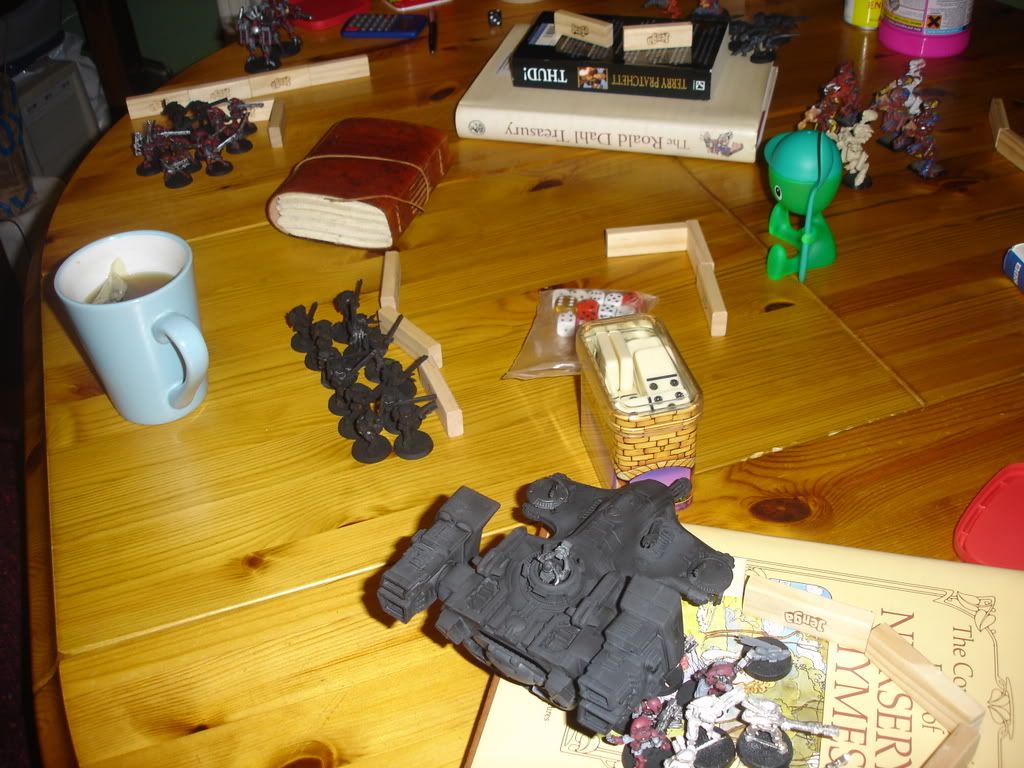
The two WIP armies go toe to toe on the dining room table. It's Tau firepower versus the scuttling nastiness of the 'nids! Feels very 'Alien' doesn't it - where's Ripley? (In Derbyshire, UK - Ed.)

This was a cracking fight which went right down to the wire with some fantastic twists. All Seven turns (yes Seven!) completed before midnight - come on!

Game: Capture and Control
Deployment: Pitched Battle

Due to the narrow board, we decided to exclude flanking - mainly because this would mean the broodlord would dominate the game.

Lists

Tau
  • Crisis Suit Shas'El: Plasma Rifle, Missile Pod and Flamer, Hard Wired Target Lock, Hard Wired Multi-tracker.
  • Bodyguard Shas'Vre: Fusion Blaster, Plasma Rifle, Multi-tracker.
  • Stealth Team [6] - with targeting arrays.
  • Fire Warriors [12]
  • Fire Warriors [12]
  • Pathfinder Team [8] with 6 carbine markerlights and 2 rail rifles, Devilfish
Tyranids
  • Broodlord with Flesh Hooks and Extended Carapace and implant attack.
  • 8 Genestealer Brood with Flesh Hooks and Extended Carapace.
  • Tyranid Warriors [3] with toxin sacs, devourers, enhanced senses and Scything Talons.
  • Tyranid Warriors [6] with Extended Carapace, rending claws, flesh hooks, deathspitters and leaping.
  • 10 Gaunts with Fleshborers, scuttlers and without numbers.
  • 8 Hormagaunts with flesh hooks and toxin sacs.
The plan was to throw the Hormagaunts and Gaunts at the Tau as a body shield and then mince them up with the Genestealers and Warriors. Meanwhile the 'resurrected' Gaunts could hobble to the objective for the win.
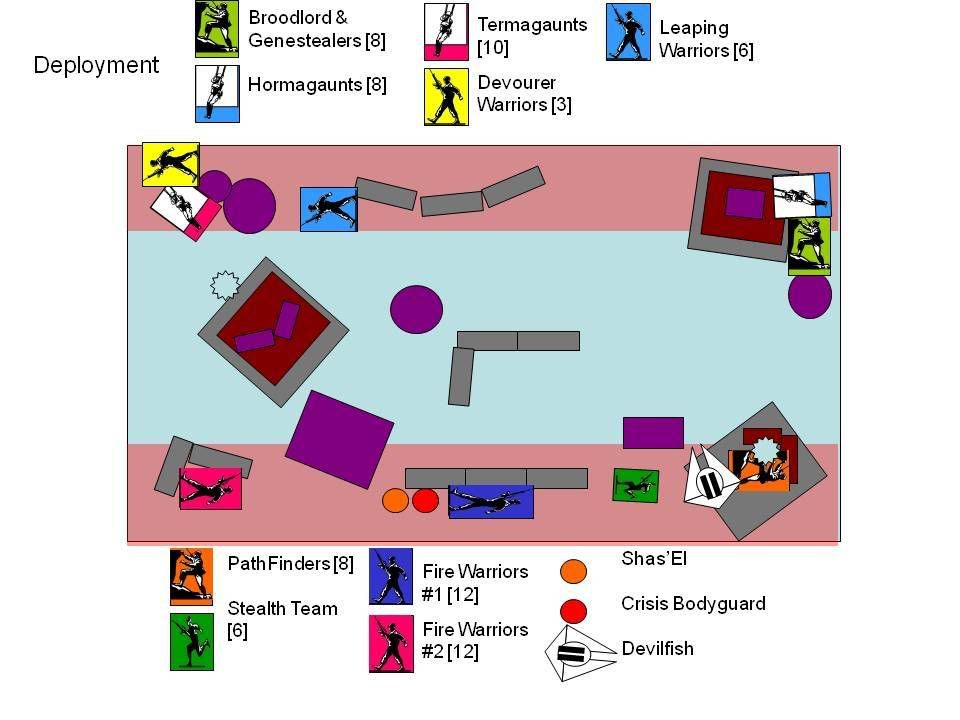
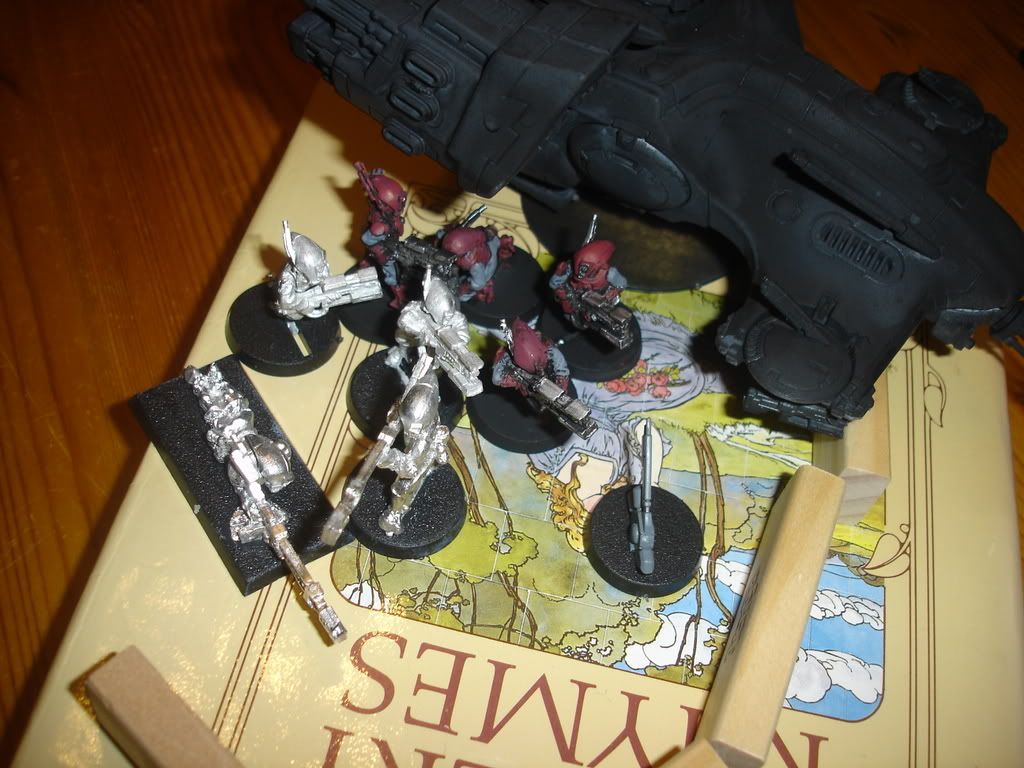
Deployment - The Tau formed up a strong gunline of the two fire warrior squads and the pathfinders. Between these less maneuverable squads the Stealth teams anti-swarm fire power would enable quick redeployment, while the plasma and missile pods of the command squad went to see off bigger beasts. The Devilfish set up in a supporting position to the Pathfinders, giving them a quick 'out' if required.
For the 'Nids, I had learnt from my previous mistakes against Dustin Tau and (confident of the first turn) deployed my Nids as close to the enemy as possible. I might catch the Pathfinders napping with my broodlord and hormagaunts. Unfortunately, my opponent saw this move coming and used their pathfinder scout move to inch out of potential charge range.

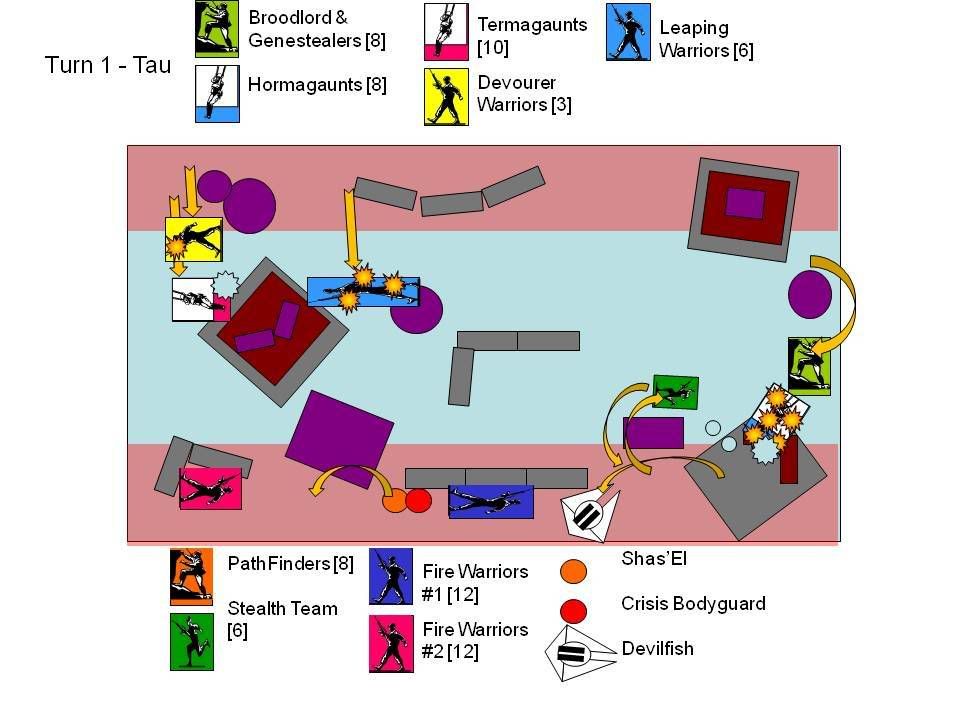
Turn 1: The Tyranids whole flank moves and runs or charges. Despite an impressive 12" leap, the hormagaunts miss the Tau by a few bare millimetres. The genestealers move up behind the leapers and hide behind the hill and lick their lips for the next turn. The Hormagaunts are left hanging, but I'm reasonably confident at least some will challenge for the next round. On my right flank, I run my Termagaunts carelessly forward and open fire with my Augmented Senses Warriors. The 12 devourer shots hit a total of six times, but the rerolls for it's 'living ammunition' cause 6 wounds, killing four Tau!!! I like this gun, like a shuriken catapult on bladestorm every turn! Unfortunately the pesky Fire Warriors pass their leadership test.
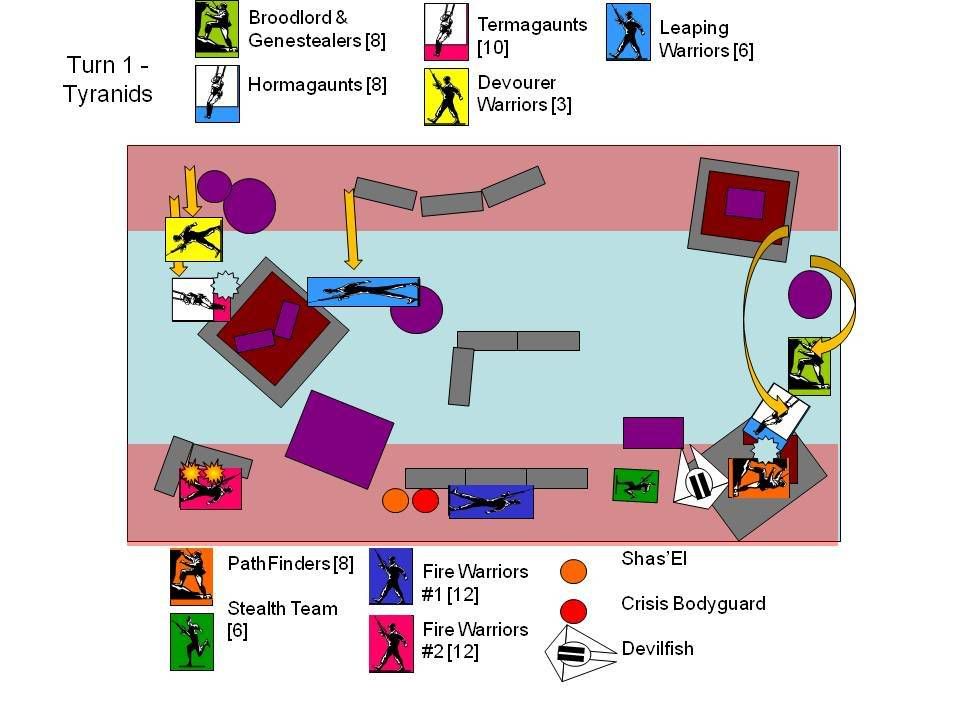
The Tau Respond in a typically fire power orientated fashion. Some crafty maneurvering on the right allows the pathfinders to jump inside their devilfish and move back, while the tank releases its gundrones as a pair of close combat sacrifices. The Stealth team jump forward, and between the gundrones, six stealthteam and the burst cannon on the devilfish - the hormagaunts are wiped out! Meanwhile the fire warriors in the centre and the command crisis team line up the tyranid warriors in the centre. Devastating fire power kills 3 warriors and wounds a fourth one. Three warriors struggle from the cover despite their carapace and cover. On the Tau left flank the other 8 fire warriors target the devourer warriors in an attempt to break up the fearless march of the termagaunts, whether their mettle was shaken by the devastating devourer fire we'll never know as they only managed to wound one tyranid.
Turn 2: The Genestealers surge up the hill and thoroughly slaughter the gundrones, despite their vulnerability, I commit them into the open, trusting to their 4+ extended carapace and the surprise I've planned for the middle. The three surviving Tyranid Warriors armed with deathspitter in the centre shake off their pretentions of ranged combat and commit a leaping charge into the middle of the Tau fire warrior ranks! Despite only one 6, they kill over 6 fire warriors for no reply, this shattering combat proves too much for the stalwart 'bluies' and they are massacred as they attempt to flee... woohahaha! Meanwhile the termagaunts on the left attempt the same trick, fleeting and charging towards the fire warriors. Unfortunately they only manage 3" in running - so their charge is brought short mere millimetres from the worried looking fire warriors. The Devourers splutter their firepower again and manage a further couple of kills.
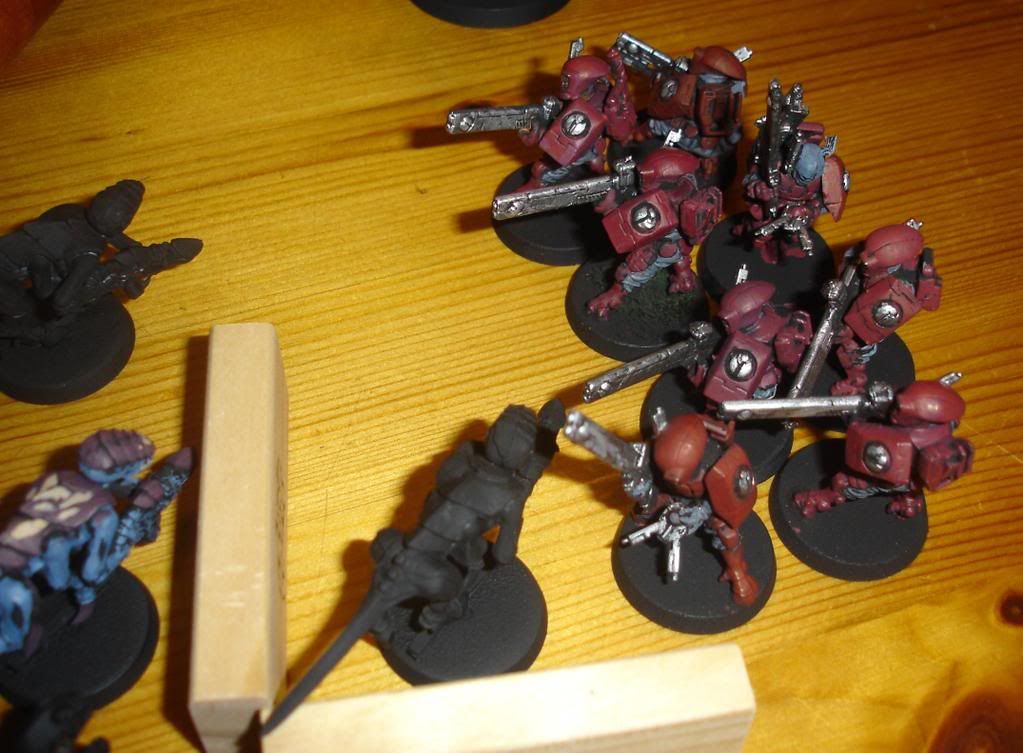
The Tau are up against it with their backs against the walls. Permeated by light troops to the left flank, they are skidding back from the broodlord's retinue on the right and with wickedly lethal Tyranid Leapers in the middle. The Tau Devilfish executes a dazzling maneuveur, jumping over the feasting Tyranids in the middle and forming a fragile fire wall on the left flank with the tank foremost and the pathfinders disgorged behind it (next to the command squad) in a bizarre 'fish of fury' move. The combined firepower of the tank and pathfinders fails to down the warriors (thanks to their extended carapace), and it requires all their shots to down them. Meanwhile the stealth team is carefully retreating across the board firing fussilade after fussilade into the Genestealers. I suddenly realise that thanks to their move-fire-move jetpack ability, my chance of catching them is slim to nil... This ponder occurs to me as a further two genstealers are downed (thanks carapace!)
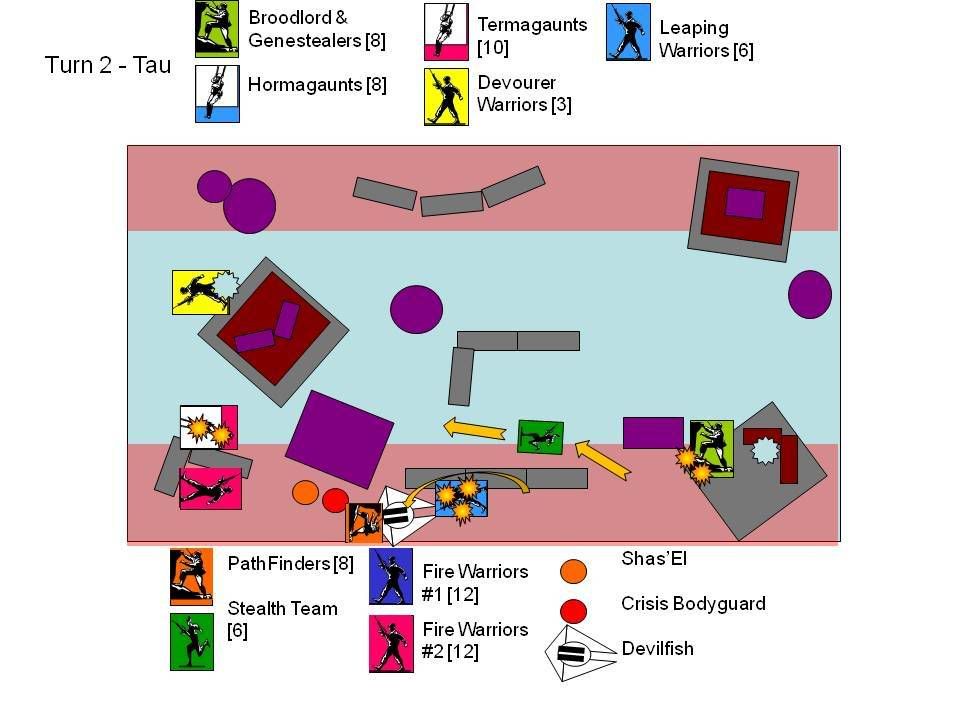
On the left flank the fire warriors decide not to charge and fire on the gaunts at point blank range - killing only four despite no cover save. The Tyranid Warriors behind enforce their steely Hivemind grip and the slavering Gaunts hold. Pretty decisive shooting, but was it enough.

Turn 3 - Trusting to the fact that the Gaunt's lack of survival was part of the plan, I hastened my devourer warriors into a pincer maneurver. Charging across the hill (thanks move through cover) the Warriors opened fire with their devourers. A stunning set of shooting forced 8 saving throws and 3 stealth warriors fell. I was further impressed as the Tyranid Warriors piled into combat. With scything talons and 4 attacks each they killed every last stealth team.
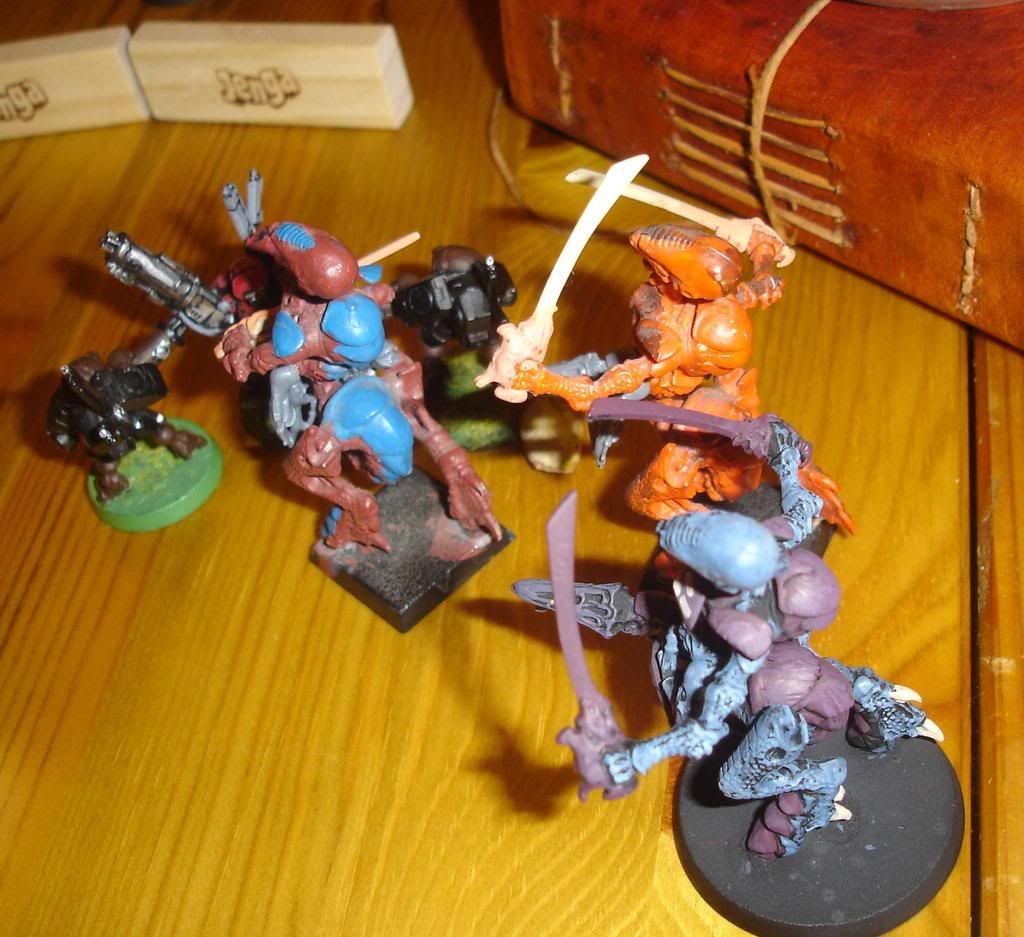
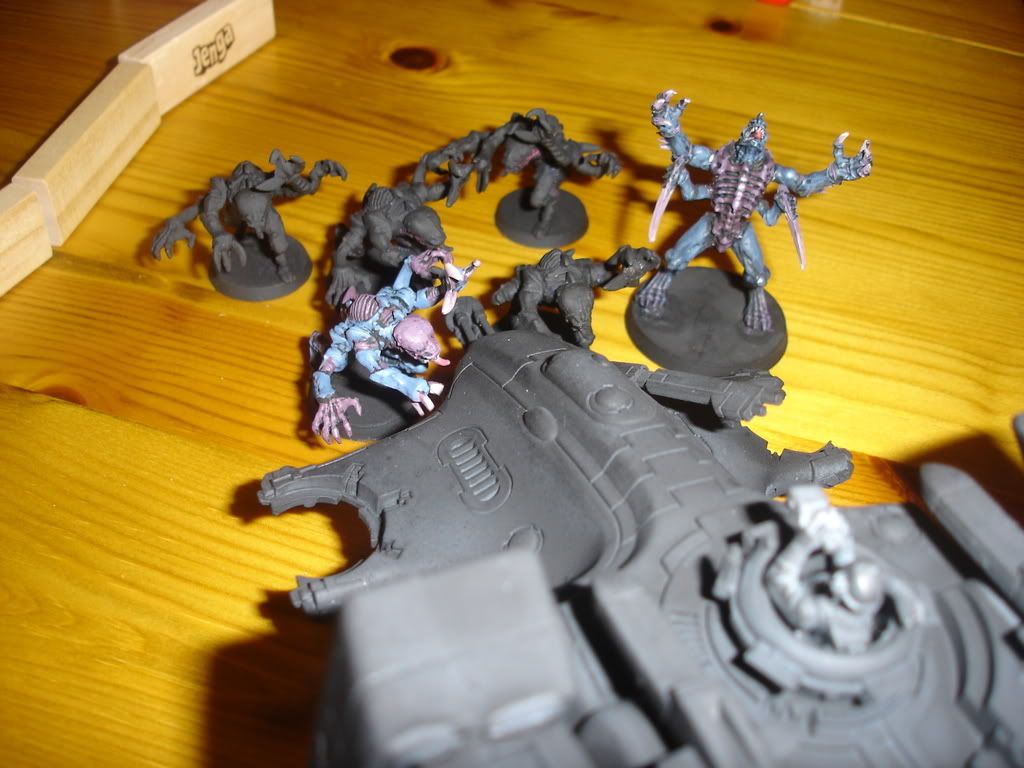
On the left, the gaunts fired on the fire warriors and then charged - causing a total of 4 wounds before the Tau could retaliate. The remaining 2 Tau buckled under pressure and routed, leaving the left flank in my hands. Meanwhile the Genestealers were left clear to pound across to the Devilfish which, thanks to it's size, was just in charge range. Then the gods of 'luck and roll' played a hand, despite a total of 5 s5 rending attacks and 15 s4 rending attacks, my genestealers needed a 6 to hit (as the vehicle had move over 6"), managing only one, I needed a 6 for rending. 20 hits resulted in no kills.
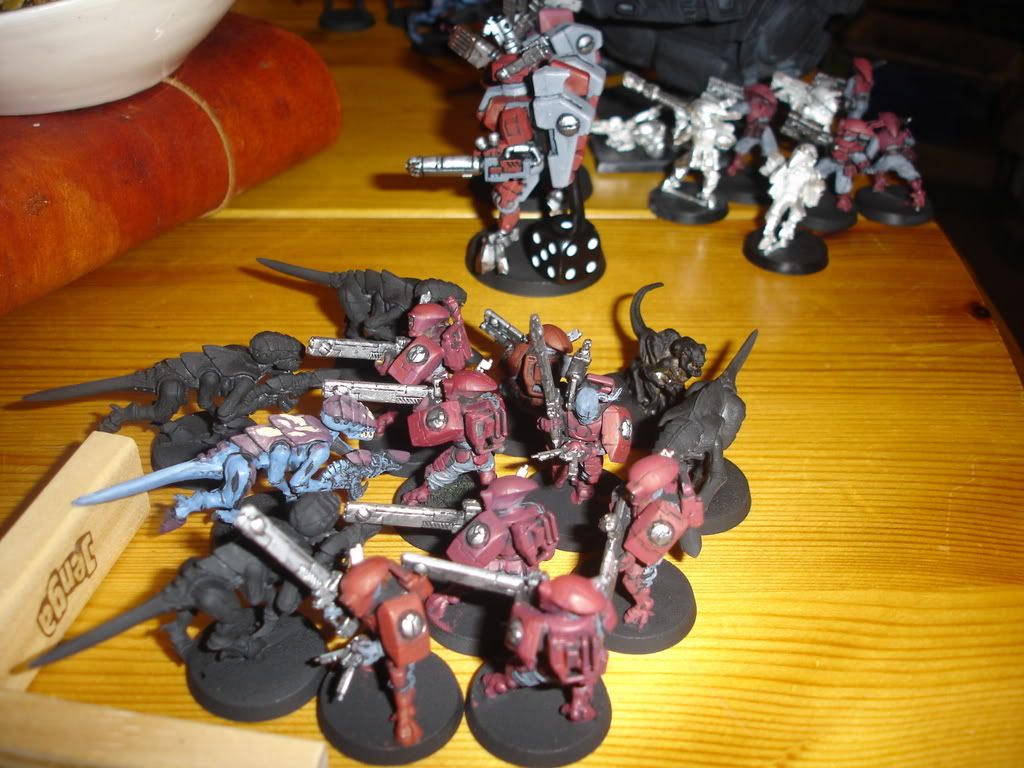
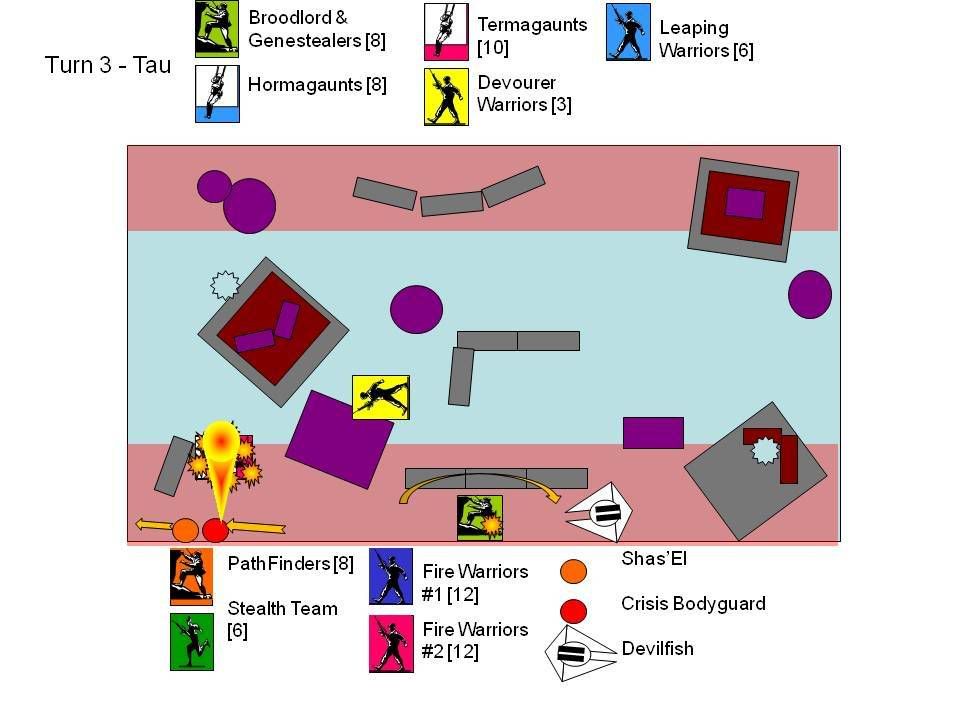
The Tau responded with efficiency. The pathfinders jumped back in their devilfish and taking discretion over valour soared over the Stealers head and moved 12" across the board. The crisis suits meanwhile broke left and made quick work of the Gaunts with flamer and plasma. (Right into my little trap - hehehe!) The Tau were on the ropes, with a HQ option cornered and a pathfinder team on the run ... it was only a matter of time. They couldn't win through claiming - only draw. And then...
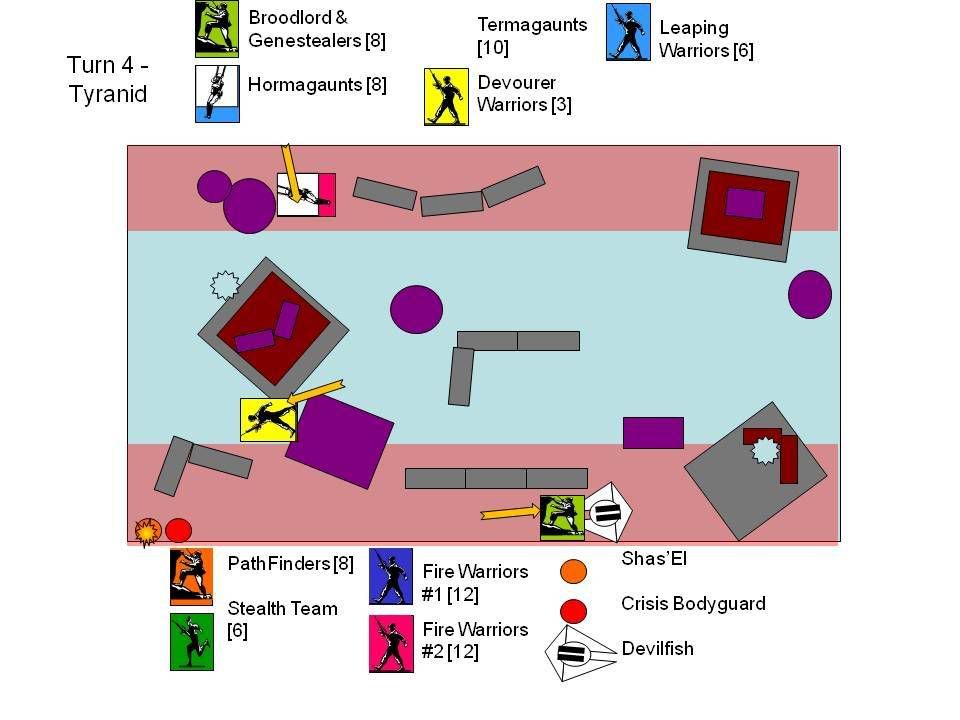
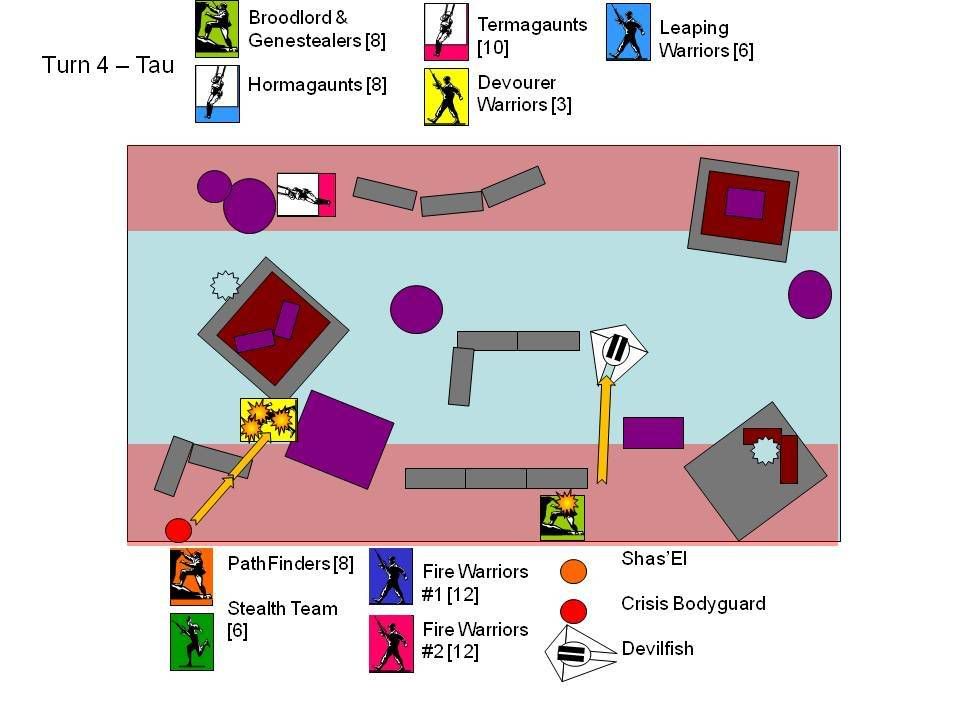
Turn 4: The Gaunts trotted back on the board and made posthaste (with a ld test of<5). style="margin: 0px auto 10px; display: block; text-align: center; cursor: pointer; width: 213px; height: 159px;" src="http://i302.photobucket.com/albums/nn107/suneokun/DSC02938.jpg" alt="" border="0">Get ready to fire!

It was do or die for the Shas'El. Locking and loading he fired his flamer and missile pod and stormed into close combat. Despite his lack of weapon flamer he flamed the wounded Warrior to death and managed to kill another, sustaining only a wound in return. The Tyranid Warrior and the Shas'El remained locked in combat. The devilfish moved a further 12" and opened fire on the genstealers, killing the final brood bodyguard. The Broodlord grimaced and prepared for a final charge.
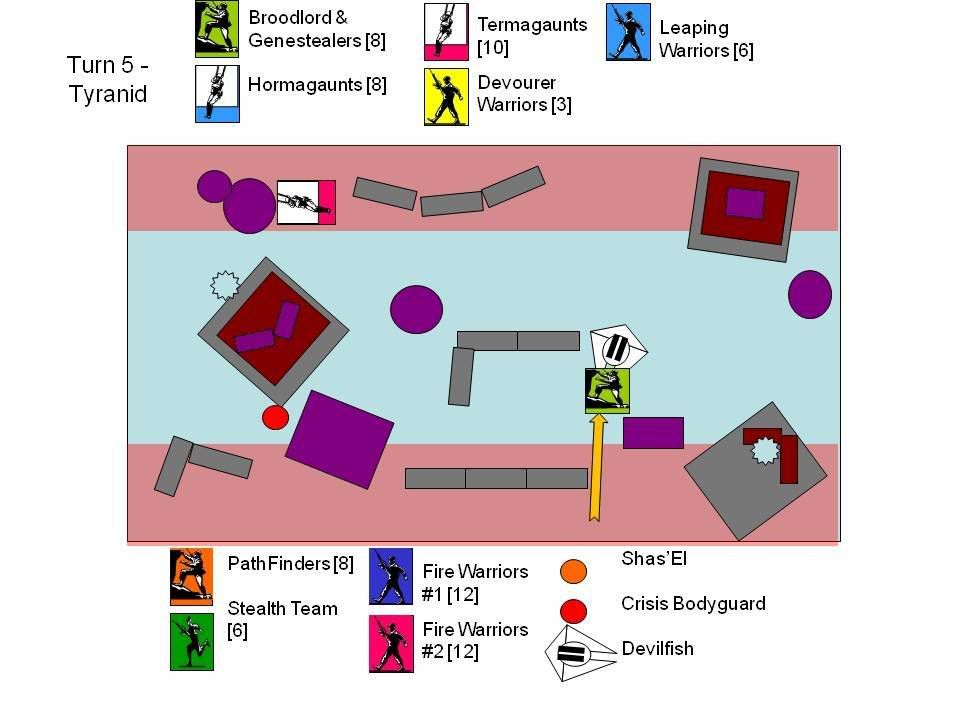
Turn 5: The Gaunts failed their leadership and skulked - cursable numbskulls. Meanwhile the Broodlord charged the devilfish again - but failed to score a hit! The combat between the Tyranid Warrior and the Shas'El thundered across the board, here was the hopes and dreams of the greater good facing up to the hivemind. With a roar the sything blades of the tyranid struck at the Tau crisis armour - in return the Crisis Shas'El reconfigured his power supply. Grasping the Alien about the neck with his armoured gauntlet he slammed the bulky plasma rifle repeated into the things armoured skull. Eventually reinforced chitin crunched under the superior strength of the XV8 suit. The scrabbling claws flailed senselessly at his visual display corum as his twisted the creature neck with a grunt. Flinging the gaping, tyrannic maw away from him the Shas'El glanced down at the shaking and shivering creature. "Now that's what I call the grated good!" he grimaced and burst across the battlefield in a blast of superheated air.
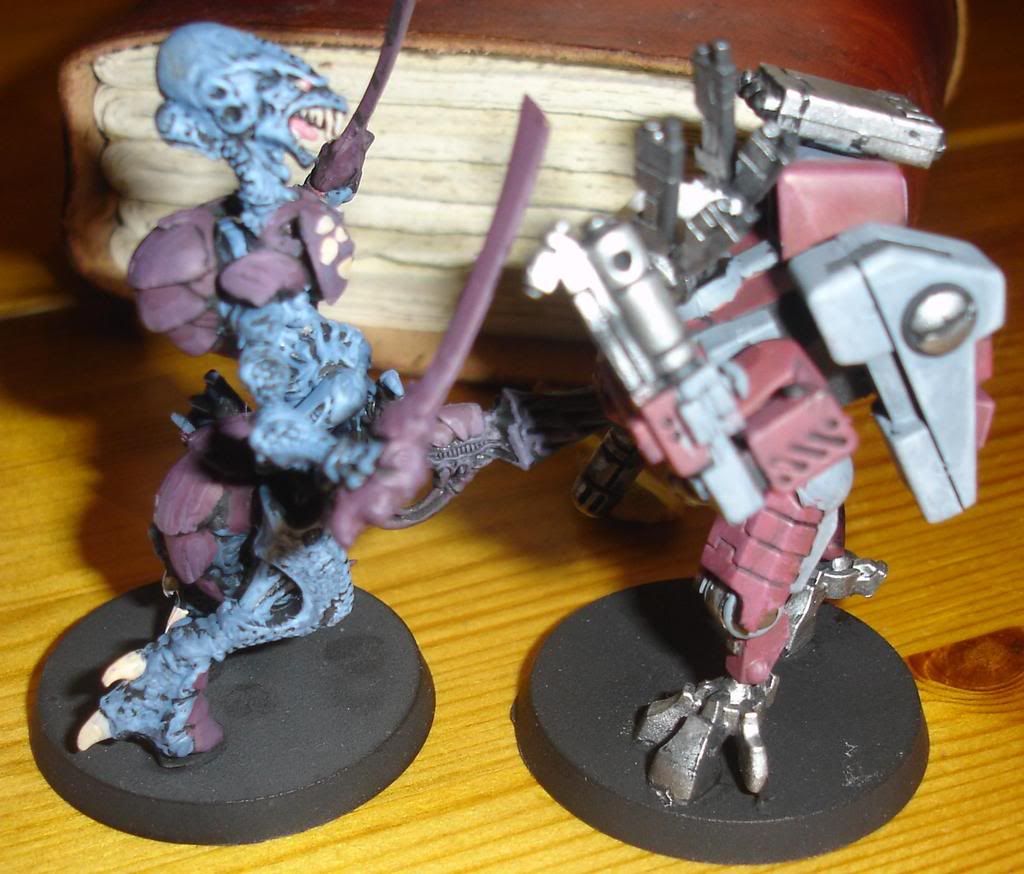
The Devilfish redeployed one last time and deposited the Pathfinders, the Shas'El leapt to the hill and took a passing shot at the Broodlord (failing to hit) and moving on towards the Tyranid objective. The pathfinders and devilfish fire on the Broodlord and bring him down to one wound.

We roll a dice, a 3 - play on!

Turn 6: Tyranid options are bleak, I pass my gaunt skulking test and raced towards the objective. After careful thought I decide to try to kill the Crisis Suit. Unfortunately I decide to just shoot the Crisis Suit instead of charging - not sure why now (tired I guess), they fail to kill. Additionally, the broodlord fails to kill the devilfish.

In return the Crisis Suit Charges the Gaunts, killing them with flame (again), missile pod (again) and a big fist. The pathfinders stay put and contrary to every other turn, fire their well guarded rail rifles at the broodlord. The two S6 AP3 hits hit, and kill him twice over. The rest of the squad shoot up the gaunts.
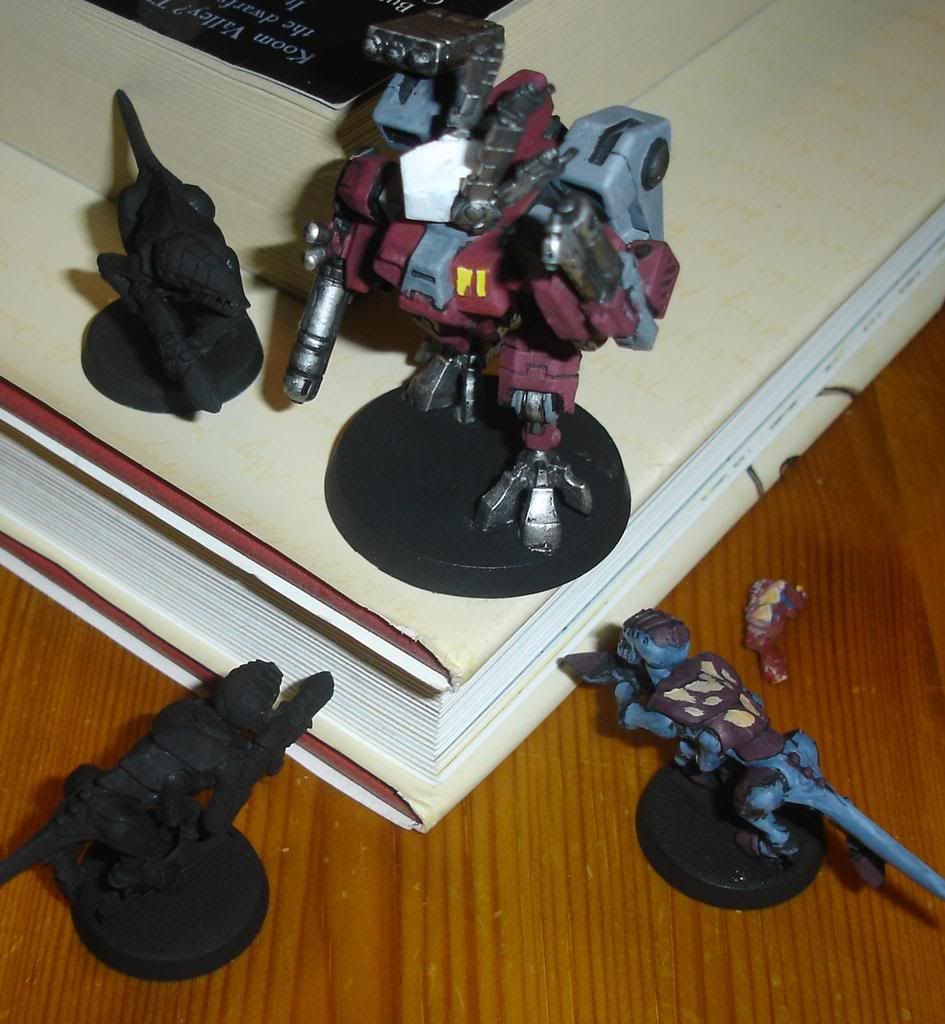
At the End of turn six only 3 gaunts remain, but on the objective (see small tyranid claw)!?! We roll a six, turn 7!!

Turn 7: need I say that the poor gaunts died badly and that annililation was achieved. With a well wounded Shas'El, a squad of cowardly pathfinders and a very well scratched tank - it was a worthy victory!

Conclusion: What a battle! It had everything! I was particularly pleased with my leaping Tyranids and my enhanced senses devourers. At 12 shots a turn, they pumped impressive firepower into the tau and albeit with the help of some unlucky saving throws - forced the odds and killed 6 firewarriors, 6 stealthsuits and a crisis bodyguard - and almost killed the commander too!! I'm seriously considering dropping deathspitters from the arsenal and stocking up with more devourers. Alternatively, I'm thinking that more broods and a significant squad of rending claw and scthying talon leaping warriors is the way to go. With 4 rending attacks on the 18" charge, they can follow in behind the hormagaunt to mop up. The loss of the hormagaunts was a pain, also the broodlord proved useless. His lack of a fleet option leaves him very vulnerable to the 'move and fire' tau devilfish tactics.

My next purchase will be the Tyranid Battle Force as I need more critters to fling at the enemy, additionally a second - 'fleeting' - genestealer swarm would give me real punch. The warriors were impressive though and extended carapace proved very effective (considering I had so few models) reducing losses for both the genestealer and warriors and ensuring I could fight on!

The tau were great, I'll continue to paint them up, the next purchase for them is some Kroot and Kroot Hounds. I've only got to finish painting over 100 models before I can buy them!!?
Thursday, 22 January 2009

2000 pt Guard versus Tau

By suneokun.

Right, I won't bore you with a huge amount of detail as the match was heavily against me. For starters, we rolled Annililation and Dawn of War - so deployment was weird. I deployed a serious list of Tau bashing glory... in relatively poor positions, ooops!

That said, my guard fought hard and importantly, would probably have made it to combat if not for the game ending.

Kochi VI Assault Force: Tried to go for firepower AND close combat crunch - note to self, don't bother doing both...

HQ
  • Command Squad: Heroic Leader, power sword 3 vets with close combat weapons and a meltagun and Nork Deddog in a HB/ML Chimera with smoke, all with Carapace.
  • Commissar Yarrick and 5 orgyrns in a Heavvy Flamer and Multilaser (with heavy stubber and smoke) Chimera.
  • 2 Missile Squads of 6
  • 1 Armageddon Style Sentinel
Elites
  • Kochi Vet Sappers [6], 2 plasma and melta, 3 shotguns, power sword and storm bolter.
  • Orgyrns with Chimera (with Yarrick)
  • Techpriest Engineseer with 2 combat Servitors and 2 technical servitors
Troops
  • Command Squad with plasma gun, missile launcher, medic and power weapon.
  • Squad Alpha, Missile Launcher and Plasma.
  • Squad Beta, Missile Launcher and Melta.
  • Conscript Platoon [20] with two flamers.
Fast Attack
  • Hellhound with Smoke and Heavy stubber
  • Sentinel with Lascannon
  • Rough Riders with lances, sergeant with powersword, carapace, frag grenade.
Heavy Support
  • Leman Russ Battle Tank (Lascannon, Heavy Stubber, smoke)
  • Leman Russ Battle Tank (Heavy Bolter, Heavy Stubber, smoke)
Tau Force

Shas'El and Shas'O
2 Crisis Suit Teams [3] (mostly toting plasma and twin linked Missile Pods)
Stealth Team (3) with Gun Drones (6)
3 Squads of 10 fire warriors
2 Groups of 12-15 Kroot with Hounds.
Devilfish and 8 Pathfinders (one with a rail rifle)
2 Hammerheads (Ion Cannon and Railgun)
2 Broadsides.
1 Piranha

Battle Report

Dustin wins first turn and sets up his two fire warrior teams in cover, one supported by a crisis Shas'El. I set up opposite with all the anti tank weapons in cover. The conscripts behind the missile launcher teams in the center and the command team to the left, sheltering behind a building. The command Squad Chimera rolls on the left flank and goes at top speed.

Synopsis of the game: Dustin manages to manage his fire lines well and pounds my missile launchers into submission. The Missile launchers in return aren't good enough to destroy any of his vehicles and are torn between hitting the tank and trying to destroy the troops in his buildings. The Leman Russes arrive on the left flank and manage to destroy 5 kroot and 2 crisis suits in one shot! The missile launcher manage to kill one team of fire warriors and stun the hammerhead before being wiped out. The conscripts are a ridiculous meat shield that Dustin ignores. Unfortunately Yarrick and the Orgyrns and the Command Squad never make it to combat because the game is cut short. The Rough Riders are wiped out despite their carapace - bloody pulse rifles. The leman Russes are good but the lascannon russ fails to kill a ion hammerhead. Both the flanking sentinels miss their lascannon shots (It's a bloody tank! How can you miss a tank!) and die badly... The flanking Vets blast a gundrone and then charge into close combat with the Stealth team - only to get beaten up - the only close combat of the game and I'm beaten - groan... The two squads get tangled up in pinning shots from gundrones (which are a real pain)... and by the time my hellhound arrives, all it can do it shoot the blaster off the piranha...

The game wasn't finished, but considering he still had 20 odd Kroot to draw on, I was unlikely to win - but we never found out as we had to stop a turn from 'first contact!

Final score - 7:2 to the Tau.

What I learnt from the game is this.
  • Either go for close combat totally, or go for firepower totally.
  • Carapace armour is a waste of points.
  • Keep heavy weapons at least 30" away from Tau.
  • Bring more firepower. I need to buy a demolisher or a Basalisk - advice please!?!
  • Lascannons and Mortars - Missile Launchers might be versatile but what I needed was 7 mortars and a set of lascannons to mix it up. The S9 is essential for killing tanks. Mortars are ideal as they pin, and the tau were getting a 4+ save whether I went for AP4 or AP3 or not.
  • Ratling Snipers with a rending/pinning weapon and +1 cover save, these guys could have nullified and slaughtered the tau. 36" range helps too!
  • And Finally - Cameoline, that 3+ save would have been great and would have also forced the pathfinders to waste ALL their markerlight shots nullifying.
Example List

Doctrines: Camo, Sharpshooters, Ratlings, Techpriest
  • HQ - Mortar, powersword, meltagun.
  • HQ - Deathwatch Kill team
  • 2 x Missile Launcher teams (camo and sharp shooters)
  • 2 x Mortar teams
  • Elites - Ratling Snipers
  • Elites - Veterans [10] with 3 plasma and missile launcher (infiltrate, (camo and sharp shooters)
  • Elites - Techpriest Engineseer (with 2 combat and 2 technical servitors)
  • Troops - Command with Missile Launcher (camo and sharp shooters)
  • Squad 1 - Missile Launcher (camo and sharp shooters)
  • Squad 2 - Missile Launcher (camo and sharp shooters)
  • Squad 3 - Missile Launcher (camo and sharp shooters)
  • Remnant Squad - Flamer
  • Conscripts [20] - 2 flamers
  • Hellhound
  • 3 x Sentinels (bring on at back - behind cover/tank)
  • 2 Leman Russ Battle Tanks
  • 1 Basalisk
So in final conculsion, I enjoyed the match up. We should have made the battle smaller (my fault - I wanted to bring everything!) and then maybe we would have got somewhere. I learnt a lot from this game, Dustin is an efficient player and likes to chip away at an enemy. This battle has proven to me what fun (and how effective) the Tau force is to play, both fast, nimble and with incredible firepower.

It's also demonstrated to me just how out of touch the Imperial Guard codex is ... too many ways to lose currently. Oh well, roll on April.