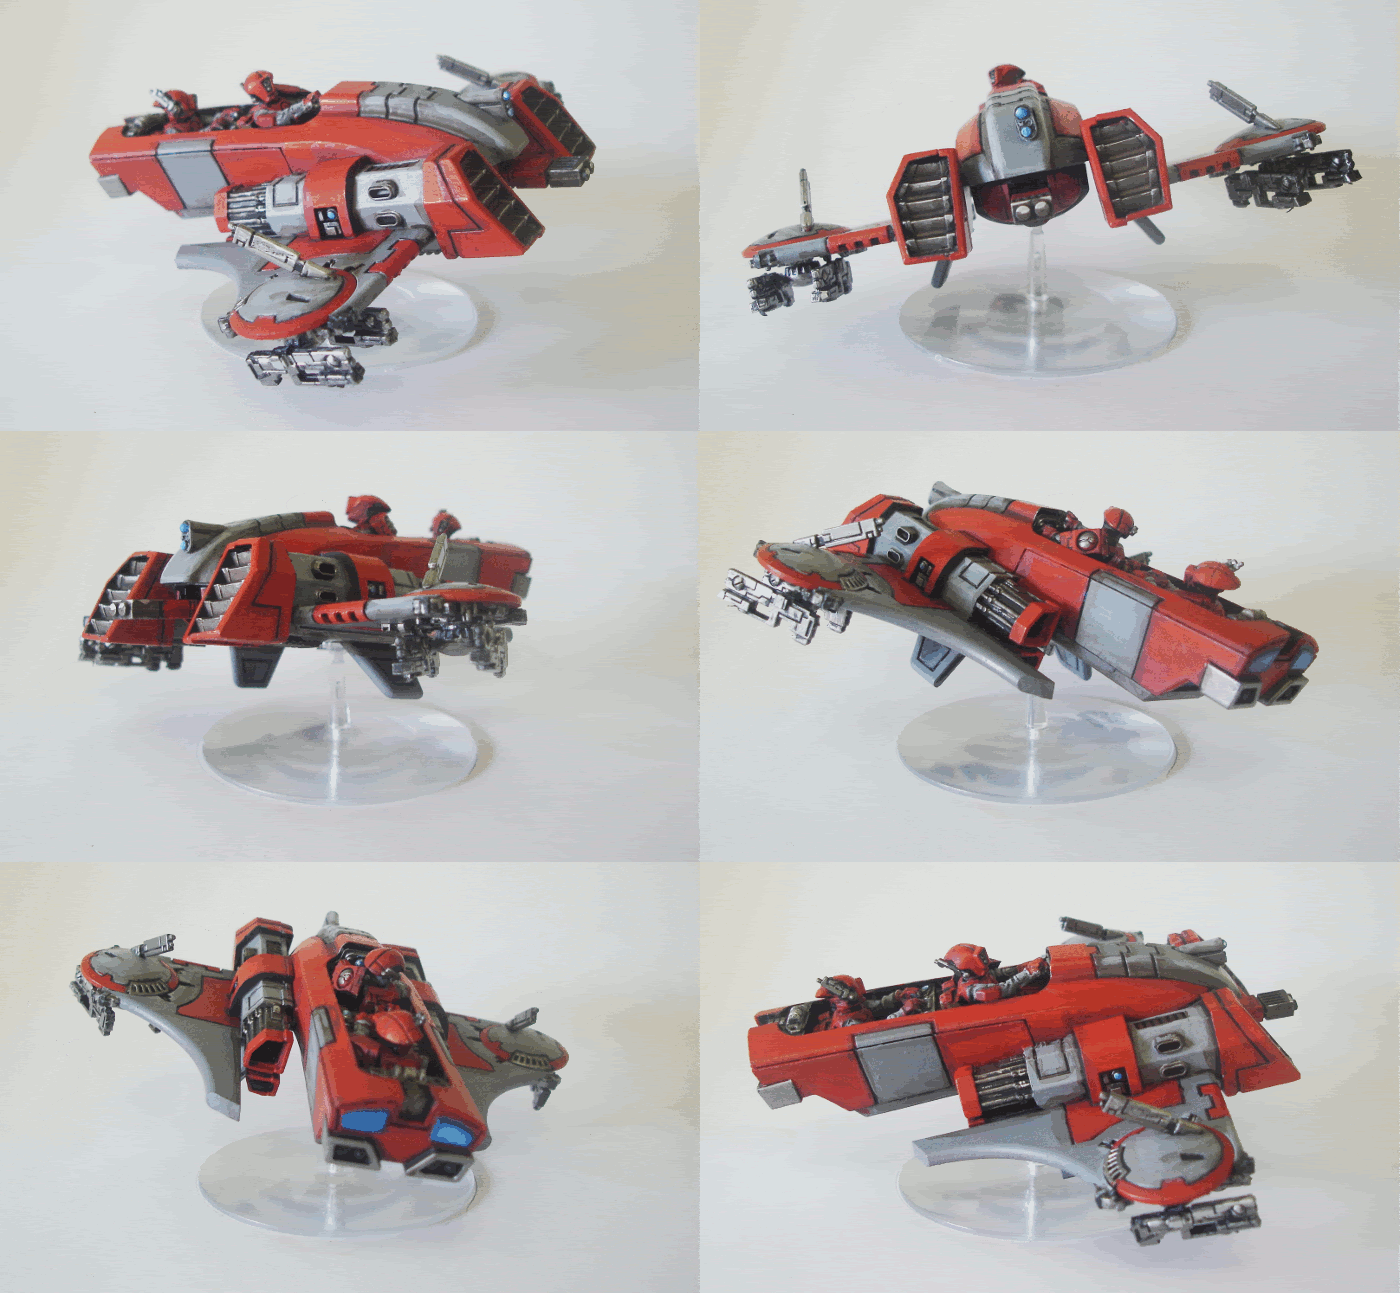
I have to admit that I had kind of 'lost the love' for the Tau back there for a while. The combination of the 'shiny new' Imperial Guard and Tyranid codici had grabbed my attention. I was pulled away from the Tau'Va and the Greater Good.
Damn it ... I was gonna dig out those Tau and give some Genestealers a damn good drubbing!!
The Joetsu Sept arrived at the planet of Kor'Vak to find a world in desolation. The planet had been bled to breaking point my Hive Splinter Orubus ... but something else was treading in these waters. The dried up husks of Hive ships and shells scattered about the planets orbit attested to a great contest. The recon cadre met no resistance ... there was little left. As the Shas'El made to order the Manta in for a retrieval, the sky blossomed with swirling clouds ... like ink it spread across the sky ... tinged green, it turned quickly violet and suddenly, inexplicably black.
The world was benighted. As the cadre fanned out in preparation, strange howls split the inky darkness. Were they humans, their weak souls would have been ripped asunder by the simulcra of power now holding the planet in sway. While the Tau could sense the abnormal night and their devices could map the titanic damage to the planet... they were yet untested.
That was about to change.
A week before the game I posted my army list for this conflict. Effectively designing a Tau force optimised for speed and durability and the ability to drop a lot of firepower very very hard indeed.
The army was all about regurgitating what the Tau do best. I would adapt 'fish of fury' into a durable anti assault screen for shooting my fire warriors past, I would exploit the assault moves of the Battlesuits to whittle the enemy down.
I would deploy the Kroot in a defensible position, confident that the Tyranids wouldn't have access to frag grenades. I would go back to what the Tau'Va do best ... pure and simple high strength firepower. And I would use pathfinder markerlights and Tank shocking to save the day... The list is as follows:
- HQ: Shas'El, Air Fragmentation Projector, Flamer and Missile Pod, Stimulant Injector [136]
- Elite: Crisis Team #1 [2]: Burst Cannon, Plasma Rifle, Multitracker, team leader, 2 gundrones [141]
- Elite: Crisis Team #2 [2]: Flamer, Missile Pod, Multitracker, team leader, 2 gundrones [117]
- Elite: Stealth Team [5]: with 3 gundrones [180]
- Troops: Fire Warriors [9] in Devilfish (Multitracker, Disruption Pod, Fletchette Discharger, Sensor Spines [205]
- Troops: Fire Warriors [9] in Devilfish (Multitracker, Disruption Pod, Fletchette Discharger, Sensor Spines [205]
- Troops: Fire Warriors [9] [90]
- Troops: Kroot [12] with 2 Kroot Hounds [96]
- Fast Attack: Pathfinders [8] with Shas'Ui and Warfish (Smart Missile System, Fletchette Discharger, Multitracker, Sensor Spines, Targetting Array) [246]
- Fast Attack: Piranha [1] with Targetting Array, Fusion Blaster, Disruption Pod and Fletchette Discharger [85]
- Heavy Support: Broadsides [2] Targetting Arrays [160]
- Heavy Support: Hammerhead (Railgun, Disruption Pod, Fletchette Discharger, Multitracker and Target Lock and Smart Missile System) [190]
The gauntlet was thrown down to Anton of the
Anarchy, and in true 'anarchy' fashion he decided to go for his 'tried and tested' Chaos Daemons rather than tempt fate with an untested Tyranid list. So the Tau were in for an upset ... and a rather tasty list!
- HQ: Great Unclean One
- HQ: The Masque
- HQ: Herald of Khrone on a Juggernaut
- Elites: 2 Fiends of Slaanesh
- Troops: 10 Bloodletters
- Troops: 20 Deamonettes
- Troops: 15 Plaguebearers plus icon
- Troops: 15 Plaguebearers plus icon
- Troops: 10 Pink Horrors with a Changeling
- Fast Attack: 8 Flesh Hounds including Karanack
- Heavy Support: Soulgrinder with Phlegm and Mawcannon
- Heavy Support: Deamon Prince with Ironhide, Mark of Nurgle and Boon of Mutation
Ant hadn't lost a game so far with his Deamons (3 in a row) and was looking forward to eating the Tau'va ... his confidence well placed. Ant is the master of 'carrying the day' and his Deamons had made a meal of both Space Marines and Guardsmen - what were some WS2 Tau gonna do?
Battle Missions
As in the previous game, we opted for battle missions. After a random roll-off (that Ant won) ... we establish 'Night Fight' as the battle.
Night Fight is different in two key ways. Firstly the 'night fight' rules used in turn 1 of a dawn of war battle apply throughout the night fight. Secondly the deployment of the defending Tau and the deepstriking Daemons is randomised. The board is divided by a diagonal cross, and all models must be deployed within those diagonal segements. 1-4 gives you a segment, with 5 or 6 giving you free choice.
The tau were denied any reserves ... while the Deamons would enter via their special rules... gulp.
Objectives
We placed 3 objectives ... one smack in the centre and one of to each side. Placing the objectives was a little random ... as neither of us had either 'a side' or any concept of what would end up where.
Deployment
 "Bunch up boys!" Said the Shas'El "Ethan the Ethereal wants a 'group shot'!"
The rolls were all 1-4, with only one unit gaining a 5-6 result! Thus my only way of holding the centre was to bottle myself up. Feeling a bit exposed, I tried to keep all my units pretty close to the centre. This also meant that I was fanned out over plenty of ground ... meaning that the Daemons couldn't come too close. I kept all the firewarriors close to their transports too and placed the Stealth team and Crisis Suits in good fire support positions. The only units 'out on their own' were the pathfinders AND the broadsides...
 Devilfish back to back to avoid the first turn firepower and Crisis Suits on high alert ... it's like 4th edition all over again!
Turn 1 - Deamon Entry
 The Deamons arrive ... and the Tau run away!
The Soulgrinder, Plaguefather, two plaguebearer units, Khrone on Juggernaut, Deamon Prince and Fleshhounds all arrived. First up, the Deamon Prince deepstruck into one of my units and gets delayed. Next a Plaguebearer unit gets destroyed in a warp mishap (that doesn't really make any sense) after scattering on to my crisis suits.
The other units made it down securely. The other plaguebearers and Juggernaut hiding behind a small building while the Soulgrinder popped up right next to the pathfinders. The Plaguefather and Hounds deep struck a long way back ... but those hounds worried me with their 6+D6+12" charge!
Tau: Sticking to my plan ... the Tau'va boarded their transports and got with the relocating. The Crisis suits moved within 18" of the Flesh hounds and opened up with everything they had. The Shas'El missed dramatically with his AFP ... but the Missile Pods and plasma rifle fire dropped a few Hounds ... and two hounds died by Gundrone fire.
Note to self: Do Gundrones hate Chaos?
The markerlights lit up the soulgrinder (at point blank range) and the Broadsides did too. BS5 reroll, plus no cover save resulted in a weapon destroyed result (boo). the markerlight on the Hammerhead was less effective ... rolling a 1 to penetrate. The Piranha had broken off to turbo-boost across the board, running interference across the front line of the Tau and running in front of the Soulgrinder.
The Devilfish moved back on mass, pelting some odds and ends at the Plaguebearers and Juggernaut and achieving little. Acutely aware of the Hounds and the Soulgrinder ... the Crisis Suits backed off - making their dangerous terrain roll to keep their distance!
Turn 2 - Deamon Attack
 Soul Grinder 'Linford Christie' makes the 100m dash look easy...
Anton rolls for the reminder of his nasties and get the Deamonettes and the Masque, a unit of Pink Horrors and the Deamon Prince. They all land safety, with the pink horrors away in the backfield behind the pathfinders. The Deamon Prince and Deamonettes all opt to drop within 6 inches of the Plaguebearers Icon ... putting them front a centre. Rolling a few run moves, these guys spread out.
The pink horrors let rip with shots on the pathfinders... I opt to go to ground and suffer a single casualty. Meanwhile the plaguebearers trudge forwards, hoping to get to grips with the Tau. The Herald on the Juggernaut does the same ... approaching fast-ish (Jugg's aren't cavalry - go figure?)
The one's that really worry me are the Soulgrinder and the deamon hounds. The Soul grinder ignores the pathfinders beside it and race fullsquare at the plasma rifle and Missile Pod team. After consulting the W40k book on charging with vehicles (which handily uses the Defiler as a reference - and yes the charge is measured from the leg ... not the 'hull' - a rare circumstance where GW directly relates to a problem!) The soulgrinder kills all but one of the Crisis Suits, but thanks to the gundrones I get to take a swing and achieve nothing. The final crisis suit bottles it and gets eaten (which suits me fine!)
The Fleshhounds attempt to achieve likewise and roll a huge 4 (3" move, plus 1" run) and fail to even vacate the ruins they are cowering in!
 The Tau go 'old school' with an anti-assault Fish'o'Fury!
This was the crunch moment. Could the Tau deploy the ultimate firepower at point blank range and turn the terror on the Deamons...?
The devilfish went into 'fish 'o' fury' mode. 3 squads of nine firewarriors dropped at 9" away from the Deamonettes. The Crisis Suit Commander and two XV8s joined in with their firepower (Flamers, Air Fragger and Missile Pods) while the Stealth team went ballistic. To add insult to injury 12 Kroot make a 26" spotting check and add their S4 shots to the mix.
The Crisis Suits kill 10 Deamonettes. The Stealth team then wade in and wipe them out. The first firewarrior team fires blistering firepower on the Herald and wipes him out. The remaining units (and tanks) fire on the suddenly exposed Plaguebearers and killed a few (T5 plus 5++ plus 4+ being hard to beat) ... but the back of the assault was thwarted. The Masque and the Deamonettes were gone.
The Hammerhead was having equal fun on the other side of the board. They hit all 10 Pink Horrors and wiped them out to just 6, they then followed up with some particularly devastating Smart missile system shooting which left the changeling more than a little exposed.
TURN 3 - Turning the tide
 The Chaos Deamons regroup for the charge....
Deamons: Hats off to Ant for pushing through. The rolls weren't going his way and I was bringing 1500pts+ of firepower (TAU FIREPOWER) to bear on his piecemeal army!
All Ant's 'others' arrived. A unit of Bloodletters and 2 Fiends. They followed the Deamonettes in and took up the space (but this time behind the plaguebearers).
 Fiends, Bloodletters and Plaguebearers - oh my!
The Fleshhounds leapt out of the ruins and race towards my gundrones and Piranha. While the two hounds made short work of the drones, Karnock failed to wound the speeding Piranha. I revenge the piranha let off it fragmentation device and wounded and killed Karnock!
The Soulgrinder ... immobilised but unbowed shot up the crisis suit team, killing a drone. Meanwhile the Plaguebearer trudged dramatically towards the enemy. The Great Unclean One continued his 'slow and purposeful' trudge towards the centre of the board. The Changeling wisely hid.
 .... only for the Tau to run away ... again!
TURN 4 - Jumping the stealthies.
 The Deamon Prince shows how its done and gets the drop on the Stealth Team
 The XV25's fight to the last to delay the Deamon Prince ... for the Greater Good!
However, he has underestimated the ability of Suneokun stealthers! They hit the Deamon prince first. Hitting him TWICE and putting a single wound on him. In response the Prince kills 4 suits ... but the stealthers hold (at Ld5) and fight on!
 The Tau 'rinse and repeat', dropping a biblical pile of S5 death on the hapless Deamons
Tau: The markerlights spot and pick out the Plaguebearers this turn as the devilfish rinse and repeat their fish of fury firepower. The broadside manage to finally (FINALLY!?!?!) blow up the soulgrinder. Meanwhile the Fish formation wipes out the Bloodletters and tears great holes in the Plaguebearers. The Kroot join in as the XV8 suits dispose of the spawn. The Changeling is dismissively gunned down by SMS fire as the Hammerhead Railgun shot scatters and nearly shoots its own fish'o'fury formation!
The Kroot back away from the Deamon Prince as the stealth team is stripped down to nothing but a single member who unbelievably HOLDS HIS GROUND! The Crisis Suit commander moves forward to potentially intercept the Deamon Prince (Tau'Va and all that!)
TURN 5 - Backs to the wall
 The Plaguebearers attempt to tie the game ... as the Deamon Prince finally escapes the Stealthers
He makes a do-or die play. The Deamon Prince tries to turn the last Stealth team member into a Spawn ... but the Stealther passes his toughness test, holding the Prince up! The Plaguebearers surge from the ruins and assault the Kroot. 4 T5 5++ FNP Plaguebearers versus 12 Kroot and 2 Hounds. The Hounds go first at I5, downing a single Plaguebearer. The remaining 6 attacks bite home, but most missed and the subsequent reroll to wound of the poisoned weapons is awful. The Plaguebearer kill a single Kroot. In retaliation the Kroot pile on the wounds and only one Plaguebearer survives.
He then has to take two saves and a FNP to either hold up the only unit in scoring range ... but Ant rolls a 2. The Plaguebearers are wiped out and the Kroot get to consolidate on to the objective.
 Look Familiar? ... Butch Cassidy or Way of the Gun ... The Deamon Prince and Greater Deamon make their last stand!
The Deamon Prince strangles the last of the Stealth Team and the two MC's retreat as the Tau encirclement begins.
 Way of the Gun. Cumulative firepower rules ... they don't survive to turn 6.
CONCLUSIONS
Well Tau are redundant ... aren't they?
I think we put that one securely to bed. Needless to say, this wasn't the most enjoyable game ever played by Anton. The ability of the Tau to 'concentrate firepower' would make even Admiral Akbar proud. The Fish of Fury and assault moves made for some impressive play. Resulting in an army that Ant just couldn't get to grips with ... which is hardly fair.
In fact, Anton and I discussed it afterwards and struggled to think HOW the Deamons could get the drop on the Tau with their deepstrikers. Clearly the Plaguebearers were the only unit that didn't fold like a damp cloth when targetted, but even a 4+ cover save meant very little in the face of so many high strength rifles.
Even when the Deamons got to grips, the slippery Tau proved just that - slippery! The added insult of the Air Fragmentors was particularly nasty. The Tau simply had the ability to 'upsticks' and run away ... while offering firepower the Deamons couldn't afford to absorb.
SECOND THOUGHTS ... is 1850pts too much?
I've been playing around in the 1750-1850pt arena for a good six months now. The last 1500pt battle I played was a cracking match against Mark's Guard... very close and 'down to the wire'. The problem I'm finding is that at 1850pts the battle very quickly swings one way or the other.
This problem is further compounded by Jervis Johnson's battle missions. I'm wondering whether they should have been released with a disclaimer of 'designed to be played at 1500 pts' ... as the two games I've had at 1850pts have resulted in demonstrable wipeouts.
Maybe the real question is this. If at 1850pts I can take pretty much everything I would want to ... perhaps the 'balance' of the 1500 game is that I have to 'sacrifice' 350pts worth of 'like to have' and choose between several good options ... but I can't take them all?
BEST UNITS
The stealth team wins best unit through their stalwart holding up and wounding of the Deamon Prince ... they managed to bog him down for two turns. After that ... I loved flying around my new Piranha. Fast skimmers are a lot of fun to field. I remember an earlier game against Ant where he was fielding Saim Hann and kept saying 'I can't get over the speed' ... yeah I get that!
On the Deamons side, the Plaguebearers were solid ... although their 'slow and purposeful' turned them into nothing but mobile cover against such mobile foes. Two units (if they'd arrived) would have given Ant some nastier options (especially for 'precision' deepstriking) and put me under more pressure ... but even so.
COULD YOU BEAT TAU WITH DEAMONS?
Without dedicated anti-tank, even killing my broadside or the Kroot would have been an uneven leveller. The pathfinder too, would have played ample sacrifice. A nid army full of Zoanthropes and Hiveguard would have proven a bigger challenge ... but then the S5 comes into play. And there were just too many 2+ to wound hits going on.
Clearly against enemies with plenty of firepower (like Guard) or a mix (like Marines), Tau still struggle... but avoiding the gunline and using the firepower is the first in more confident steps...
How would you beat Tau with Deamons?