Showing posts with label Battle Reports. Show all posts

Monday, 27 February 2012

Follow the Flames: Round 2 - 800 pts

INTRO

My USSR troops were in action again (again mascarading as Greeks).  Unlike last time, both these games were tactically much more challenging and a good learning experience.


GAME 1 - Assaulting Hill 593

The battle was set in the mountains during the second battle of Monte Cassino, and the taking of Hill 593.  The rules were challenging, as neither side had the option to 'dig in' due to the rocky ground, but would automatically gain bulletproof cover if they went to ground (didn't move or fire).

As the 'assaulting' force, this left me with a significant tactical disadvantage.  The Germans would have fortifications, machine gun nests and mortars.  If I 'walked in' on this firepower, I'd be annihilated.  The Allies teams had taken considerable casulaties at this point.  How could I turn the tide?

For this game, I was fighting Kurt.  An excellent opponent, but Kurt scratched his list together with minutes to spare, would unfamiliarity breed mistakes - I hoped so.


GAME 2 - Fighting Encirclement in the Swamp

For this game I was going to be playing one of the most experienced players in the local area.  Coops has played flames for years and years and amassed a huge number of armies including an epic tonne of Russians, Germans and American Vietnam Vets.  He's played in national and regional flames tournaments.  I was pretty certain I had a fight on my hands.  Coops gripped my arm before the game, and whispered in an undertone.  "PLEASE give me a tough game!" ... he'd wiped the board with everyone so far, could I beat him?

For the first time, I was defending!  In this battle I had the option of splitting my forces over the bottom left and top right quadrants of the board.  Coops then deployed in the bottom right, with his reserves coming in top left, and the objectives he had to take doing likewise.

ARMY LIST

USSR - Rifles Battalion (800pts)
  • Command Team (Commander, 2iC, Commissar) - 30pts
  • 45mm Antitank guns (2 bases of guns as a Command Attachment) - 45pts
  • Strelkovy Company (8 bases, rifle and machineguns) - 130pts
  • Strelkovy Company (16 bases, 7 Submachineguns, 8 R/MG and a Maksim HMG) - 265pts
  • Scout Platoon (2 bases) - 100pts
  • Heavy Mortar Platoon (8 bases including 6 mortars and a spotter team) - 145pts
  • 45mm Antitank guns (5 bases including 4 antitank guns) - 85pts
My main strengths are the awesome Heavy mortars, these guys can pin and produce casualties of even dug in opponents.  My enlarged Strelkovy Batalon with 16 bases was also party to the "Quantity is quality" rule, meaning that they'd need double the number of hits (10 instead of 5) to get pinned, importantly, this meant that if they got in assault range, these boys were unstoppable.  Finally, my 45mm were my 'funny' ace in the hole.  I'd brought them along after my experience in round one of machinegun nests and they are VERY effective.  However, they'd also become increasingly useful for shooting up enemy infantry in cover, and despite the comments of my peers - I was enjoying having them aboard.

GAME 1 AXIS - Grenadier Company (800pts)
  • Command Team
  • Grenadier Platoon (7 bases)
  • Grenadier Platoon (7 bases)
  • 105mm Howitser Platoon (4 guns, spotter, command and staff)
  • Heavy Mortar Platoon (7 bases including 6 mortars)
  • 2 HMG nests
  • 3 sets of fortification trench lines
THE BOARD - HILL 593

Hilly terrain dotted the board.  This was my core advantage.  The downside was that due to the 'rocky terrain', I couldn't dig in and anything that moved was going to get a pounding.  Kurt had learnt from his earlier games and had both a four gun artillery unit AND a six mortar platoon.  These could shelter behind a double platoon of grenadiers, trenches and two HMG nests.  While grenadiers are only Trained and Confident, ALL my troops are identical.  These represent the low water mark of the german reich.  Let's hope I can give them hell!


German Defensive Line
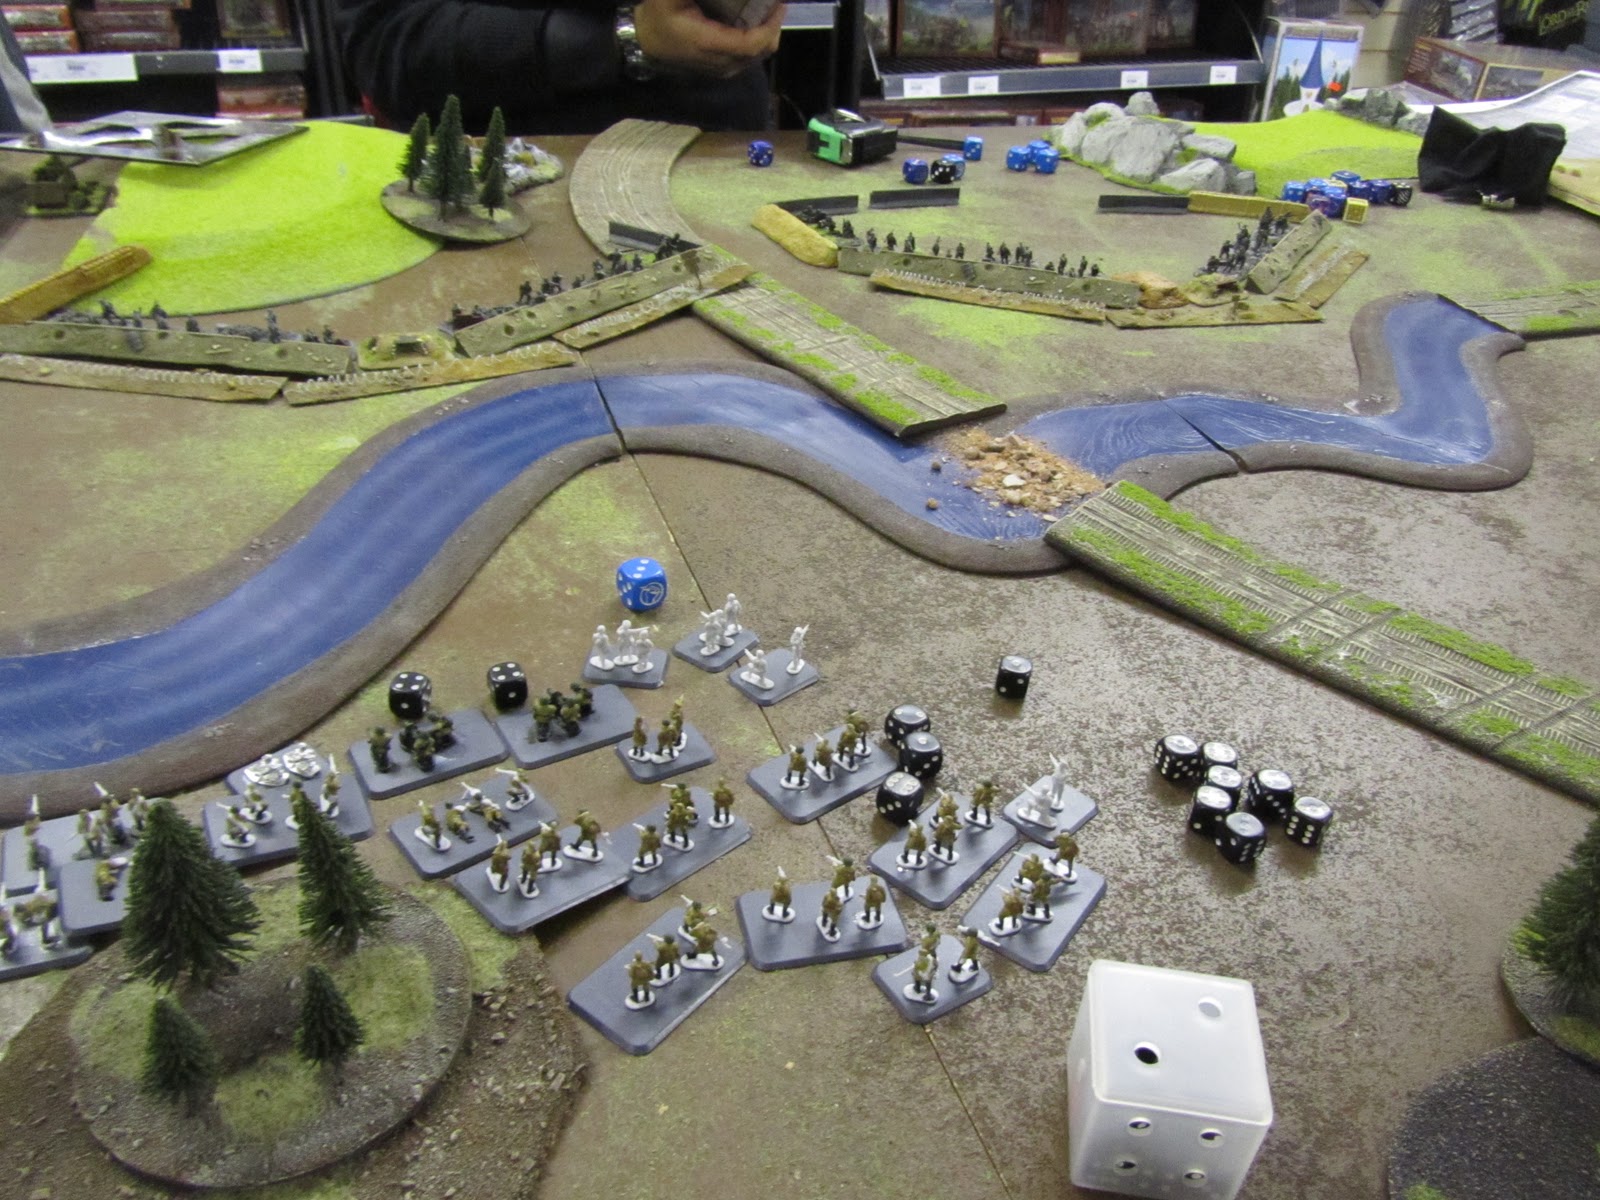
My forces (in blue) all started on the table, The heavy mortar platoon started in the top left hand corner - completely hidden behind a hill.  This meant that they could fire without being fired upon - very useful indeed.  The small platoon and Antitank guns started in the middle.  The larger platoon started at the top of the board.  Before starting the game I initiated an 'infiltration' move, using my 100pts of scouts to pull 16 bases of infantry 16" closer to the enemy.


The Germans didn't largely move all game.

Moving was risky in this game, so I went all out.  By running, I could get 100% of the huge platoon behind a large hill on the top.  This stopped them being spotted (for arty) or being shot at direct (direct fire rolls double dice against 'running' troops - ouch!)  The smaller platoon in the middle did the same trick, hugging terrain.


Russian flood from behind the hill up the left flank
Now the smart thing for Kurt to do would is to readjust his lines to ensure dominating defensive fire faced my incoming infantry.  He didn't however.  His BIG mistake.  I think he did this mainly because he was still working in "28mm mode" and thought that his infantry could see over the hill.  At only 5mm in height - they couldn't!  Realising that the only units with line of site were one shot artillery pieces and a couple of infantry, I ran like blazes at them.  Hooking behind the front line of the HMG nests - I avoided them completely.

Antitank guns move up behind their bulletproof shields to kill the HMG nests
 Now Kurt rushed to fill the gap, moving infantry across, reserves arrived that he rushed to the front lines ... but my mortars spotted them and blew them to pieces, wounding every one of them and Kurt failing 5/7 3+ cover saves!  But Rifles and Machine Guns are Rate of Fire 1 if they move.  My SMG units and most R/MG units rushed up under covering fire from my HMG and some rifle units.  The Russian firepower was devastating, destroying the Artillery with Machinegun fire alone and killing multiple infantry units.  The 'Mortered' reserve unit simply fled, many other units were pinned or engaged.  The Germans attempted a counter attack, but the defensive fire was too intense and they all died on the way in.  In one turn of assault I destroyed an HMG nest, 9 bases of infantry and a whole platoon of Artillery.  The next turn, we mopped up the remaining infantry and the AT guns wiped out the last HMG nest.

4-2 win to the Russians.

GAME 2 - Encirclement in the swamp.

Rolling for the next game (and promising experienced player Coops a tough game), I opted for a defensive position.  This would be my first defensive game and a beauty to start with.  Against such an old hand, I'd need every advantage I could get.  Coops list looked something like this:

Grenadier Company (Confident-Veteran)
  • Command HQ and 2iC
  • Veteran Rifles with 2 HMG
  • Veteran Rifles with 2 HMG
  • HMG Platoon (4 HMG and Command)
  • Mortar Platoon
In Coops opinion, Confident Veteran was the perfect mix.  Fearless is uneccessary, and costs too much.  Being Veteran means that over 16", you are almost impossible to hit.  Only certain weapons, and at certain ranges, can have much of any chance against you.

That said, as a numerically inferior force - charging out of pre-prepared positions at my lines would be suicide.  Even if they make it ... I would simply drown them in double the numbers.

The mass of heavy machine guns, while awesome in defense against an attacking army, would be handicapped by my dug in positions and bullet proof cover.

THE BOARD - SWAMP

A Complete lack of terrain combined with the fact that I was automatically 'dug in' as the defender meant that I was in a good position.  The large hill on the top right formed the base of my defence.  The Heavy mortars hid behind the hill as they could range in anything on the board and could then avoid being spotted themselves.

In front of them came the two AT guns and and both the infantry batalons.  My original plan had be to 'infiltrate' the big infantry company over towards the objectives on the bridge, in order to muck up his plans, but without this, I dug in to weather the artillery.

My defensive position with the heavy mortars positioned behind the hill
And artillery Coops definitely had.  On top of the mortars, Coops commander character had two levels of artillery to pull on.  This meant that 'off the board' mortars and artillery would be raining down on my men.  Nice!  I also had taken this 'upgrade path', so I reciprocated as best I could (but lacked the two tiers he had).

On the other flank, 4 AT guns lined up.  As long as they didn't move, they have bulletproof cover, the scouts in front of them gave them a stalling line.  I was hoping that they (and the HMG nest adjacent) would be enough of a disincentive to approach in that direction.

The Germans attempt to dig in in the face of Soviet firepower
The game opened up with some blistering firepower.  Coops failed to dig in his veteran HMG's and mortars the first turn, although they opened fire with everything they had.  They killed a couple of bases and started to worry at the large platoons - but nothing to worry about too greatly.  In return my HMG and heavy mortars targetted the HMG's in the open and pounded their lines, killing 3 out of 4 HMG's and effectively taking them out of the game.

Over the following 2 turns, the mortar teams exchanged fire, with his mortars forced to target my infantry whilst my mortars rained hell and brimstone down on his mortar teams.  By turn 4 only 1 mortar remained, this is mainly because normal mortars are firepower 6, meaning that even if you hit and they fail their saving throw, you still need a 6 to kill!  Heavy mortars are firepower 3+.  Between the rerolls to hit (see below), the 5+ cover save for the mortar teams (unlike infantries 3+) and the 3+ to overcome their bulletproof cover ... they dropped like flies.

Artillery works in a unique way in that a 'hit' hits everything under a 4" square template.  You then roll a skill check (4+ for me, 3+ for Coops vets) to hit them.  Six or more arty pieces gets you a reroll to hit.  3-4 and it's straight, 1-2 and you have to reroll every hit.  This meant the enemy mortars were completely useless.

The reserves arrive
The enemy flankers arrived on turn 3, and I turned all hell on them.  The 'god of war' mortar barrage killed 1 and the Antitank guns got in range at 16".  At sixteen inches and dug in, I needed a 5+ to hit.  But the 'volley fire' rule meant I could pour on the firepower and hits.  Giving me rerolls to hit.  The 4+ firepower made a mockery of his cover save and then the Heavy mortar plowed in.

Killing half the team, his embedded and dug in unit pass their pinning test but fail their morale check (4+) and routed.  Sometimes fearless is just what it takes.

Conclusion

The first battle was won through some intelligent movement and a mistake by my opponent.  The second battle was an uphill struggle (for my opponent).  If he'd moved, I'd have killed him.  My heavy mortars came into their own and ate his for breakfast.  Personally, I can't see how he could have won unless I'd made a serious mistake.  I didn't, I gave him a tough game ... and with 2 more turns to turn on the pressure on those Grenadiers contesting - it couldn't really have gone any other way.

Friday, 10 February 2012

Sometimes Winning sucks - brief batrep


Flames of War campaign week 2 this Wednesday gone...

Only got one game in because only half the crowd turned up.  After reviewing the campaign mission here's the setup.

He deploys a platoon and his fortifications, inlcude two mahcine gun nests around the monestary at the top of the hill.  I deploy randomly on board edges.  I roll a 3, and deploy my 45mm A/T guns with 2nd in command facing his machine gun nests.  I then roll a 5 for my rifle/machinegun platoon (with attached commissar) and deploy them in the enemy left flank.

All attackers have cautious movement.  This means that if I move normally and don't shoot/assault, I'm +2 to hit (ie a 5+ rather than 3+).  I advance on him, my AT guns move up.  He fires and misses everything.  I use volley fire @ 16" and destroy his machine gun nest.  My troops move to point blank range and then assault without shooting.

They storm into the base and start handing out death.  The A/T guns shoot up the german infantry gun.  End of round three, opponent hands in the towel.

The problem with campaign games.

Real life is rarely fair, I had Russian Infantry.  They were confident and trained, but nothing to write home about.  I was facing German elite SS Totenkopf troops with MG teams.  A single platoon for me is 8 bases (9 with Kommissar).  My opponent didn't even have that at the top of the hill.  His elites were nullified by the 5+ to hit that cautious movement gave me.  My A/T gun didn't help either.

Outnumbered and outmanuevered, it was a tough fight, but could he have won?

Options.

Totenkopf have options.  For example, by moving all his machinegun teams to the left flank of his hill, he could have delivered devastating firepower, making an assault highly difficult.  His choice of the infantry gun also had limited usage.  It's low powered and lacking range, useful on the assault, but useless in defence.  The machine gun nests ARE good, but only really against rifle/MG troops. With the machine gun nests better placed he could have challenged my location.  Bringing the infantry gun to bear on my A/T would also have helped.  MG teams are good, but some Heavy machine guns with RoF 6 would have been better AND harder to kill.

I think he could have held me off and forced me off the hill with his machinegun teams.  All he had to do was get 5 hits and any charge would fail.  Shooting would get me nothing as it's harder to hit vets than trained troops.  Using 'stormtrooper' move would have allowed him to get into position to meet the charge and still fired every turn at the full rate of fire.

On the game, I rused a total of 5 points, and my opponent just the 1, but he could have made me bleed for it.  And it didn't really feel like a win.

In a nutshell, apart from my A/T guns, I had little advantage.  Which gets me thinking on the options for round 2 and 3.  Is dropping the antitank guns really the best idea.  Or it more a better one?

Thoughts on a postcard please...

Thursday, 2 February 2012

Follow the Flames - Cassino Campaign First Round Batrep

“...behind every hill there’s another river, and behind every river, there’s another hill."

British Commandoes attempt to storm a Monastery at Monte Cassino

I know, I know - a batrep from Suneokun.  Sit your ass down and prepare to be amazed!

The Cassino Campaign kicked off last night at my local gaming store (Tabletop Tyrants, otherwise known as GiftsforGeeks).  The boards looked amazing and have done plenty to encourage me to finish off my core force for round two the week after next!

The Cassino Campaign in WW2 was one of the bloodiest and meanest battles going, and something more akin to a WW1 trench warfare.  The allies, fresh from defeating Rommel in North Africa, and hoodwinking the Germans with Operation Mincemeat and seizing Sicily, were aiming for the 'Soft underbelly of Europe'.  The problem was that the Italian Facists had gone got themselves a German personal trainer, and that underbelly had more abs than Jodie Marsh.

Jodie Marsh
For indicative purposes only ... "The Soft Underbelly" - Perception versus Reality

The Germans had picked their battlefield well.  Cassino was an extremely rocky and inaccesible environment with massive natural features and difficult terrain.  As such this environment was an anathema to vehicles, it made transport and supply lines difficult, troops could only move slowly and this greatly advantaged the defenders.  There would be no easy breakthrough, exploitation and encirclement.

To further compliment these already demonstrable advantages, the Germans went about building the Gustav line (and behind it the Hitler line and the Caesar line), these enormous fortifications spanned between the frequent hills and mountains across the whole 'leg' of Italy.  They were to prove one of the western allies greatest challenges.  Arguably far harder than the D-Day landings against 'Fortress Europe' with little vehicle support, hitting the Facists at the height of their capabilities and readiness, with the battlefield, fortifications and killspots all in their favour.

Approximately 55,000 casulaties at Cassino, compared to around 12,000 on D Day and 226,386 for Operation Overlord.  This was a very serious and bloody business, but completely overshadowed by the D-Day landings (which occured as the Cassino Victory came in).

Politically the allies were under pressure from the Russians to open up a second front, hence the punch at the 'soft' bit.  It was to prove a impossible task and arguably Cassino never fell, but was retreated from when encirclement finally seems inevitable.  The allies could never bring their numerical advantages to the fore thanks to terrain and early stage errors and bad planning.  The defence by the Germans was remarkable.


The Gaming Campaign

"Our four days and nights were absolute hell; mortar bombs continued to rain down; we had a nebelwerfer rocket through our roof; and the never-ending smoke shells meant that we were living in a world where there was no day. Our nerves were stretched to breaking point, hands shaking so much that cigarettes were hard to light. Hot meals were impossible, as was washing and shaving. My diary notes, ‘it takes all our nerves to move from our position to Company Headquarters 25 yards away’. "
 New Zealand platoon commander on fighting in the town. Ref

Flames are a very well researched and intelligent organisation.  Writing campaigns that are balanced, fun and also fulfill the history buffs is a demanding challenge (certainly more demanding than making up shite about shite, calling it difficult, taking forever AND then getting it soooo wrong, eh GW?).  As such I would recommend looking at the Flames of War Cassino Campaign Overview .

The Campaign is broken down into 'rounds' of skirmishes representing the 4 battles of the Cassino Campaign.  The Different battles represent different routes taken by the allies in and around Monte Cassino.

For this campaign, it really is a trial by fire.  The majority of the Allied gamers are new to the game, with only a handful of battles under their belts.  The German commanders have years of experience in flames at local and tournament level.  A tough ask indeed.

My first round force of 500pts, were put together from the Strelkovy Batalon (Rifle Battalion) in the Red Bear book, for the requirements of the game, I am fielding them as Free Polish Infantry, or Greek - I'm not decided yet.  They are made up of competent (Confident and Trained) troops, based around the performance in a handful of games I've fielded them so far.

Rifle Battalion - 500pts

Rifle HQ (Command, 2nd, Commissar) - 30pts
Rifle Platoon (Rifle and Machine Guns) with 2 additional Maksim HMG - 180pts
Rifle Platoon (Sub Machine Guns) with Kommissar - 145pts
120mm Heavy Mortar Platoon (6) including command and spotters - 145pts

The Battlefield.

 
The Germans are hunkered down in two entrenched positions.  They comprise 2 Grenadier units (Confident trained - same as mine), in addition to a command squad and the trench lines, they have 3 machine gun nests (which are unbelievably evil).  To make matters worse, I have to ford or swim the river, which is dangerous, difficult and makes me immensely vulnerable.  In my advantage ... well I'm attempting this at night.  Which gives the enemy a fair chance of not seeing me... I hope.

Attempt 1 - Mucking about

I'll go through this one quickly, because it's a massacre and a learning experience.  Rather than fording immediately, I get testing with the mortars and my entrenched Rifle and machine gun and Maksim machine gun teams.  3 turns of pounding later and I've caused more casualties than any of my predecessors (Dustin was wiped out without killing a stand and Jack killed one stand), but the fording is left too late.  I move up to the river turn 4, get in the river turn 5, get out the river turn 6, and don't have a chance to entrench (my objective being to 'dig in' as a beachhead on their side of the river by turn six!) ... epic fail.  I get 2 command points for turning up AND having my commander survive (at the back).  As the assault infantry resurface, dawn breaks  - game over man, game over!

Attempt 2 - no mucking about

On the second attempt I line up the SMG's, with the command team attached (in for a penny), on the river bank.  I then surge into the river turn one, while the spotters target the enemy rifle team opposite.  Not firing with either unit means that Dustin has to struggle to spot my teams,  he manages to down a few of the teams on the river, but 4 (of 6) make it across.

On the second turn I move the 4 teams onto the bank and move the other units (including the command team) into the river.  With the unit split between the river and the bank, I have no option to dig in next turn ... but must weather the fire.  The spotters rain down fire on the enemy troops, and the mortars pin the grenadiers! Yeah!  The rifles and machine guns open up, but fail to kill any.  The mortars have so far killed an enemy base.  In a brilliant turn of events, the 'view' rolls of Dustins forces suffer an epic fail and all the in range units fail to spot my shivering troops. - Wow!

Turn three sees me throwing everything against the Nazi's, the sun doesn't rise, giving me darkness as cover.  The HMG's throw everything at the closest Machine gun nest and destroy it!  (12 shots, requiring a 4+, a 6 and then another 6!).  All I need now is a good turn of space marine armour saves and I'll dig in.  The attritional firepower is immense, of the 7 teams on the bank, only 2 survive and they only just hold it together.

Turn four, it's do or die now.  The Mortars hit again, killing another stand, but failing to pin as the grenadier commander rushes across.  I feel a real sense of urgency in the Germans.  Unfortunately, dawn breaks!  The SMG and command team attempt to dig in, but after fording a river, seeing their friend massacred and rallying.  They fluff the 4+ roll to dig in.  As such, no bulletproof cover and the raking fire wipes them off the bank, despite everything I throw at them.

By turn 6 I pummel a whole platoon into desertion, and gain a +1 of the command points.  But with the death of my command team (My polish commander, injured, was rescued after the Russians bombarded the Germans into next week!  So for all the efforts, I was a 4+ away from a +4 Russian victory... and capturing the bridgehead by the skin of my teeth.

Conclusion

So close ... really, I was a 50/50 roll away from walking away with that. The Germans were unlikely to assault my position (due to their own barbed wire and my R/MG team and Maksims covering my men) and although only 2 teams he had only a 2% chance of machinegunning them down ... it was a close run thing.

Getting in and out of the river was sheer murder, and really really nasty.  3 turns of creeping and swimming in the face of enemy fire... I was helped by an astounding piece of luck.  However it clearly ran out then, as I failed 3+ after 3+ cover save.

However, everyone agreed that the river crossing was the worse of the three battles and the result, whilst galling  - was realistic.

What would I do differently, not much really.  Soviet force lists have a big chunk missing, in that smoke mortars aren't used.  This would have made the crossing a lot more possible, as a few smoke shots could have completely silenced the machineguns of the other side (for a turn).  The biggest worry for me

The other battles include assaulting a Monastery (with delayed reserves on both sides AND loads of cover (everyone is always in bulletproof cover!), or assault a barracks through the town (even more bulletproof cover).  I look forward to these.

As for the campaign ... every single allied attack lost.  A combination of entrenchment, machine-gun and tank emplacements, barbed wire, grenadiers and mortars meant that everyone struggled.

We can at least comfort ourselves that the early campaign in Cassino were equally bloody.  And take real comfort in the fact that I can pack my little men up afterwards and go home to my wife.

And finally ... a free gift to my readers

This is a superb Ministry of Defence historical PDF on the Monte Cassino campaign, with quotations, citations and great tactical analysis - Clickety Click here.  Well worth a scan!

Thursday, 8 December 2011

A Wonderful Surprise, and 40k Hangovers

Visit Hyperwar
Last night I arranged to visit my local store/club and "join in" on a 1500pt mid-war flames of war kick off between the Germans and the Brits.

Dustin was facing off against Coops and Dustin (very kindly) offered to crow bar me in a company or two to take part.

I arrived at the club with my 10-ish tanks, and boy was I in for a surprise (and a learning curve!).

Coops had double booked himself, arranging a game against Dustin in Mid-WW2, and a game against Anton (of the Anarchy) in Vietnam based Tropic Thunder US v VietCong!

As a true gentleman he is (and delighted FoW player of 6 years with a vast collection) ... Coops had brought me along an entire Soviet mid war army of 1500pts, written me an army list and even brought me his special soviet dice and markers for the different units!

Wow, this was special treatment!

The Army Lists

Russian Mid War - 1500 pts.  


Description: This is a lot of tanks supported by a single stand of infantry and some awesome Katyusha artillery support.   The tanks and infantry are so numerous because they are all consripted, meaning that they are easy to hit AND have poor abilities when these are called upon.

Command Tank T34/76
Tankovy Company #1: 3xT-34/76 and 3xT-34/57

Tankovy Company #2: 3xT-34/76 and 3xT-34/57
Tank Rider Company: 14 Infantry, 1 Officer, 1 Maksim Heavy Machine Gun and Commissar.
5 Katyusha Rocket Launchers with Staff Officer and Spotters

The Katyusha are Trained/Fearless, all the others are Conscript/Fearless.

British Mid-War - 8th Army Indian Irregulars

Infantry Company, Rifles and Light machine guns, piat recoiless antitank guns and mortars.
Indian Heavy Bombards - antitank weapons x 2
Two British "Sideways Firing" Bofors Mobile Antitank Armoured Trucks
Heavy Mortar Platoon (4 x Fearless Veteran Squads) - best of the best with 2 spotters.
3 x Matilda Tanks
3 x Sherman Tanks
Lots of other infantry.

Deployment - Aggressive tanks versus defensive Infantry

Unlike 40k, FoW has more balanced encounters than 'equal' ones.  This means that while the deployment of the attacker and the defender are totally alien to eachother, the special rules of the defender (who are usually dug in and camoflagued, with multiple 'ambush' units), gets significant advantages over the attacking tanks.  This helps to negate the alpha strike as a tactical 'game-winner', because outside Nagasaki and Hiroshima, and 40k - "Alpha Strike" isn't actually in reality.

So while I got first turn and ALL my troops on the table.  Dustin could beploy his units in and around the objective and make his 'anti-tank' units invisible.  The turn he 'declared their attack' they would hit at full rate of fire (in some circumstances they would get both full RoF and hit against side armour ... that's ambuscade).

The downside for dustin is that half his army is in reserve - meaning that he would be in a positive position, but with only half his troops.

Turn 1 - the rush.

Dropping my Katyusha spotter inside the command T-34/76, I rushed forwards on the left AND the right.  The heavy mortars were camped around the objetcive to my right flank, and the commander and other made a bee line for that.  The other group of 6 tanks moved towards the dug-in infantry on the left flank.  Moving over 6" in a russian tank means losing your ability to fire, although the 24" movement more than made up for this.  The conscripts in the middle moved forward under the reproachful eye of their Commissar.

In return, Dustin 'uncovered' two camoflagued unit in the open on the right flank.

Notes on Ambush in Flames of War: Unlike 40k and Infinity, there's no requirement to 'write down' where the camoflagued unit in located, the player can simply 'deep strike' them without a roll.  This represents a good reflection on the lack of 'micromanagement' of Flames, as its assumed the unit NCO or officer is perfectly capable of setting up in a good position.  The downside is that ambushers cannot set up within 16" of an enemy is plain sight or 4" of an enemy within cover (or 8" of a recce patrol), this means that any wood can become the hidey hole for a platoon of 6 pound artillery or tank hunters ... rushing forward and securing this ambush spot will stop the ambush happening (or force it out early!), but equally you cannot 'clear' the spot - only occupy it!  This represents well th ability of artillery and tank hunters to lie dormant, biting their nerve and then fire a massed volley into the sides and rears of the enemy!

The Bofors gun and dug in bombards opened up on the T-34's on the right flank at full rate of fire.  Destroying one tank and bailing out a further two.  My tanks are manned by conscripts, they get hit on a 2+, eeeeeeek!  The mortars on the right flank pinged my command tank squad, but to no avail.


Turn 2 - Dithering and Blathering

This left me in a panic ... umm, what to do?  Well, first of all I reacted just like that crap commander at Easy Company's attack on Foy - I panicked and had the tanks hunker down in some cover and try shooting it out with the enemy.  Suddenly I discovered that firing on dug-in infantry in cover at more than 16" was a recipe for disaster.  My shooting required a 5+, followed by a 3+ cover save for them and then a 3+ firepower check for me ... I killed nothing.  Rethink required.  Likewise, the tanks on the right flank awaited the move up by the Conscripts and tried to land another Katyusha attack on the mortars - to no avail!

Dustin pressed to exploit his hesitant idiot opponents mistake on the left flank and shot up the tanks, evacuating another 2 (although no more explosions, mid-war british anti-tank is shocking!).  In addition, 3 Mathilda's trundled on to the board (and we discovered they have shocking guns with useless range AND shocking armour - who knew?)

The mortars pinged the tanks on the right flank and managed to evac one.


Turn 3

Dustin kindly pointed out that charging the tanks into the heavily defended RPG and antitank regiment on the left flank wasn't bright and maybe I should just move left.  It's useful when your opponent helps you.  Taking his advice I moved right with everything I has (that wasn't bailed out) and worked out that he had some weak spots in his lines.

One of the bailed out tanks on the left and the bailee on the right pulled it together and joined in.  Moving the tanks to the right flank and centre I asked about tank assaults.

I have been digesting the rules over the last weeks, and I had registered in the back on my mind that tanks couldn't assault tanks, but COULD ASSAULT INFANTRY.  Well this is a novel idea and an alien one to 40k players.  My tanks could fight with infantry, not shoot them.  But what I didn't understand is that when infantry are in dug in positions, assaulting them with tanks (ie driving over them/driving them off) is the best approach and FAR MORE EFFECTIVE THAN SHOOTING AT THEM.

So what's 40k thinking: I mean tank-shock, Tank shock?  Tank Shock?  Where's tank squish, or tank supressing your ass and ramming your dug out and scattering your unit to the four winds?  Tank shock? Boo!  It's like the Scooby Doo version of warfare!  Which beggars the question, why can't trucks just run people over in 40k?  Why can't landraiders run over Terminators and pop them like little spider eggs?  Why is the infantry/tank relationship in 40k so weird?  


So four tanks assaulted one spotter unit and 3 tanks assaulted the other, still requiring a 5+ to hit him (Assaults are tested against ability rather than opponents ability, the reverse of shooting, which makes sense to me.)  Any hits automatically kill, there's no saving throw and no cover save.  Your fox hole is full of grenades and you buddies full of bayonets.  Or the tank equivilent - you are ketchup.


NB: On Shooting and Fighting.  If I'm shooting at you, it matters more how incompetent you are than how 'good' I am.  A crack shot is a crack shot, but over a company of men it'll even out.  A bunch of conscripts won't have the awareness, ability and experience to anticipate/locate/avoid/circumvent/zigzag around enemy fire, veterans will.  Whereas in assault, if I'm a highly trained Spetsnaz unit, I'm gonna kick your ass.  The assault unit ROLLS FIRST, but the defending units (and every friendly within 4") gets to fire everything they've got at the attackers, either wiping them out, or scoring 5 or more hits and pinning them (and stopping the assault).  Likewise the assaulters CAN FIRE at the assaulted, giving them a good chance of 'pinning' the assaulted and avoiding that defensive fire... which is kind of, well, realistic really.  Hits in combat kill - immediately, once it's into the trenches - there's no quarter.


SO, I assault the spotters and I assault the far end of the trench line.  I massacre the spotters (4 tanks on one and 3 on another and also kill 3 units in the centre.  Running over men with tanks is really effective, I mean, who knew?  (Hint: Not GW.)

At this point the Mathilda's arrive and prove their uselessness, some Shermans arrive as well and after exchanging some shots (that the Russians win), we've wasted enough time already and call it a night.

Conclusion

A good game in the learning curve, although understanding tanks in Flames of War is a learning curve over 40k.  If I had moved up 32" in turn one, swung right 32" decisively in turn two, I could have surpressed and charge the mortars (massacring them as they only had antitank 3 - useless against my side armour in defensive fire.)  I could then have mopped up half the infantry and sent my infantry in under a barrage of denfensive fire on the bombards and blown the Antitank jokes to bits by turn 3-4.  On turn four, I would have been facing 3 Mathilda's and 3 Shermans with 13 T-34 - no contest.  And had Katyusha's and tank assault to throw at the legion of standard infantry slogging towards my position.

The game was mine for the dithering ... and I dithered.  But that's the learning curve!

But this game is cool.

Wednesday, 30 November 2011

Flames of War - first intro game

Check out All Miniatures Great and Small
Played my first intro game of Flames of War last night and was delighted!  After years at the 40k grindstone the play style, movement and interactions of FoW are a real boon.  Our list were as follows, I thought Dustino had given me a overpowered force, until I looked at the armylists!

No pictures I'm afraid, as I was concentrating too hard!

USSR (Late War period) - all troops are confident, trained (ie run of the mill).

5 x T34/76 tanks (with 2xMachine guns, fast tank, wide tracks, limited vision @ 265pts.
3 x Emcha (M4 Shermans with 2 x Machine guns) @ 180pts.
Rifle/Machinegun Infantry platoon @ 120 pts

German (Late War period) - all troops are fearless, veteran (ie hardcore!).

2 x 2 STuG III Assault Guns (with single machine gun) @ 380pts
Rifle/Machinegun Infantry platoon @ 195pts

Battle Report

Turn 1: We start out of range of each other, and he moves his troops forward into a series of hedges and shelters his guns behind some bunkers, I move my American Emcha tanks forward on the left flank in line with the troops that storm up the hill.  My T34's move back out of range of the STuG's and shoot at the German infantry - proving that Russians can't hit the side of a barn door at range, killing no one.

NB: Shooting in Fow: Unlike 40k, your roll to hit is predicated on the competence of the unit you are shooting at rather than your own abilities.  This strikes me as more realistic, as conscripts can be hit on a 2+ by trained or veteran troops (they are equally inept at using cover).  This is further modified by range (+1 over 16"), and cover (+1 for any cover for infantry, 50% for tanks).  As such, by T-34's needed 6's to hit the german infantry. 4+, +1, +1.  Russians at range suck!  In addition, a unit that stays still gets it's full Rate of Fire (RoF), whereas a vehicle or unit that moves is RoF 1.  Some weapons avoid this reduction, like vehicle mounted machine guns, Sub machineguns (always RoF 3) and Flamethrowers ... for obvious reasons.

Turn 2: The German infantry shoot up my Russian infantry and kill a single base (all infantry gains a 3+ cover save, even when in the open), The STuG's on the left flank shoot forward behind the objective bunker and shoot up my Emcha's, one Emcha is destroyed, another is bailed out - from 2 shots between the STuGs ... not good.  The bailed out crew hid behind the tank and then I passed the 'motivation test' (5+ for conscripts, 4+ for trained, 3+ for veterans) at the start of my turn and my boys piled back into the tanks.  The Emcha's returned fire, the undamaged tank firing twice, the bailed one just the once (see below), they manage a couple of hits but the german armour proves too much for them, although one StuG crew bailed out.  The T34's decide to use their machine guns on the German infantry.  Advancing to 16", they unlease hell on the Germans, managing 12 hits!  The Germans are reduced from 8 stands to just two.  The Infantry follow suit and manage to kill the closest stand - the officer!  The final german unit (despite only needing a 3+) passes his pinning test, but loses his nerve as last man and retreats.

NB: Bailing out.  Unlike 40k, shaken or stunned rolls don't exist.  A tank which is borderline penetrated (ie you have armour 7, they have antitank 10, you roll a 3 on D6) or is penetrated and fails to explode (Firepower test, usually 4+ or 3+ depending on gun) result in the crew panicking and bugging out of the tank.  The tank isn't dead, but cannot do anything without the crew.  The crew then take a motivation test to reboard their vehicle, they can then shoot - but they count as moving - meaning they are Rate of Fire (RoF) 1.

Turn 3:  The STuG's on the left stay where they are and shoot up the Emcha's, using their 4 shots to kill and bail the remaining two tanks.  The StuG's on the right flank advance from the rear and shoot down a single T-34 with their two shots.  The Emcha on the left flank fails his bailout roll, but passes his last-man check - the Infantry Platoon - seizing their chance race down the hill to the objective bunker (with the STuG on the other side).

Talking Tactics: The T-34's have a tricky choice, due to 'hen and chicks' rule for soviet tanks, they can only shoot if they move a maximum of 6".  With only antitank 9 against the Stug's forward armour of 7, they have a very slim chance of challenging them.  The alternative (classic russian tactics), is to use their 'fast tank' move to race 32" behind the German lines and behind the germans deployment bunkers - forcing the German Tanks to engage them at close range - where their 6" move and fire can get into those tanks side/rear armour of 3.


This is what they do, forcing the STuG's to come to them.

Turn 4: The STuG's are now forced to split their fire.  The "anti-Emcha (M4)" unit leave one STuG behind as the other STuG supports the two STuG's from the other unit to shoot up the T-34's at point blank range (Most tanks, unlike Russians, can move 12" and fire once, it's all about the training and radios).  The remaining STuG shoots the disembarked Emcha, forcing another motivation test - which the crew wisely fail and leg it.  Meanwhile the 3 assault tanks have an awful time - only 1 of the 3 shots hits and despite penetration side armour fails to destory the vehicle and I pass my bail out test.

The Infantry meanwhile assault to lone STuG with molitovs and hand grenade and Boris' headbutt of doom.  By flanking the hull mounted machine gun around the bunker, the STuG has no chance of surpressing them with machinegun fire.  All 6 remaining stand get an attack each, hitting on a 4+, garnering a statistically acceptable 3 hits.  The Stug want to avoid rolling a 1, which it fails.  The crew bails out - not the smartest idea in the face of Boris' mighty forehead (and some USSR stamped bayonets).  The crew die badly.

Ignoring the remaining STuG on the left flank, the T-34's bum rush the Stug teams on the right, surrounding them at point blank range and punching shots through their weaker side and rear armour.  While I fail spectacularly to kill either tank, both tank crews bail out (at this point we realise we don't know the rules for bailing at point blank range and that the crew should really be machine gunned to death as they evacuate - but that's the learning curve ... answers on a postcard please!).

Answer: The crew counts as 'bailed', even though they are cowering in the bottom of the tank.  However, if only destroyed, bogged down or bailed out units  are within 4" of the assault at the end of the turn ... the vehicle and it's crew is captured automatically - win!


NB: Assault and Machineguns.  Unlike 40k, charging into the enemy guns in a dangerous thing (as it is in real life!)  A machine gun platoon will roll 21 dice with 3+ to hit against a charging unit, and any unit recieving 5 or more hits is automatically pinned and fails the assault.  The preferred tactics are either to pin the defenders (this is where SMGs with their ROF 3 become essential), or split squads to pin and charge separately, or ideally flank their firepower altogether.  The co-axial mount of a Sherman or T34 has 360 degrees of fire, as does standard infantry and man-packed guns.  Heavy guns and hull mounted weapons (like the hull mounted machine gun) only have a 180 degree field of fire drawn across the front of the unit.  As such, they can be circumvented.


Assaults are risky and need coordination, but are well worth it against dug in troops (see later) as any hits that are successful result in immediate removal of a stand of troops, with no cover or bullet-proof cover saves.


Turn 5

The last STuG fails his morale check (last man standing) as the russian troops storm the objective bunker AND the T-34's blow up one STuG and bail out the other.


A decisive Russian victory.


NB: Bulletproof cover and digging in.  Something infantry can do to great effect is to use bullet-proof cover and dig in.  Not only do they gain a standard 3+ cover save, but in addition they gain a further save based upon the 'firepower rating' of the weapon fired.  This means that after rolling to hit AND failing a save, most man packed weapons require a 6 to kill an infantry base.  This makes bunkers especially effective.


To add insult to injury (well actually this is pretty realistic), any infantry unit that hasn't moved in it's turn can use it 'movement' to 'dig in', this requires a successful motivation test (4+ for trained, 3+ to vet germans), they then gain bulletproof cover, as they have dug in, in foxholes.  Obviously their shooting is effected, going to ROF 1 for that turn, but even so!


A word of warning though, just alike to tanks, the firepower rating determine the 'destructability' of said cover.  So a Stug firing on that cover will kill on a 3+ (he still has to get through the 3+ to hit and 3+ cover save) and a mortar team will be particularly effective.

As soon as a unit moves, it loses its foxhole.


Conclusions and thoughts on Flames of War

This game is very exciting and a joy to play.  There's very few parts of this game that doesn't make sense to me, and the designers have worked hard to try for realism across the board and the early stage synergy between infantry and tanks is much more mature than 40k.  The use of manpacked or light guns (which cannot be singled out by enemy fire) compared to antitank medium and heavy guns (which can) is cleverly postulated to make you build interesting regiments.

The 'all-army' rules give a useful flavour to the Russians or Germans, while certain countries use technology to compensate for play styles.

As a tank and WW2 buff, I'm totally sold on this game.  The only thing I'm slightly weary of its the toughness of the Sherman tank in this game.  The panzer 4 is paltry in comparison, and from my knowledge - I think the 'tommy boiler' is over-spec'd in armour penetration and frontal armour.

But this is a small criticism for a very enjoyable game.  Considering everything that's going on, we completed this small game in just over an hour.  An equivilent 40k game would have been double that time.

Great fun!

Sunday, 5 June 2011

BLOGWARS battle summaries


Big thank you to the guys at From the Fang for a great treat of a day at BlogWars. A lot of hard work went into a smashing day. After spending all day there I can confidently report that:

a) Bloggers are 50% normal, 25% geekizoid and 25% very cool.
b) They are also quite cagey about their identities...
c) Some can be quite weirdly competitive about their popularity ... as I discovered.

I never got to meet Mr Colonel Corbane ... despite him being the only person I actually sorta knew.

Anyhow, I met some great boys who travelled in packs, from the following blogs:

Claws and Fists: (clickety click) a bunch of really nice guys (and a very opinionated one with Navy links in his thirties... LOL), I played against Grazer/Graeme in my last game and he was a champion gentleman and a top bloke too.

Sons of Sanguinius: (clicky click). Didn't play any of them (and I'm glad), as these guys creamed all the top spots in the tournament. Two brothers came first and second, and the winner crack'd first place with Dark Eldar - which he'd pick'd up a few weeks before.

Brother Loring from 3++: (if you need a clicky click ... you'll need your head examined). Very nice fella, very nice girlfriend. Good to play against...

On with the battle reports:

Battle One: This is where my day sort of started and ended really. 7:30 start ... first game. I'm toting 105 guardsmen and 7 vehicles against. Draigo and 20 Grey Knight Paladins, 4 Psycannon with an Apothecary in two two wound mass blobs. It was nicknamed as the 'cheesy' list by the tournament runners. And it was VERY boring to play against. It was spearhead and capture and control and I really didn't know what to do about these boys.

I layered up in one corner and then sent the mech out to the other corner with the Vets and platoon command to challenge the other objective. I managed to put a wound on Draigo in the first turn. Then in turn three 20 2W Terminators with FNP arrived within charge range of my blob. I unleased everything at a squad and killed all but a few. They then shot at me and I lost the platoon command and the autocannons (running) (double Ld9 fail!) and then they ate my blob. All of them.

I hurt him, getting many victory points (747), but Draigo sat on his home objective and contested "LIKE A BOSS!", and my vehicles were left licking their wounds.

Battle Two: Brother Loring from 3++. Building a balanced list with unconventional units was a real joy. And then 16 Black Templars Terminators supported Grimaldus, a Chaplain and an Emperors Champion (2+) into my lines...

I played the beggining well. Placing two 'sacrificial' mortars squads on the 24" forces all the Terminators back at 6" from the start and started hurting them. Everything in his army not in Terminator Armour died badly.

And then a dreaded sense of deja vu overcame me as I was yet again trying to kill terminators with mass firepower. At this point it all got a little much ... a multi-army tournament and I'm facing nothing but 2+, 5++, 3++ ... boo.

It's a killpoint game. He's got 8 kill points in total and he topped ten... so there we go, 2 game sin and I'm too down.

And I'm so tired of Terminators.

Battle Three: finally Graeme arrives with Landraiders and Predators and stuff that most people arrived at the tournament with and I'd weirdly avoided. And this went the other way. Turn One, I wrecked his Landraider and a rhino in the first turn. Next up, Kharn and his Terminators went down kicking under the hooves of my rough riders.

With vehicles to bite into and only 4 termies on the board, the mortars ripped apart the Berserkers and the game finished with 3 objectives in my control and only 2 obliterators on the board. After two games of frustration, everything worked. Graeme was a real champ in taking some really hard knocks as all the rolls worked out.

So overall I scored 17th out of 26ish players. Damn you 2++, damn you to eternity.

Conclusions

The army list worked well, except against Terminators ... blasted termies...

Thursday, 26 May 2011

BATREP Guard V DEldar: 750 miles to play 1750pts

He's quite scary in a purely EMO might cry on you kinda way...

I drove to Falkirk in Scotland for a job, I had an overnight and as serendipity would have it - it was the gaming night at the local GW store. Multi-win! I turned up with my 1750pts list and played against a very affable young ginger scot!

I was running my tournament list for blogwars, which may be up for some minor modifications post game...:

70 Command HQ with 3 Sniper Rifles and a flamer
105 Infantry HQ with 4 Grenade Launchers and a Chimera
255 3 x Lascannon equipped squads, plus a Commissar with power weapon
165 2 x Autocannon equipped squads plus a Commissar with power weapon
300 5 x Mortar Heavy Weapons Teams
155 Veterans with 3 x Melta and Chimera
85 Rough Riders x 8
150 Armoured Sentinels x 2 with lascannons and smokes
125 Devildog, Smoke, Heavy Flamer
125 Basilisk
215 Leman Russ Battle Tank, Lascannon and Pask

Total: 1750pts

The hansome young Scot called Scott (for want of his real name!) played DEldar and something along these lines:

Baron Samedi and 10 HobGoblins (where ARE the pumpkin bombs?)
Another 10 Hobgoblins
A band of 7 birdy things with 3 hobgoblin handlers
A jetbike squad of 5
Another Jetbike 'horde' of 8
3 Ravager (with the 3 darklances)

It was a very fluffy themed list with a wonderful look. It was also bloody fast.

It was a killpoint game with standard 12" deployment, he went first and deployed first.

I decided to get the whole lot on the board.

I stuck Pask, the Chimeltas, the GrenCommand and the Devildog in the centre and then twoblobs far left and far right. Six mortars hid behind Pask, while 2 more went far left and one and a Bassie went far right. The Command HQ went far left with the autocannons (and had very little influence because of this)...

First turn, he loses more guys to dangerous terrain than my shooting. Meanwhile he blows heavy flamers off all my tanks (boo) and immobilises the Chimeltas. Pask takes a drubbing, but fails to hurt anything in return. My mortars miss everything, but manage to mangle up a hobgoblin unit heading for my autocannon horde.

They hit Turn two (they are quite fast). Careful driving mean that the attacks are all thrown in close combat at tanks, with the beasties killing my Chimelta's ride and a hobgoblin horde on the right jumping the lascannons.

He suddenly discovers that charging my hordes is 'bad' as the commissar and dudes on the left lose 12 men to his charge, kill 5 and then shrug it off. He hits and runs rather than sticks. The Veterans and everyone else (including one mortar squad) denudes Baron von Munchhausen of his hobo's and kills all but one birdie swarm. The Basalisk fails to kill anything (again!), but the lascannon horde bite back and chew up their first Ravager.

The Autocannon horde run off and club some jet-bikers to death on mass and then rally to shoot down a surviving Hobgoblin denying a victory point. Pask takes turn after turn of nasty shooting, survives (although a turret destroyed result turns him from a Leman Russ to a Marder II tankhunter), the devildog also kills no-one both soaks up turn after turn of shots. The rough riders killed a single jetbiker.

Overall score 9-2 to me.

The DEldar were a deliciously fluffy list and great fun to fight. They weren't particularly dirty and paid the 'Tau' price once the scatter dice started hitting. That said, I rolled atrociously for the first half of the game and really felt on the back foot until the DEldar 'bounced'... If he'd come after my mortar teams though ... that's like 'free' blood tokens and then this 'easy win' would have been another matter.

Top night though, cheers GW Falkirk.

Monday, 9 May 2011

"Why do you bring baggage to my Apoc game - fool!"


If you have a scan down my Batrep history, you'll see a bunch of posts for some big-ass APOC games. Now I'm a pretty sound guy to have on your team for Apocalypse. After all, I'm a fairly solid macro tactician, I like a giggle and I'm usually laughing too hard at what my stupid Guardsmen/Tau/Chaos Smurfs are doing today.

So we had a small APOC game (6k a side) set up for Sunday. Mark has considerately put together the concept of using spearhead formations in combination with the standard list to 'limit' the amount of overpowered shite on the board. We could all take 1 superheavy. We could all take tankhunters and stuff like that ... it was a very solid idea and worth stealing people.

Now we'd made the mistake of playing on a Sunday which is like open season down the club. This means that POPLAR (not his real name) turns up ... which is cool, and we quickly work at accomodating him.

He's on my side with Foot Eldar, to compliment Marks Mech Eldar and my mixed Guard. So Mark and I strip out 500pts each from our lists and the Chaosmarines we're facing get a Warhound Titan - standard stuff.

No problem. We've all agreed the deployment, we win deployment and I discuss with Mark and we opt to go first (they steal initiative with a DEldar 4+)...

POPLAR - A background

I've had lots of chats with 'poplar' before and he seems like a sound guy. He's got his hangups, a mite pedantic and with the tension to go for a condensending tone - but overall, he's good. He knows his WW2 stuff inside out, and as a fairly keen WW2 anorak I really enjoyed chatting with him before, I've even played alongside him and he was fine before - I mean he's not like a barrel of laughs and he tends to pick every fight rather than just the one's he's right about - but that's ok. Something happened on the way to the gamestore on Sunday though ... and I'm struggling to forgive it.

...And then...

Then the sighs begin. Before we've even started the game, Pat's sighing. He's complaining that he's gonna get nuked on turn one because his footdar are in the open. (Talk about bringing a knife to a gunfight - what did he expect?!? The irony being that the DEldar/Berserker quite happily massacred all the Elder in close combat ... and hence why they hit my lines with FNP!)

He's complaining that I'm pointing out that he can't put his footdar down where he wants because our (Mark and My) tanks are in the way, and so he has to put them in the 'non' deployment zone - which he can't... He's complaining about, well everything...

In short, he's being a douche. I now intimately know what that word means.

The game starts and a mechanised assault attacks his guardians. It's DEldar and they were born to it. He starts folding (and wittering and whinging) and frankly getting on my wick. To make it worse he's contesting every law abiding assertion. I'm interjecting with appropriate one's like "Did you make that out of cover?", "You get a cover save." etc and he's just wringing his hands and making his own bad bad luck.

At this point we should have taken him aside and said 'put up or shut up' but we didn't because we're English...

And so it continues. My guard mortars and basilisks and everything have nearly nothing to shoot at because the Eldar are getting very slowly eaten by DEldar and WorldEaters and everything is in combat! I knock out his armour pretty much turn 1-2. Mark shuts down his heavy hitters and 'he' continues to die badly against warriors in raiders.

Anyhow. End story, we lose. But six hours of his constant complaining, bitching, whinging (I'm not rolling until they listen to me - no shit he said this!) and shouting has run me ragged. I would rather turn around and walk away - back to my kids and wife - than spend another 6 hours in the company of that douchebag.

He didn't even have the decency to apologise for acting like a complete grinch the entire 6 hours.

At one point I had the following bizarre conversation:

Him "They're gonna kill them and then consolidate - it's useless!"
ME "No, its great, cause then you just shoot them"
Him "NO, because they'll consolidate into them."
ME "##NAME##, it's FIFTH edition, they can't consolidate into combat with another of your units ... so it's good, yeah?!?"
Him "Oh..." returns to sulk-mode.

So, no I didn't enjoy my all day Sunday game, because of the behaviour of one guy who selfishly decided to bring all his home problems to the table well, just be miserable.

The positives...

That said, I did play 1750pts of my core army, which is going to go to Mansfield for the Blogwars and it performed admirably. Pask works, he missed his lascannon every turn, but the S9 Battlecannon is very nice. The 'clumps' worked well (although they lacked a good close combat edge ... but I was charged by Wytches, Incubi and Lesser Deamons in a single turn and they held it together. The Devildog is great... attracting lots of attention and threatening everything. I just need to work out what to do with my vets/platoon command and use them aggressively or reserve them.

But hey, this wasn't a real game...

The only question-marks were the lack of a close combat threat beyond roughriders ... and whether lascannons on the Sentinels are really worth it. After all - autocannons are awesome against rhinos ... but I think lascannons give me more targetting flexibility for punking heroes, obliterators and other things like that!

Guard might be able to exploit some options in Spearhead, but the combo of mechanised assault (three units first turn flank) AND sky storm (deep strike skimmers and assault off them) is just pure murder for the Dark Eldar... making them seriously powerful.

The mortars were awesome. The best APOC level purchase - The Stormsword was a revelation! A S10 AP1 pieplate that ignores cover. It killed absolutely everything - leaving 1's and 2's of a unit straggling along. We just couldn't kill them.

So all in all, my Sunday would have been a tighter game, a closer game and a funnier game without the addition of the 'on the day' guy. It would also have been an enjoyable game.

Grrrr....

What's your experience of playing alongside or against players like this... have you been caught in an APOC trap like this? Let me know...

Sunday, 27 March 2011

BATREP - 1750pts Guard versus Eldar

Copyright Armandeo64 - check him out.

Mark C agreed to a match-up. As a mighty Guard player, he's been fielding other armies recently (and now owns even more armies than I!) He'd recently taken up using the old Eldar codex with a lot of focus on the Dire Avengers. As the 'local' Guardsman, he relished the chance to take on Guardsmen with his DA.

I haven't shot down any Eldar in quite a while (since Devilin quit 40k, in fact!), and subsequently I relished the chance to hurt dem pointy ear'd bastards...

Catachan List - 1750pts.

Straken's Command HQ with 2 Melta guns, Regimental Banner, Medic, Nork Deddog and a Chug (Chimera)
Guardsman Marbo
9 Ratlings
Infantry Platoon - HQ with Powerfist, 4 Grenade Launchers and a Chug. 4 squads with Missile Launchers, Flamers and Power Weapons and a Commissar with a power weapon. 10 Mortars and 2 Autocannons.
Harker's Veterans with Autocannon, 3 Sniper Rifles and Demolitions.
5 Rough Riders
2 Hellhounds with Heavy Bolters, Heavy Stubbers, smoke and extra armour.

Tactics: The Missile Launchers and Autocannons would start cracking open Wave Serpents as the Mortars could decimate the enemy. The use of grenade launchers, flamers and hellhounds highlight my XP of lance technology. Trying to build in some speed was also a priority.

Dire Avengers Eldar List

Dire Avenger Phoenix Lord
3 Dire Avenger units of 11, all with Exarch.
1 ten man Striking Scorpion Unit
3 Wave Serpents, one with Bright lance and most with Missile Launchers
1 Vyper with Missile Launcher
3 Fire Prisms

Mission and Deployment: Dawn of war and Annihilation really benefited the Eldar as I couldn't deploy my Ratlings, Mortars or anything useful. The Guard Horde massed up in cover , Straken held the board centre in his Chug and the Veterans when to cover on the right flank. The Eldar stayed in their two Wave Serpent way off on the right.

Unit by unit Game Synopsis

My shooting fail to kill any tanks, but neither did his. The Veterans assaulted a turbo'd Wave Serpent, got a kill point and were then chop'd up by the Phoenix Lord, Exarch and cronnies. I'd forgotten how filth these top level Eldar are. Straken attempted a melta shot on the Scorpion WaveSerpent, forgot he had orders and fluffed the shooting. A Dire Avenger unit then killed all the 'non-heroes' in the unit. Nork and Straken looked exposed. The Fire Prisms entered and shot a turret off Straken's Chug - the bloody cheek.

In my turn I shook the viper and turned missiles on the Pheonix Lord's squad, killing a couple. The Rough Riders and Straken/Nork charged the Scorpion WaveSerpent hoping in vain to pop it with a Plasma Pistol. This didn't happen and the Rough Riders wasted their lances, Straken and Nork fluffed their attacks and the tank dumped 10 Striking Scorpions, who chewed into the two units. The Rough Riders died badly (they really are designed for fighting Marines), while Straken and Nork formed a solid front. The combo of a majority T5 and all the 3+ and 4+ plus FNP kept the Scorpions at bay. In return both warriors were rolling 4+'s and 2 up on 8 attacks to kill. Nork kept them at bay while Straken went to work. And in two turns the Scorpions died.

Meanwhile, the Dire Avengers on the right flank all bebarked and shot up my horde as the Phoenix Lord and Cronies charged in. Then the Lord realised his mistake as four power weapon wielding sergeants and a commissar jumped on the bastards. Even with a 'defence' skill reducing the attacks to 10, I consistently killed them. Until only the Phoenix Lord was left, and he finally got dragged down in turn 5.

Meanwhile the 'supporting' WaveSerpent and Dire Avengers met Mr. Marbo. His Demolition charge destroyed the transport and killed a few, while a hellhound torched all but the Exarch and 2 Avengers. The Avengers then tried to shoot and combat this 'easy' kill point. Only for Marbo to make his 5 up, kill the two cronies and rout the Exarch. Kudos.

The foot slogging avengers spotted the mortars finally setting up and went to ground, right next to Straken's Chug which heavy flame'd them, supported by a exuberant hellhound. The ratlings killed the Exarch.

The Autocannon team setup up and killed the Vyper and then shook and destroyed one vehicle after another. So much so that little could shoot or attack. At the end of turn five, Mark had one Dire Avenger unit (pre-flaming death), 3 Fire Prisms and a Wave Serpent. By the end he had a single Fire Prism (shaken).

I'd lost 2 killpoints, he'd lost everything bar one skimmer.

Conclusion

Looking back I think Mark did have the toolkit to take me apart. I was very very lucky and he failed to destroy a single vehicle all game. That said, all the vehicles I'd bought were cheap. By focusing his attacks on my 'horde' and Hellhounds, I got away with an awful lot. Additionally, Mark was a good sport, charging his Scorpions in to Straken, when really I should have been gunned down in ignomy. As a 'unit' Marbo and Straken are lethal as one provides the durability while the other just kills stuff, however for future I'd focus on taking just a couple of meltaguns along - as all the bodies around these two are just cannon fodder.

Marbo surviving was a turn up, and he played a blinder. If mark had concentrated his S9 blast on the HWT's, killpoints would have racked up. The ratlings would have been chow down for any of his units, while the Scorpions could have chewed up the horde nicely, although I doubt they would have survived a couple of turned against so many power weapons. The problem was that outside a vehicle, the hellhounds were death to any dire avenger - so he couldn't get out until the tanks were neutered. But he didn't have to neuter them with destruction.

On discussion after the game, I suggested that Star-Engines would have given him more options and we agreed that he was probably in too much of a Space Marine headset to play the Eldar to their strengths. All in all I liked Mark's army, but it needed to play more tactically and use its speed to manage the engagement. After all, he could easily have tripped me into one flank, have boosted to the other side, focussed all his firepower on the other flank and chalked up five killpoints, re-embarked and then come hard at the HWT's netting him easy points.

The guard codex does have a lot of advantages though, when even a fluffy list (does anything with Marbo in it count) can make some stupid mistakes and pull off a near massacre. A very forgiving codex, and not a fair reflection on Mark's list or use of it.

Thursday, 17 March 2011

MiniAPOC - Battle Report, 4000pts


Squeezing a 4000pt doubles game into a Spearhead deployment is fun, but I was air-dropped in as a last minute replacement last night over at a friends house... no piccies I'm afraid - but dynamic dialogue anyhow!

Team Rhubarb - (me and MarkC, rolling with the Tau and the Space Marines)

Za Tau... baby!
  • Shas'O with Air Fragmenty Boomgun, plasma and Missile Pod
  • 2 squads of 2 Crisis suits, kitted up with largely missile pods, flamers and burst cannons. 2 plasma rifles and a Shas'O Air Frag Projector special. All with targetting arrays, All units have an escort of 2 gundrones.
  • 5 Stealthers with 5 gundrones
  • 4 x 9 Fire Warriors with a Sergeant each.
  • Kroot Horde of 20 kroot and 10 kroot hounds.
  • 5 Pathfinders with a Devilfish
  • Piranha (say it like Darla from 'finding Nemo' for full effect) with Fusion (meltagun)Blaster
  • 2 Broadsides with Targetters and 2 Shield Drones
  • 2 SkyRays with Smart Missile Systems

All vehicles have Targetting Arrays (5pts), Disruption Pod (5pts) and Multitrackers (10pts)

Za Smurfs ... bluey?

  • 2 Biker Scout Squads (5ish)
  • 4 Biker Squads (5ish)
  • 1 Command Biker Squad (7ish)
  • 10 Assault Marines
Team Custard - Necrons and D-Eldar (played by Hutch and t'Mark, another Mark)

Neccies
  • Destroyer Lord with Res Ord, Scythe and stuff (ok I never really saw him)
  • 2 huge squads of Neccies (20)
  • Unit of Destroyers (3)
  • Immortals (5)
  • Flayed Ones (10)
  • Monolith with everything ...
D-Eldar
  • 2 x AV11 multi darklance tanks (Ravagers?)
  • 2 x Av10 transports (Raiders?)
  • 6 Jetbikers
  • 2 x D-Eldar Warrior Units
  • 2 x large Evil Beast units, with warp beasts and razorwings
  • Incubi unit with death weaponry
  • Some mad-ass chosen dudes sporting S8 plasma guns, Eeeek!
Deployment

Table quarters and annihilation - Great! I set up my Tau behind a veritable wall of Smurf bikers. The pathfinders and the Broadsides get the high ground while the firewarriors sit in their transports and the SkyRays get their markerlights warmed up!

The Kroot horde infiltrate into the right flank building, filling all 4 stories with their smelly bodies, the Stealth team go out on the far left, deep behind enemy lines and looking to disrupt the enemies movement.

Game Highlights

First turn, They start, stealing initiative on a 4+! but Marks cunning scout move with his bikes mean that they can't get the shots and combat they want. They spend a frustrating turn killing a few Marine scouts and thanks to E-Eldar/Necron firepower (scary but VERY short ranged), I'm left unmarked.

Marks entire army races off into the wild blue yonder, intent on murder (hence I'm a little hazy on his army really). I focus on what I do best. 4 markerlights hit the Monolith, giving me a 2+ rerollable to hit and ignoring the 4+ cover save he should have. 2 shots later and the Broadsides have paid for themselves.

To follow up, the Pathfinder light up the AV11 Raider thingie and ping it with a couple of seeker missiles, only to fail. A Crisis Suit team does a duck and cover and blows it to bits with four missiles from the missile pods.

The Necron Swarms are looking threatening, until the Shas'O detachs and drops a S4 big blast causing 14 wounds into their midst! At the end of the shooting only 4 of 9 bases remain. Ignoring cover saves and dropping a template on swarms ... finger licking good! The Stealthers sneak forward and unleash serious firepower on a warbeast horde, but they only kill a couple. They retreat to the corner.

Marks Smurf Bikers make short work of the Beast Swarm on the right and consolidate towards the Necrons.

Turn 2: The Stealthers get charged by the Swarm of nine Scabbie thingies. 4 rounds of combat will result in a final ignoble death of the Stealthers ... ho hum. The Flayed ones flank and come in behind a SkyRay, stunning it. Nothing much else happens to my forces, so I wander off and make TEA.

The four unit scabbie swarmie thing I dlew up charges my fire warriors ... WS2, I2 S3 fightoff is embarressing in the extreme, but all the flapping hands goes his way, but my Shas'ui holds it together. He has many more attacks and 3 wounds each - and I have marginally better armour.
Ha, I'm back! Broadsides, all crisis suits, 9 firewarriors, 2 Smart Missile Systems, a Transport and the Smart Missile Systems on the Broadsides ALL target the Flayed ones and kill. 8 out of 10 (shouldn't that be cats?), ironically 8 out of 10 flayed ones WWB in my face - boo.

The Kroot make their first mighty move through cover roll and manage to throw 72 attacks at a 9 unit Necron horde. Cover save my ass - the Krooty muller them ... yeah! He takes 21 wounds after armour saves, and then gets kyboshed by the 21 fearless saving throws he has to take against the 2 remaining bases. The Shas'O has other problems, his move-fire-assault move jetpack thingie, back into cover kills all his gundrones ... must get new ones.

Mark's Bikers jump the D-Eldar Incubi and Lord and die tragically (but not without turning the Necron Lord into a tube of toothpaste using a powerfist - how graphic!), the rest of the bikers decide that eating Necron units is funny and get on with their job.

At this point the score is like "PURE WIN FOR THE MARINES AND TAU" - like 8-2.

Turn 3: Revenge of the Green Eyed Man/Robots...

Ok, looking good. But now we're in range and stuff gets nasty. First up, the beasts on the far left attack some bikes, but it turns out this is the command squad and its peachy. I couple of 'uber-marines' die and the beasts flee - but not far.

The D-Eldar also unleash S8 uber-plasma death on said command squad as the 'chosen' and Necron immortals in the centre get in on the game. The Destroyers blow up one of my devilfish - boo. The Flayers (all 8, fecking WBB rolls), charge the fire warriors and the warriors hold them (why can't these damned tau learn how to die properly), protecting the flayers.

They also shoot up my Piranha, which has been turbo-boosting a screen for the firewarriors on the left. Speaking of which, those FW's lose their combat to the scabs and run... ho hum.

5 incubi make a break for my pathfinders.

MY TURN! Broadsides target another AV11 Ravager (is that right?) and pop it open, S10 AP1 - yummy! The Markerlight sail into the Incubi and 2 seeker missiles make pulp of them. One is gutted by a Broadside shot (damn 1's) while 2 teams of crisis suits, a SkyRay SMS and the Shas'O manage to pulp the remaining Incubi.

The Kroot make another 'mighty' 6 inch MTC roll and assault a 6 man jetbike squad that's supporting the Flayed ones ... the Jetbikes get 1 attack each and kill 1 kroot. Unfortunately for them, 29 Kroot and kroot hounds then eat them. Mark's Assault marines valiantly come to the defence of the dying fire warriors as the devilfish moves away - denying a killpoint.

TURN 4: Last turn.

The D-Eldar and Necron have very little left. It all comes down to how much damage Marks command and other bikers have done in the DEldar and Necron backfield. Killing Destroyers and all sorts. The Terminators arrive and save the command squads, although catching those damned Beasts at I7 is tough work.

The Flayed Ones massacre the Assault Marines (eh?), I then 'bravely' charge my Kroot in, 84 attacks are stymied by the Flayed Ones 'SCARY FACE' roll. The Kroot fluff their Ld7 test and have to hit the neccies on a six. Not good, but doable. Awful rolling later and every save is passed. The Necrons kill 5 kroot in reply and suddenly I've got to roll a double 1 to not run ... with a sense of the inevitable the kroot are caught and massacred. Doh!

In any case, everybody attacked everybody else and the game ended with us winning by about 8 killpoints. The Broadsides were dependable and the SkyRays were just pure dirt against the D-Eldar.

Conclusion

Sometimes, going wappy with 4000pts on a 6' x 4' board just works. Tau are a great support army (like Guard) and work in great synergy with Space Marines and other 'attack' armies. In fact, for the most part we could play two separate games. On reflection, the Kroot were on for being 'man of the match', before being pipped by a unit of 10 lowly flanking slayers. Who killed a firewarrior squad, 28 kroot and an assault marines squad and managed more killpoints against me than the rest of two entire 2000 pt armies... (but mainly because I had a lot of bikes to hide behind).

Feed me back if you likey? Yes...?

Monday, 15 November 2010

2000pts CSM v Dark Eldar

Anton's new paint scheme ... loverley!

My now ubiquitous list of deep striking nasties versus a surprise entry from Anton - he'd succumbed to the 'other' dark side and brought along soul eating death elves for tea! I'm not entirely sure of the validity of attacking a 'largely' slanneshi army with your death elves - but clearly there was a logic somewhere (Rick Priestly's head) so there you go!

Swords of Alpharius: I decided to leave the Mark of Slannesh on the Terminators at home and bring an additional lesser Deamon, allowing me to field two squads of 5 Deamons.
  • HQ: Huron Blackheart [170]
  • HQ: Chaos Sorcerer - Terminator Armour, Lash of Submission, Combi weapon (plasma) [130]
  • Elites: 5 Chosen - Chump w. PF, 4 meltaguns, icon [175]
  • Elites: 5 Terminators - 2 Chumps with Lighting Claws, Chainfist and Combi-melta, PF and Heavy Flamer, PF and combi-flamer, Mark of Slaanesh [265]
  • Elites: Dreadnought - Plasma Cannon and Heavy Flamer [110]
  • Troops: 9 Alpha Marines: Icon, Flamer, Rhino [185]
  • Troops: 9 Alpha Marines: Icon, Flamer, Rhino [185]
  • Troops: 7 Plague Marines: Icon, Chump with PF, 2 Plasmaguns, Rhino [271]
  • Troops: 5 Lesser Deamons [65]
  • Troops: 5 Lesser Deamons [65]
  • Fast Attack: 5 Raptors with Icon and 2 meltaguns [130]
  • Heavy Support: Greater Deamon [100]
  • Heavy Support: 2 Obilterators [150]
Total 2001

Dark Elves with Splinter guns: this was an intro to the Dark Elves, so I was intrigued and a little bemused by the bunch of them...
  • Archon carrying nasty stuff with four incubi carrying nasty power glaves in a Venom
  • Lelith (accompanying the Wytches).
  • 5 incubi in a Venom
  • 10 Warriors in a Raider
  • 10 Warriors in a Raider
  • 10 Wytches in a Raider
  • 3 Reavers
  • 3 Reavers
  • 3 Reavers
  • 2 Talos Pain Engines (left at home)
And that's about all I can tell you, they had some nasty guns ... but luck favoured the brave (or the ignorant over the inexperienced in this case).

The Deployment was Spearhead (which suited me fine) with the objective was seize ground (4 markers). These were spread out fairly evenly.

TURN 1: The Reavers and right hand side shot forwards, attempting to kill my Chosen which were deployed way out on the left flank in their deployment zone. The range was perfect, and although they managed to kill one raptor with Raider fire, they didn't get into close combat with my Chosen. The Reavers and Raiders made a main push down the right flank, targetting my Rhino's and Dreadnought with fire. Many shots later nothing had happened.

In return I went to work. The reserves rolls were VERY pleasent, giving me the greater Deamon, a squad of lesser deamons, and the Terminators. Huron and his Chaosmarines stayed away, as did an 'ace in the hole' Deamon unit.

The Terminators and little deamons (Li-mons?) bounced off the Chosen's ICON. Allowing them to position themselves perfectly. A quick LASH later and I could unleash multiple Heavy and Flamer shots on the bunched up Dark Eldar while 'shooting' at the Reavers behind them. The massacre was complete and no Eldar survived. Three of the chosens Meltaguns then barked at 12" and demonstrated that 1D6 + 8 is more than enough against a AP10 vehicle, and the doom of open topped reared it's head, at +2 on the chart the vehicle was doomed.

So the left flank was secure, but what of the right? Well the obliterators went to work on the Raiders and Venoms, although I failed to destroy a single vehicle, I did manage to roll lots of ones, which automatically went to 2 - which stalled the entire advance of the dark Eldar.

Three Reavers also flew like blazes behind my Rhino and Dreadnought on the right flank. They were met by the Greater Deamon (Gri-mon) who killed the PlagueMarine Chump (there's got to be a cheaper way!) and 4 Raptors. The Grater Deamon killed all the Reavers, while the Reavers killed a Raptor.

TURN 2 : Without being able to move or fire, and being too far away to jump out and charge ... the Eldar were left with limited shots and limited options. The non immobile Incubi raced after the marine squad in the centre (going after a central objective), jumped out and charged the rhino. At this point we realise that although Incubi have AWESOME power weapon death - they are fairly useless at using their standard issue tin openers. Even with autohit (the rhino had gone and immobilised itself) they had no dice.

In return I continued to pin the other vehicles while Huron and his squad plowed into the back of the rearmost Raider and the Terminators and Chosen realigned. Now was my time for an 'accident' as the flamer from my squad proved to only kill one Incubi. I Lashed them closer to the terminators, but Only had a few bolter shots to throw (combi-plasma on the Sorceror is useless if you're lashing every turn ... but is lash a shooting spell?) Down to three incubi, I charged in the Lesser Deamons (bouncing off the chaosmarine ICON) and met with an abject fail. Lesser Deamons suck in close combat! Against warriors yes, incubi - NO!

Huron and his squad come on from the back and manage to complete fail to wreck the Raider, although they do immobilise it.

At this stage, Anton's killed one raptor, and I've killed two (one through possession and one plaguemarine through a plasma overheat!) ... so I'm kinda winning on all fronts.

TURN 3: Anton manages to get both Incubi into combat. The first incubi group manage to charge my terminators and KILL ALL OF THEM. I5, S5 and power weapons ... hang on, thats a rough rider! They then rout the Sorceror and kill him. The Archon also discovers that haywire grenades only give ONE attack - which fails to pop my rhino.

At the back, Hurons less lucky. He manages quite well to survive a charge from Lelith. With only three attacks and S3, she only manages one wound. However Huron fails to land a punch (thanks to him NOT casting warptime). He loses all but three marines to Wytches and Warrior fire from the downed unit. However he ties up the wytches for a turn and with the warriors holding one objective, it all comes down to nullifying Anton's contestors!

The Chosen step up first of all and shoot down the Incubi with vastly overpowered meltagun shots (good job as they had a 2+ save, FNP and furious charge by this stage!). Meanwhile the last Reavers are attempting to contest my home objective (they would have been wiser to challenge my Lesser Deamon and Chosen held one!) ... and they get eaten by the Greater Deamon. The Dreadnought steps up and manages to kill 4 Incubi with a plasmacannon shot at point blank and kill the Venom with a heavy flamer shot. He then tries to punk the Archon, scores 5 instantkill hits to which the Archon rolls 5/5 2+ saves... doh!

The Raptors target the remaining Venom and kill it dead while the Oblits target the mobile Raider and stun it. The marines in the centre dive out of their tank to claim the central objective. Huron dies, but with only one objective in DE hands, and only the Archon able to contest my home objective, it's all over for the DE.

Final Score 2-1 to the marines.

CONCLUSIONS

The DE are a really fun army to play and play against. The biggest weakness is their AV10 vehicles, as despite their speed and their cover saves, their combination of AV10 and open topped meant that stopping them from moving AND firing and effectively nerfing the DE charge was too easy.

The Incubi in Venoms were nasty, but the DE really lack in close attack weapons which can crack open vehicles. Haywire grenades are not enough really. Overall, Anton's army lacked enough firepower to crack open three rhinos, and he couldn't even crack them open when stationary in close combat. Definite rethink needed there! Incubi are not something to attack in close combat, and the only proper solution is to shoot them down... at T3 and 3+ save - there are plenty of options there. I think Incubi are awesome against marines ... but against guardsmen, one battlecannon shot is all it takes.

Overall, Anton needs to work on his timing. His reavers are standard Saim Hann and cannon fodder to decent marine units. Against Guardsmen, those D6 S6 flail attacks will signal the end of many a Heavy weapon team and would be useful against Tyranid MC's. However they cannot take fire and should have danced at a distance instead of coming in close. The tricky thing with the DE is getting it all to hit at about the same time. It's very very easy to delay those AV10 skimmers ... and then mob the ones that do get through with flamers, terminators and other death weapons.

Overall I think this was a demonstration of how familiarity breeds effectiveness. The reserves rolls for me were perfect, allowing me to fully exploit the 'tempt and ambush' aspects of my army. Anton's DE were the perfect example as he was a little too keen to take the bait (as he was thinking about FNP bonuses through power through pain) ... as such I was able to take his army down piecemeal without the DE able to really threaten my core force. Ironically, this was exactly what he should have been doing to me.

If he'd held back and gone for an objective grab, he would have forced my 'ambush' units to deploy without a target, holding objectives... he could then have gone in at speed with all force. Using all three reaver units on the same squad (3D6 S6 hits) and followed up with incubi and wytches. HE could have had me so easily...

At the end of the game I'd lost 2 raptors, 5 terminators and the Sorceror, 5 Le-mons, 9 Marines and Huron. He'd lost a warrior squad, 2 venoms, 2 incubi units, lost all three Reavers units and lost a raider and had an immobile Raider.